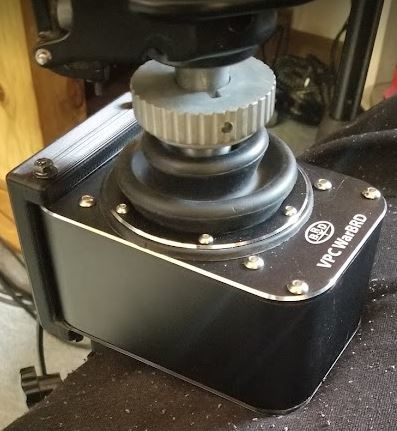
Virpil CM2 WarBRD Stick to Volair Sim Mount Converter
thingiverse
Print one of each. Use images for reference. Average total print time is 3-4 hours. You may need to widen the holes using a 4.5mm drill bit, or as necessary. Infill 80%. # Materials 6 - M4x15 Optional: 6 - M4 washers # Put It Together 1. Remove the base of Virpil CM2 WarBRD. 2. Position the 3D printed base onto the base of the WarBRD. 3. Screw in the two front bolts through the 3D printed base, into the WarBRD. 4. Position the WarBRD into the 3D printed mount. 5. Screw all 4 screws into the 3D printed mount. 6. Attach the assembly to the Volair Sim stand and tighten the stand screw at the desired height. 7. Done!
With this file you will be able to print Virpil CM2 WarBRD Stick to Volair Sim Mount Converter with your 3D printer. Click on the button and save the file on your computer to work, edit or customize your design. You can also find more 3D designs for printers on Virpil CM2 WarBRD Stick to Volair Sim Mount Converter.
