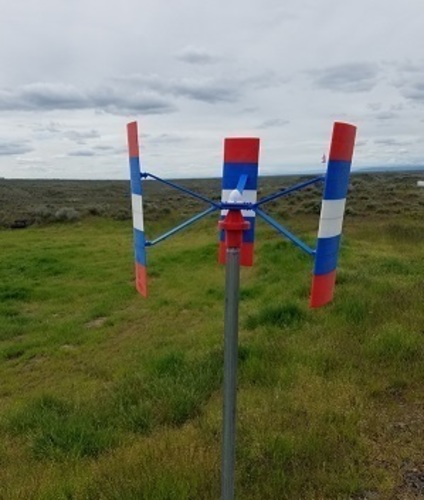
Vertical Axis Wind Turbine
pinshape
This is a test part for a vertical axis wind turbine that I modified by converting a NACA0015 symmetrical airfoil to an asymmetric airfoil. To assemble the airfoil, I will need to epoxy it together. This one will be used to drive a small electric motor that charges at about 6 volts at 100rpm. A 2.2 gear reduction with 32 pitch pinion gears similar to those found in RC cars will be employed. The initial test was documented in a YouTube video, which captured my first attempt. The turbine handled winds of up to 24mph but suffered a catastrophic failure at speeds exceeding 30mph due to the blades breaking off. To mitigate this issue, I added more material to the point of breakage. My ultimate goal is to construct a full-size turbine, scaled up by a factor of 400%, to provide power to my residence. To achieve this, I am utilizing 20mm OD and 9mm ID bearings. A steel axle approximately 100-120mm in length will be fabricated or alternatively, a threaded rod can be used as the axle. All printed components are produced using the following settings: 1.75 filament, .4 nozzle, .2 layer height, honeycomb infill with a density of .5, and PLA material. The temperature settings for the extruder and bed are 205°C and 65°C respectively for the first layer, while the second layer utilizes temperatures of 200°C and 60°C. The printing speeds employed are 30mm/s for perimeter layers and 60mm/s for infill (default speeds). Perimeter layers consist of four top and bottom layers. The blades, however, require specific settings: a .2 layer height is used for the blade center, with three perimeter layers on top and bottom, and no rectilinear infill; at the blade end, three perimeter layers are employed on top and bottom, along with three layers of .2 rectilinear infill. Blade assembly necessitates printing one of each part labeled "Blade______" for a 210mm blade. For a 360mm blade, three "BladeCenter" pieces will be required – two between BladeMounts and one on either side between BladeMount and BladeEnd. The MotorHousing uses four top and bottom layers, three perimeter layers, and a .35 layer height. I forgot to mention that the hub is not symmetrical; this asymmetry was intentionally introduced to enable me to determine the optimal angle of attack for the blades. Currently, the trailing edge has a radius approximately 4mm larger than the leading edge.
With this file you will be able to print Vertical Axis Wind Turbine with your 3D printer. Click on the button and save the file on your computer to work, edit or customize your design. You can also find more 3D designs for printers on Vertical Axis Wind Turbine.
