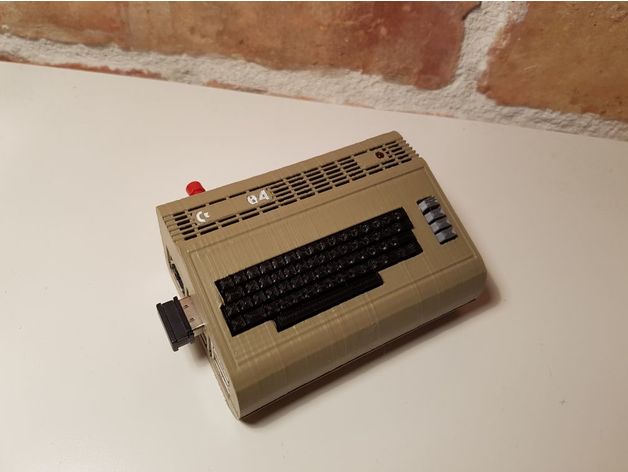
V2.0 Mini Commodore C64 Raspberry Pi 3 Case
thingiverse
HUGE UPDATE 2018.10.08: This case was my first attempt at designing something for 3D printing, and honestly, it was a Frankenstein creation with tons of cobbled-together surfaces and inelegant but functional edits in Tinkercad to get to the finished design. I always intended to redo the whole thing and have a nicer, cleaner design once I got more familiar with 3D designing software like Fusion360. In the end, I stuck with Tinkercad because I still find myself most comfortable with that tool even though Fusion360 is much more sophisticated. Changes compared to my V1 design: I redid the whole design from scratch and cleaned up surfaces that had some unfortunate seams in some places as well as improved on the general design of the top part. While I was at it, I created a couple of improvements and different flavors to choose from. There are now two main branches of design which basically differ in the way the two halves are fixed together. One uses screws and one is a snap-fit design. Under these branches, I added 2 additional flavors to choose from for the top of the case: 1. Normal, 2. with hole for a small momentum switch for power-off function. All versions also now have a small hole to fit a 3mm LED diode as the power LED. All parts have been test-printed to make sure everything fits together nicely (snap-fit joints, diode, power switch). For the best surface finish, it is highly recommended to print the top part standing upright with the solid sidewall facing the build plate. This way, the supports will all be vertical and built on the inside of the top part, and even if they leave marks, they won't be visible on the outside. Most of the inside will also have a nice surface finish this way. Bottom part you can print flat on its back, but you will not get best model accuracy that way because of the curved side lines. Here I would also suggest printing the bottom vertically with supports on the inside of the case. Same with the top half; this way, you will have minimal support scarring and even those will only be in the inside of the case. Takes a bit longer to print in this orientation, but for the better surface finish, I say it's worth it. I had to minimally alter the two keyboard pieces as well to make them fit in the new screw design. So if you have printed the previous V1 case and you want to try the new V2.0 screw version, make sure you reprint the keyboards as well or manually adjust your old ones to fit. For the snap-fit case version, you don't need to reprint the keyboards as there is no clearance issue there. For the Safe power-off switch function, I used a small momentary switch and attached it to GPIO pins 5 and 6. You also need to add code to make it work. You can use the Raspberry Pi's built-in library for this purpose. You will also need to set up your printer to print with supports on. This will ensure that your prints come out sturdy and strong. How I Designed This I started designing this case in Tinkercad, but then switched to Fusion360 because it was easier to work with. However, when I tried to use Fusion360's advanced features, I found it too complicated for my needs. So I ended up going back to Tinkercad and finishing the design there. Overall, I am happy with how this case turned out, and I hope you will be too!
With this file you will be able to print V2.0 Mini Commodore C64 Raspberry Pi 3 Case with your 3D printer. Click on the button and save the file on your computer to work, edit or customize your design. You can also find more 3D designs for printers on V2.0 Mini Commodore C64 Raspberry Pi 3 Case.
