Utility head strap (headband)
prusaprinters
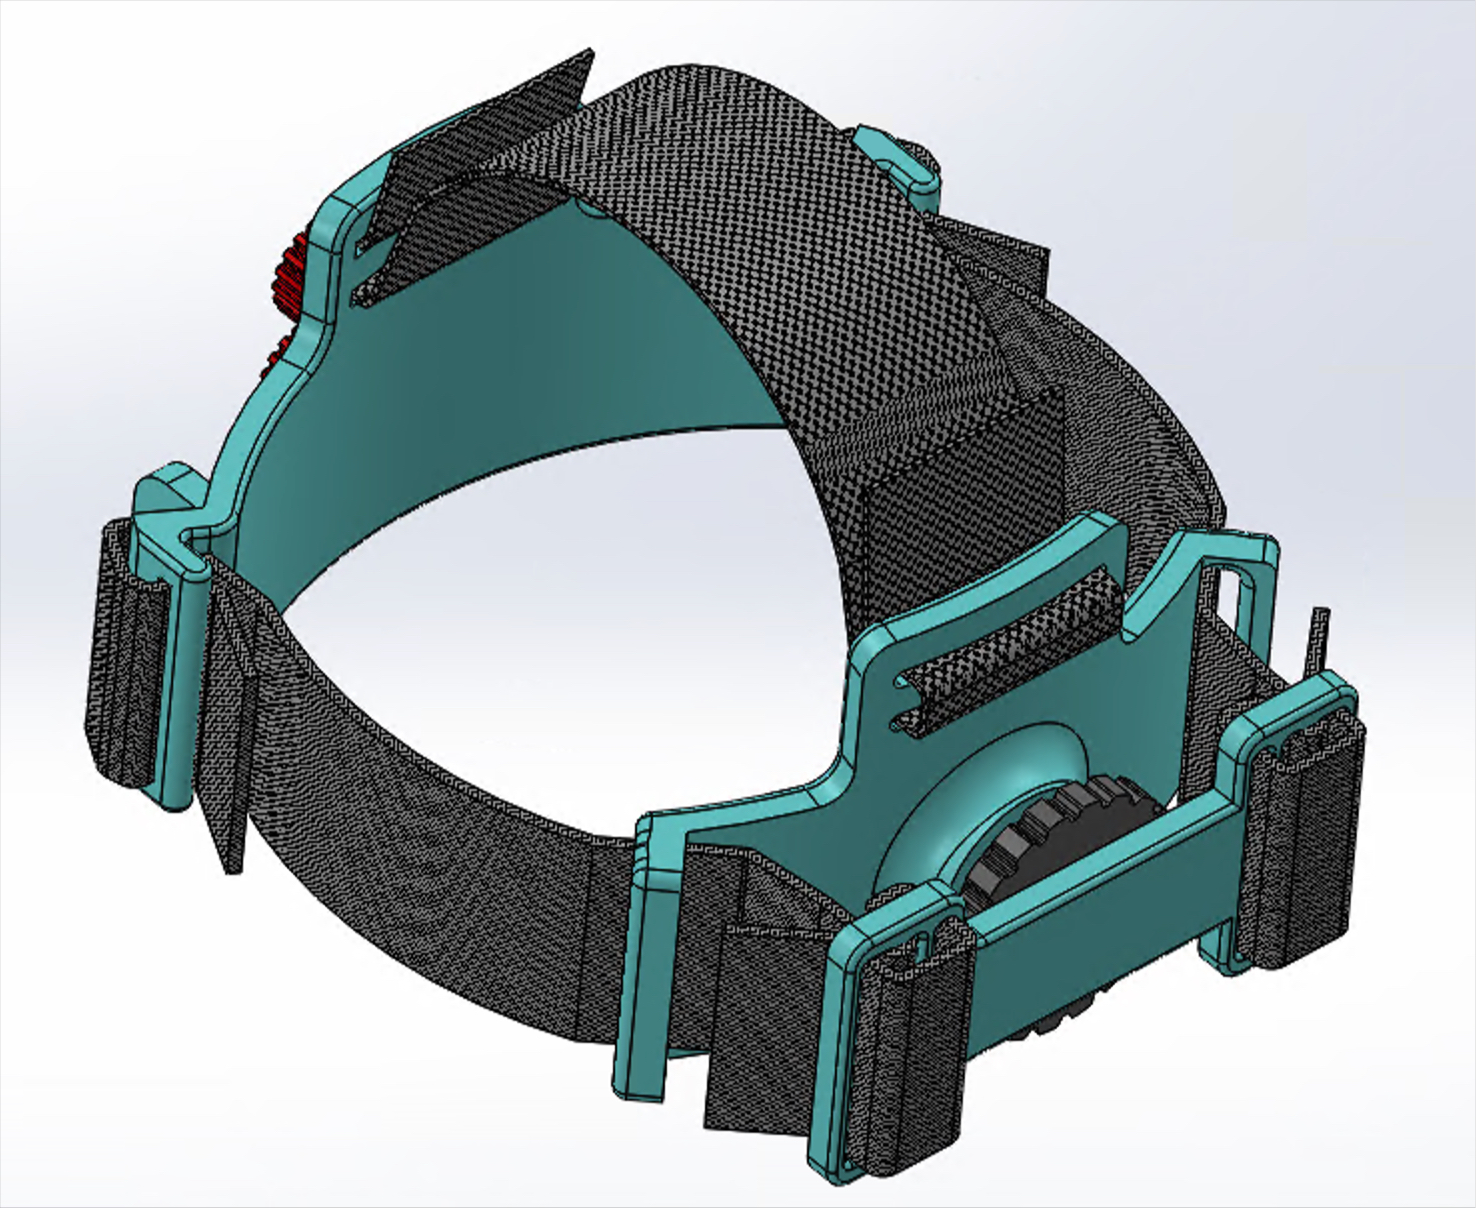
<p>Edited on 02 December 2022</p><p>I added a forehead plate for sliding dovetail mounting system. </p><p>It happens that the flashlights sold at Costco fit almost perfect. </p><figure class="image"><img src="https://media.printables.com/media/prints/305208/rich_content/d4fbeec3-15cc-4e27-bee7-67d8f27e1166/iscreen-shoter-20221202105757742.jpg#%7B%22uuid%22%3A%22a1322996-96b2-469e-8bde-ce6a8d863da5%22%2C%22w%22%3A1560%2C%22h%22%3A1361%7D"></figure><figure class="image"><img src="https://media.printables.com/media/prints/305208/rich_content/13b5e90a-65d0-4b26-8634-ece6431e2a8e/iscreen-shoter-20221202110609510.jpg#%7B%22uuid%22%3A%2216e10fc0-5f75-434d-9b86-524ca5912aaa%22%2C%22w%22%3A2082%2C%22h%22%3A1390%7D"></figure><p> </p><p>There are two pockets for M4 hex nuts. <img src="https://media.printables.com/media/prints/305208/rich_content/ad2a579e-eb8a-4e84-8da2-9e4663ededf4/iscreen-shoter-20221202112344100.jpg#%7B%22uuid%22%3A%22caacd880-cb4e-4d7c-aa93-a201e0c61f6a%22%2C%22w%22%3A1877%2C%22h%22%3A1269%7D"></p><p>Tightening the M4 screw will push the pad and apply force against a mating component.<img src="https://media.printables.com/media/prints/305208/rich_content/475afc6e-56d7-47f7-b2be-8503c9b582e0/iscreen-shoter-20221202110015523.jpg#%7B%22uuid%22%3A%22d5d2621d-c5a3-40ae-a5a5-446292d895f0%22%2C%22w%22%3A1222%2C%22h%22%3A1553%7D"></p><p>Below are the nominal dimension of the mating part if you plan to build your own attachments. You may need to adjust the dimensions based on the filament type you are planning to use for the attachment.</p><figure class="image"><img src="https://media.printables.com/media/prints/305208/rich_content/1304698f-839a-41e0-b176-09fddaccff6b/iscreen-shoter-20221202105724100.jpg#%7B%22uuid%22%3A%2232c41077-6ccb-4b25-b188-b84307537b83%22%2C%22w%22%3A1812%2C%22h%22%3A1201%7D"></figure><p>I also added a “forehead plate with dovetail and front slots”. If you plan to often switch attachments, slide inside the slot a thin metal plate to prevent the screw pushing directly against plastic surface <img src="https://media.printables.com/media/prints/305208/rich_content/df983b14-0a00-4162-8ad1-72f0b86306ca/iscreen-shoter-20221202115203788.jpg#%7B%22uuid%22%3A%22fe3307b2-6c1c-4175-a5e7-61a1c331b63c%22%2C%22w%22%3A1581%2C%22h%22%3A1130%7D"></p><p><img></p><p> </p><p>Initial model release.</p><p>I used ASA filament to print the parts. I didn't use support, just 3mm brims for the front and back plates. There are some strings due to long bridges on the horizontal slots for the webbing but they are not visible after assembly.</p><p>You will need nylon webbing strap 1 ½" wide, for example this one <a href="https://www.amazon.com/gp/product/B09QJ4T22W/ref=ppx_yo_dt_b_asin_title_o00_s00?ie=UTF8&psc=1">https://www.amazon.com/gp/product/B09QJ4T22W/ref=ppx_yo_dt_b_asin_title_o00_s00?ie=UTF8&psc=1</a></p><p> Cut the appropriate length and with a hot blade seal the cut ends to prevent fringing. </p><p>The front plate has two pockets to hold M4 hex nuts and corresponding M4 screw holes to mount various attachments. </p><figure class="image"><img src="https://media.printables.com/media/prints/305208/rich_content/eff77fa0-ffbf-4248-a155-d9b586cc27c1/iscreen-shoter-20221030124351748.jpg#%7B%22uuid%22%3A%22e4a42835-1508-47ec-93b7-8a61fdf89cb5%22%2C%22w%22%3A929%2C%22h%22%3A630%7D"></figure><p>(a test model for a pupilometer attached).</p><figure class="image"><img src="https://media.printables.com/media/prints/305208/rich_content/8bb1ef95-3bb7-44b6-9e5a-ffc0632de01a/bandhead-with-pupilometer.jpg#%7B%22uuid%22%3A%22e89d6812-01b8-46d1-8214-0d96b88a4646%22%2C%22w%22%3A778%2C%22h%22%3A1367%7D"></figure><p>Adjustable pressure and flex buckle to provide more comfort.</p><figure class="image"><img src="https://media.printables.com/media/prints/305208/rich_content/c395bce5-036f-4827-af0d-242106966f95/iscreen-shoter-20221030124606362.jpg#%7B%22uuid%22%3A%229ce0916c-1940-4a62-8d78-e9b0ea939ef2%22%2C%22w%22%3A1110%2C%22h%22%3A802%7D"></figure><p>.</p><p> </p><p> </p><p>Below is a guide on how I routed the nylon straps.</p><p><img src="https://media.printables.com/media/prints/305208/rich_content/320d87bd-1172-417f-8f0e-f3b189580730/top-band-guide.jpg#%7B%22uuid%22%3A%22b8bfca05-daf9-4c74-ba82-136420d3a271%22%2C%22w%22%3A1636%2C%22h%22%3A1150%7D"></p><figure class="image"><img src="https://media.printables.com/media/prints/305208/rich_content/c2e45d2a-e0d0-490c-a1cb-38c9e3a5bc6e/side-bands-guide.jpg#%7B%22uuid%22%3A%222466d2b6-431b-4491-905d-5f081ec3cf01%22%2C%22w%22%3A1686%2C%22h%22%3A1424%7D"></figure><p> </p><p>The pressure adjustment screw from the back is left-hand. </p><p> </p><p>Component list<img src="https://media.printables.com/media/prints/305208/rich_content/a2cfe2f5-58c8-45f1-bbfe-e1d48eebf49d/head-strap-component-list.jpg#%7B%22uuid%22%3A%224ff70674-af59-49d0-a2ce-b011bb8fa756%22%2C%22w%22%3A1867%2C%22h%22%3A1189%7D"></p><p> </p><p><a href="https://studio.youtube.com/video/Id5eiWAHVyM/edit">https://studio.youtube.com/video/Id5eiWAHVyM/edit</a></p><figure class="media"><oembed url="https://youtu.be/Id5eiWAHVyM"></oembed></figure>
With this file you will be able to print Utility head strap (headband) with your 3D printer. Click on the button and save the file on your computer to work, edit or customize your design. You can also find more 3D designs for printers on Utility head strap (headband).