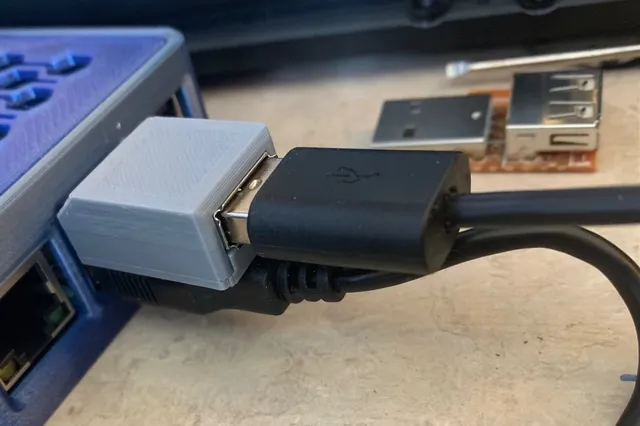
USB DC Power Blocker
prusaprinters
Some printer control boards receive power via USB when connected to a PC or OctoPi, which forces the printer's control board to stay powered on even after the printer has been turned off. This is a nuisance when you want to turn everything off (hard reset, firmware update, etc.), so a DC blocker is handy to have. This model is a 2-part case that holds standard PC-mount (printed circuitboard mount) USB A connectors (male and female). The 5V DC pin is removed on both connectors and the other pins are soldered straight through. Tips on Assembly:Parts:use standard PC mount USB male and female connector partsprint one complete set (body and lid) for each USB DC Blocker you intend to makePreparation:plug/join the male and female connectors together at this pointmakes removing the correct pin easy to tracksee the USB pinout to identify the 5V pinremove/pull the 5V DC pin from both the male and female connectorsbend the PC mount tabs flat (see pictures)carefully bend the remaining pins out flat (see assembly pictures)put the unsoldered connectors into the bodydry-fit the lid to set the spacing before solderingbend the pins as required to make soldering easieri.e. they should be touching and aligned with each otherSoldering:place a small dab of solder flux on each pair of pins (optional, but recommended)use as little solder as will do the jobdon't bridge solder between the pinsafter soldering the top, remove the assembly from the body lightly solder the bottom of the pinsmake sure you have good solder flow all aroundallow each pin to cool fully before flowing the next oneotherwise the spacing/shape will be lostTesting (before final assembly):connect DC blocker into OctoPi, plug USB cable into DC blocker and connect to printerprinter→USB Cable→DC Blocker→OctoPimake sure you can still connect to the serial portperform homing operations, etcIf trouble, check with multimeter/continuity beepermake sure all 3 signals are connected between USB connectorsmake sure there are no shorts between pinsTest that powering off printer also powers off the boardFinal Assembly:Place the soldered connector assembly back in the housing bodycarefully put a dab of hot melt glue into/onto the middle of the connector assemblycareful not to use too muchuse work gloves (cotton or leather) to avoid nasty burns from the hot meltquickly push the lid into place and hold tightly until hot melt hardensmake sure the tabs go into the right recesses on the connectors Re-test. If it still works, you're done.
With this file you will be able to print USB DC Power Blocker with your 3D printer. Click on the button and save the file on your computer to work, edit or customize your design. You can also find more 3D designs for printers on USB DC Power Blocker.
