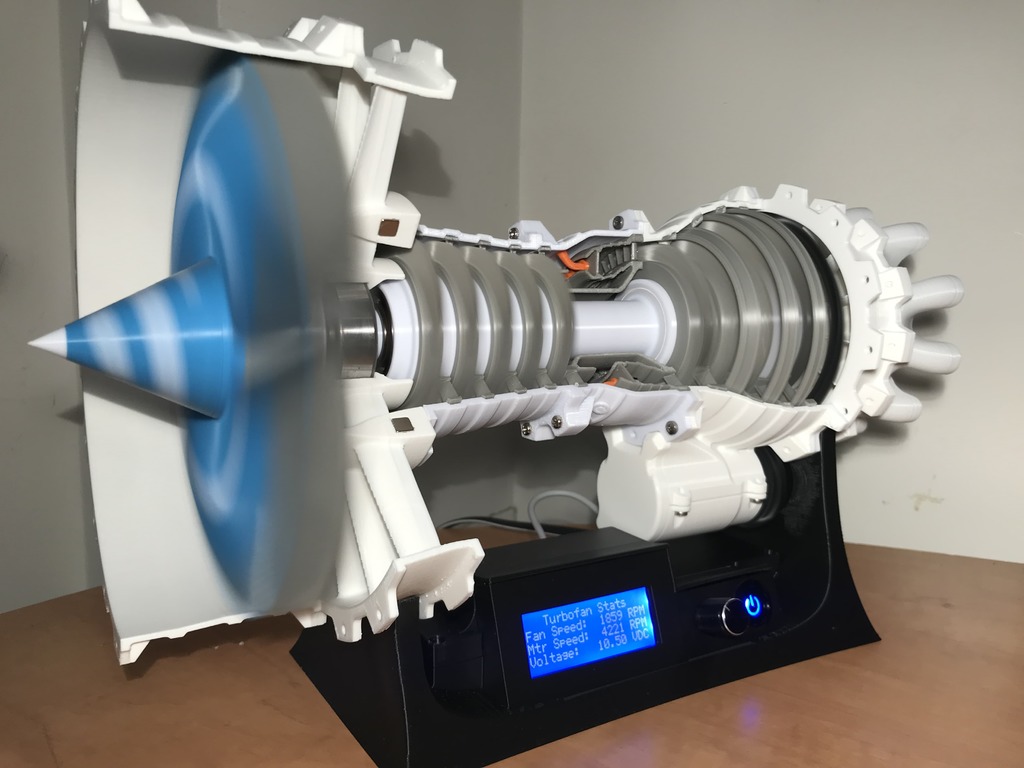
Upgrade to 3D Printable Jet Engine - Turbofan Driver With Magnetic Cover
thingiverse
***READ ALL INSTRUCTIONS BEFORE PRINTING.*** ***THIS IS A REMIX AND ONLY AN UPGRADE TO THE ORIGINAL JET ENGINE. YOU WILL NEED TO START WITH THAT THINGIVERSE PROJECT BEFORE COMING TO THIS ONE*** Here is where to find it: https://www.thingiverse.com/thing:1327093 *** YOU NEED TO MAKE CHANGES TO THE STAND AND COVER, OR SECURE THE DIFFICULT TO FIND 2004D LCD SCREEN*** I've wanted to build something like this since the original model was released and here we finally are! This is quite the upgrade and not a quick task for the average person, but I have done my best to build a guide with electrical schematic, pictures, and code so you don't even have to do much! The design features as range of fan speeds up to 2000RPM! It also features programmable speed limit with the rotary encoder's pushbutton: ***Set a maximum speed by holding the pushbutton for 2 seconds, and it will be saved even after you unplug the device.*** ***Hold the pushbutton down for 5 seconds to reset the maximum speed to uncapped.*** The purpose of this upgrade was to build off of the beauty that the original model already possessed. There are 3 important files that contain all the information you need to successfully build this bad-boy. ***Additional Hardware and Notes.PDF*** *** List of Printed Parts and Notes.PDF*** ***Assembly Instructions.PDF*** These three documents should contain all of the information including how to make the modifications to your original turbine. They are based off of an upgrade, so I do not discuss anything not related to the printing of the original model itself. Here is the GitHub repository for the Arduino Code you will need for programming: https://github.com/nairck/TurbofanDriver A quick list(also provided in the PDF in more detail) of additional components needed for this build are listed below. I used things I had lying around, and designed around what I had. I have uploaded the Stand and Electronics Bay.SLDPRT and the Electronics Bay Cover.SLDPRT so that you can edit it to suite your hardware. 1x Arduino Nano 1x L298N Motor Driver 1x RS-555SH 12V Brushed DC Motor 1x 20x4 2004D rev. C LCD Screen with I2C module 1x EC11 Rotary Encoder with Button 1x 120VAC 19mm Latching Power Button 1x 58mm x 78mm Proto Board 1x 120/240VAC to 12VDC Transformer, minimum 2A, recommended 2.5A 22AWG solid core wire – multiple colours. 1x 10k resistor. 1x 100k resistor. 2x 15, 1x 3, 1x 2 socket female header (2.54mm pitch). 2x 15 (N/A if Arduino already has pins soldered), 1x 3, 2x 2 male header pins (2.54mm pitch). 35x M3x0.5, 6mm Long Pan Head Screws – I replaced most M2.5’s with M3’s. 1x M5x0.8, 10-15mm Long Socket Cap Screw. 4x 0.25in Square Neodymium Magnet (only the shape is important) Variably sized heat shrink, clear heat shrink can be used for some connections to see wire colour. It is a work in progress and don't forget I did all this stuff for fun, so there could be room for improvements I'm sure. I'll try to make corrections if anything has any issues or real problems, but it is an worthwhile endeavor! ***HIGH SPEED THINGS CAN BE VERY DANGEROUS. PLEASE READ ALL OF THE INSTRUCTIONS AND ALWAYS BE CAREFUL.*** ***EDIT: HERE IS A LINK TO A GOOGLE DRIVE THAT CONTAINS AN ENGINE ASSEMBLY.STL FILE THAT IS TOO BIG TO UPLOAD TO THINGIVERSE.*** ***THIS FOLDER ALSO CONTAINS VIDEOS OF THE TURBINE RUNNING*** https://drive.google.com/drive/folders/1KZjoCjcnF1ufeNtmfvzTjsEuJNR3XQVG?usp=sharing https://youtu.be/M9uToxcRAMo https://youtu.be/MYGRyCYtXoE
With this file you will be able to print Upgrade to 3D Printable Jet Engine - Turbofan Driver With Magnetic Cover with your 3D printer. Click on the button and save the file on your computer to work, edit or customize your design. You can also find more 3D designs for printers on Upgrade to 3D Printable Jet Engine - Turbofan Driver With Magnetic Cover.
