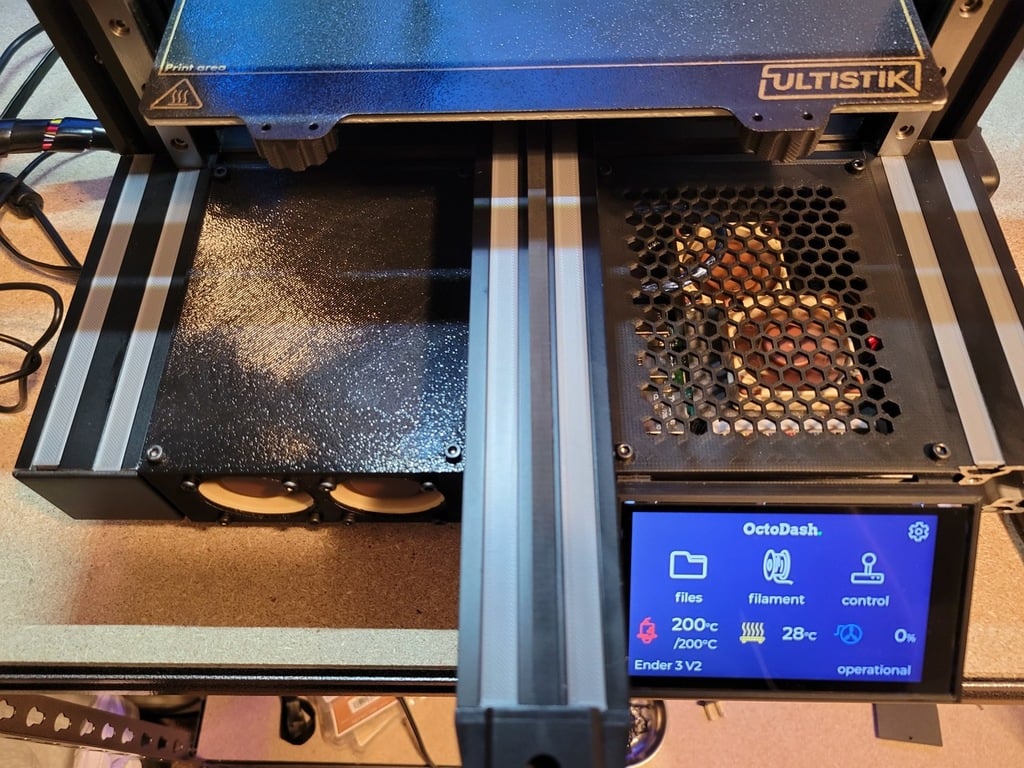
(UPDATED) Ender 3 V2/Pro Front Electronics Housing
thingiverse
UPDATED(4/28/21): I have added my V2 version of the enclosure. Changes are a hole added to the top of the mainboard housing to access mounting screw, The standoffs for the mainboard have been raised by 5mm to give a little more room for cables, and lastly I added a cable hole to the Pi enclose for you to route Pi power and ethernet if you use it, that way not everything has to go through the small hole on the mainboard side. UPDATED(4/10/21) Added Step file This is my Front Electronics Enclosure for my Ender 3 V2. If you're like me then you get really tired of having to flip your printer over onto its side every time you have to access the mainboard. I created this so that you have a top panel and have easy and quick access to your mainboard and to your PI4. I have also designed a mount for my HyperPixel 4.0 that I use. If you are interested I can Modify the files so that its a plain front if you don't have a different screen for your PI. You will also need to make sure your printer is raised. Your sd cards will not immediately accessible ( you can access them still by removing the lids) DISCLAIMER: This is a more advanced mod. YOU WILL HAVE TO DO SOME WIRING. the stock length of the power cable that powers the mainboard is a couple inches too short because of how I've rotated and moved the mainboard. You will need more 16 gauge wire and make a longer cable. I take no responsibility if you choose to modify your printer or if you electrocute yourself/ fry your printer. BOM: 12 M5 x 8 Bolts 12 M5 T-Nuts 13 M2.5 x 4 Bolts (You can use 4mm - 6mm, the holes are 4mm deep....Also to connect Hyperpixel to screen Mount) 4 M3x8 (to attach screen legs to Body) 4 M3x6 countersunk (attach screen mount to legs) 8 M3 Nuts Then whatever sized screws and nuts you need to attach your fans. I am using Sunon 40x20 fans for mine. You can use 40x10 if you wish. GPIO extension to connect pi to HyperPixel. Buck Converter (to power my 12v cooling fans) Order of Operations !!!CAREFUL When you are done printing and are removing supports, make sure to be very careful on the Mainboard side. There is a 5th screw that is buried in the support material so just be careful that you don't rip it off. Won't be the end of the world if you do, that side of the mainboard just won't be supported. I am still in the process and finishing this mod and getting everything installed. I will be taking pictures while I install mine to add to this. You will need to first remove your old mainboard and pull all of the wires out of the back hole. You can completely remove the stock housing that holds the mainboard, and if you are installing this into an ender 3 V2, you will need to remove your drawer also. Its easy to remove, you just need to remove your Y axis tensioner and the drawer will pull straight out. What I would recommend to do is to install both of your housing first( Mainboard Control and Pi Control). you can attach these with your M5x8 bolts and T-nuts. I put 2 holes on the backs/Side/Top but honestly that's probably overkill. I have mine installed and it doesn't move at all when all 6 are in. Once you have your Controls installed, Install your fans. Everything is a tight fit so you may not be able to get 4 screws in later if you wait to do it last. I would highly recommend pre-running your cables to where they are going to end up. I have the Pi and mainboard raised 10mm from the base so that you can route cables underneath them for a cleaner look and better cooling. Once you have your cables run and your fans installed you can install your Pi and Mainboard into your new enclosure. make sure to get everything plugged in and connected. Don't forget to also run your PI power and ethernet cable into the enclosure if you need too. I created 2 Lids, one solid and the other vented. If you want to make sure the airflow follows the correct path, id use two solid lids. If you aren't able to raise your printer, then id used a solid lid over your mainboard and the vented lid over your Pi. You can flip the exhaust fan so that if blows air up instead of down to vent air up through the vents. I would recommend getting some sort of filter material if you plan on using the vented lid though so that you don't get debris in your electronics. I would also recommend getting some sort of fan hat for your pi so it stays at a cooler temp. The one main downside of this mod is that you will not have easy access to your SD cards. I rarely access them since I use octoprint but if you are a person that still uses SD cards then you may want to get yourself an extension and run it out behind the screen mount so you can plug in SD cards. Please let me know if you have any questions or if I can help in any way. I do plan on adding different screen to this later once I have my own completely installed.
With this file you will be able to print (UPDATED) Ender 3 V2/Pro Front Electronics Housing with your 3D printer. Click on the button and save the file on your computer to work, edit or customize your design. You can also find more 3D designs for printers on (UPDATED) Ender 3 V2/Pro Front Electronics Housing.
