Updated E3Dv6 Shroud and 40 mm Duct w/ Magnetic Coupler
pinshape
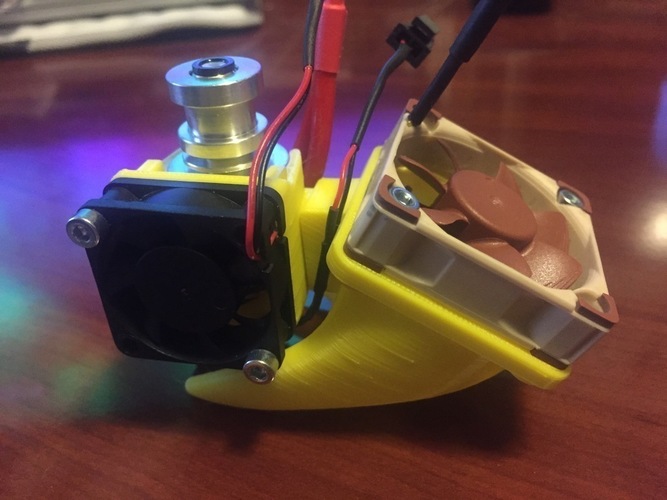
In response to multiple requests for easier assembly and disassembly of my E3Dv6 duct (http://www.thingiverse.com/thing:494430), I have updated the duct, eliminating the bolts that secure the 40 mm duct to the extruder body. The E3D shroud has been redesigned to fit more snugly with sockets for two 1/4" magnets, which can be easily found on Ebay and Amazon. Once the magnets are glued in place, the ducts snap together tightly. Because the 40 mm fan duct attaches directly to the 30 mm fan shroud, this design is no longer specific to Makergear M2 but has become more general. This change addresses a series of requests for a more universally applicable design. I have also posted a mirrored shroud so that the 40 mm duct can be mounted on either side of the extruder. The mount is centered on the 40 mm duct, allowing it to be fitted on either side of the shroud. Print Settings: Printer Brand - MakerGear, Printer - M2, Rafts - Doesn't Matter, Supports - No, Resolution - .3mm & .4mm, Infill - 50-70%. I have printed these with both 0.3 and 0.4 mm nozzles; supports are not required if the files are printed as oriented. I have been testing this update on my printer for a month, seeing no change in performance except that it is much easier to disassemble/reassemble. Due to the design's efficiency, I suggest using 20-25% fan speed. Post-Printing: Once printed, glue 1/4" magnets into the sockets, ensuring they are properly oriented so the parts attract rather than repel each other. A small tab under the magnet socket on the 30 mm fan shroud should be snapped off and trimmed.
With this file you will be able to print Updated E3Dv6 Shroud and 40 mm Duct w/ Magnetic Coupler with your 3D printer. Click on the button and save the file on your computer to work, edit or customize your design. You can also find more 3D designs for printers on Updated E3Dv6 Shroud and 40 mm Duct w/ Magnetic Coupler.