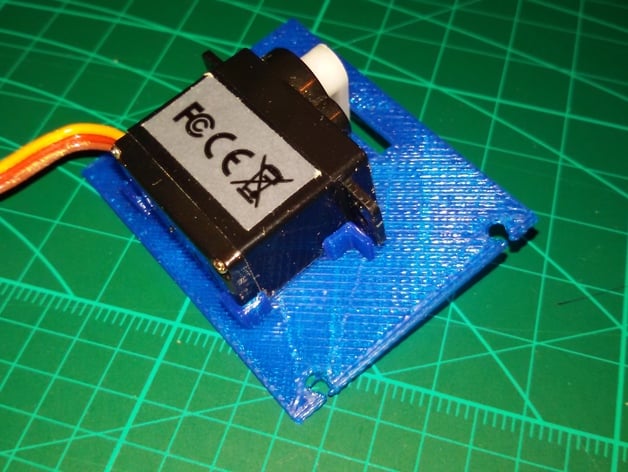
Universal servo insert part for Wersy's Speedy "Red Mini Wing"
thingiverse
The idea struck me when I couldn't find the required servo even on Hobbyking.com. After discussing it with the author of Speedy "Red Mini Wing," I created a universal insert based on the original part with their permission. I imported the original part into OpenSCAD and removed all walls from it. Then, I added four corners to place the servo accurately within 0.1 mm. This allowed me to re-engineer the original part as needed. To create this custom insert, you need to copy both "Servo_Insert_Plate.stl" and "Servo_Insert.scad" files into the same folder. Next, edit x1, x2, y1, and y2 parameters for your specific servo and generate an STL file from OpenSCAD. Note that X coordinates are measured from the center of the servo shaft, while Y coordinates are measured from the center of the servo arm. The provided Servo_Insert.stl is merely an illustration example; it was taken from a broken airplane without identifying any particular model used. On the attached photo, you can see a printed part generated from this file. You may attach your servo using double-sided tape, glue, or both on two sides for additional security. The corners serve only to position the servo precisely in place. Update: 20 January 2016 With Wersy's permission, I incorporated his "Parametric Servo Insert modified.scad" file into the project. You must now set seven parameters of your specific servo according to its characteristics. To mount it properly, you should configure three perimeter (shell) settings in slicing software to secure the screw threads; for the rest of the settings, adhere to those outlined in the original part. Update: 21 January 2016 I have added a "Parametric Servo Insert modified.stl" file solely as an example illustration. Please edit the SCAD file accordingly and generate your custom STL file based on it. Print Settings - Printer: Wanhao Duplicator i3. No raft layers were applied to the part during printing. - No support layers are needed for this model either. The print resolution was set at 0.3 mm, allowing fine details of the original part's design to be printed. You must specify specific settings in slicing software as per below: * You should start with a solid base by printing bottom 3 layers (each is 0.3mm thick) * Walls were built at 0.5 mm thickness
With this file you will be able to print Universal servo insert part for Wersy's Speedy "Red Mini Wing" with your 3D printer. Click on the button and save the file on your computer to work, edit or customize your design. You can also find more 3D designs for printers on Universal servo insert part for Wersy's Speedy "Red Mini Wing".
