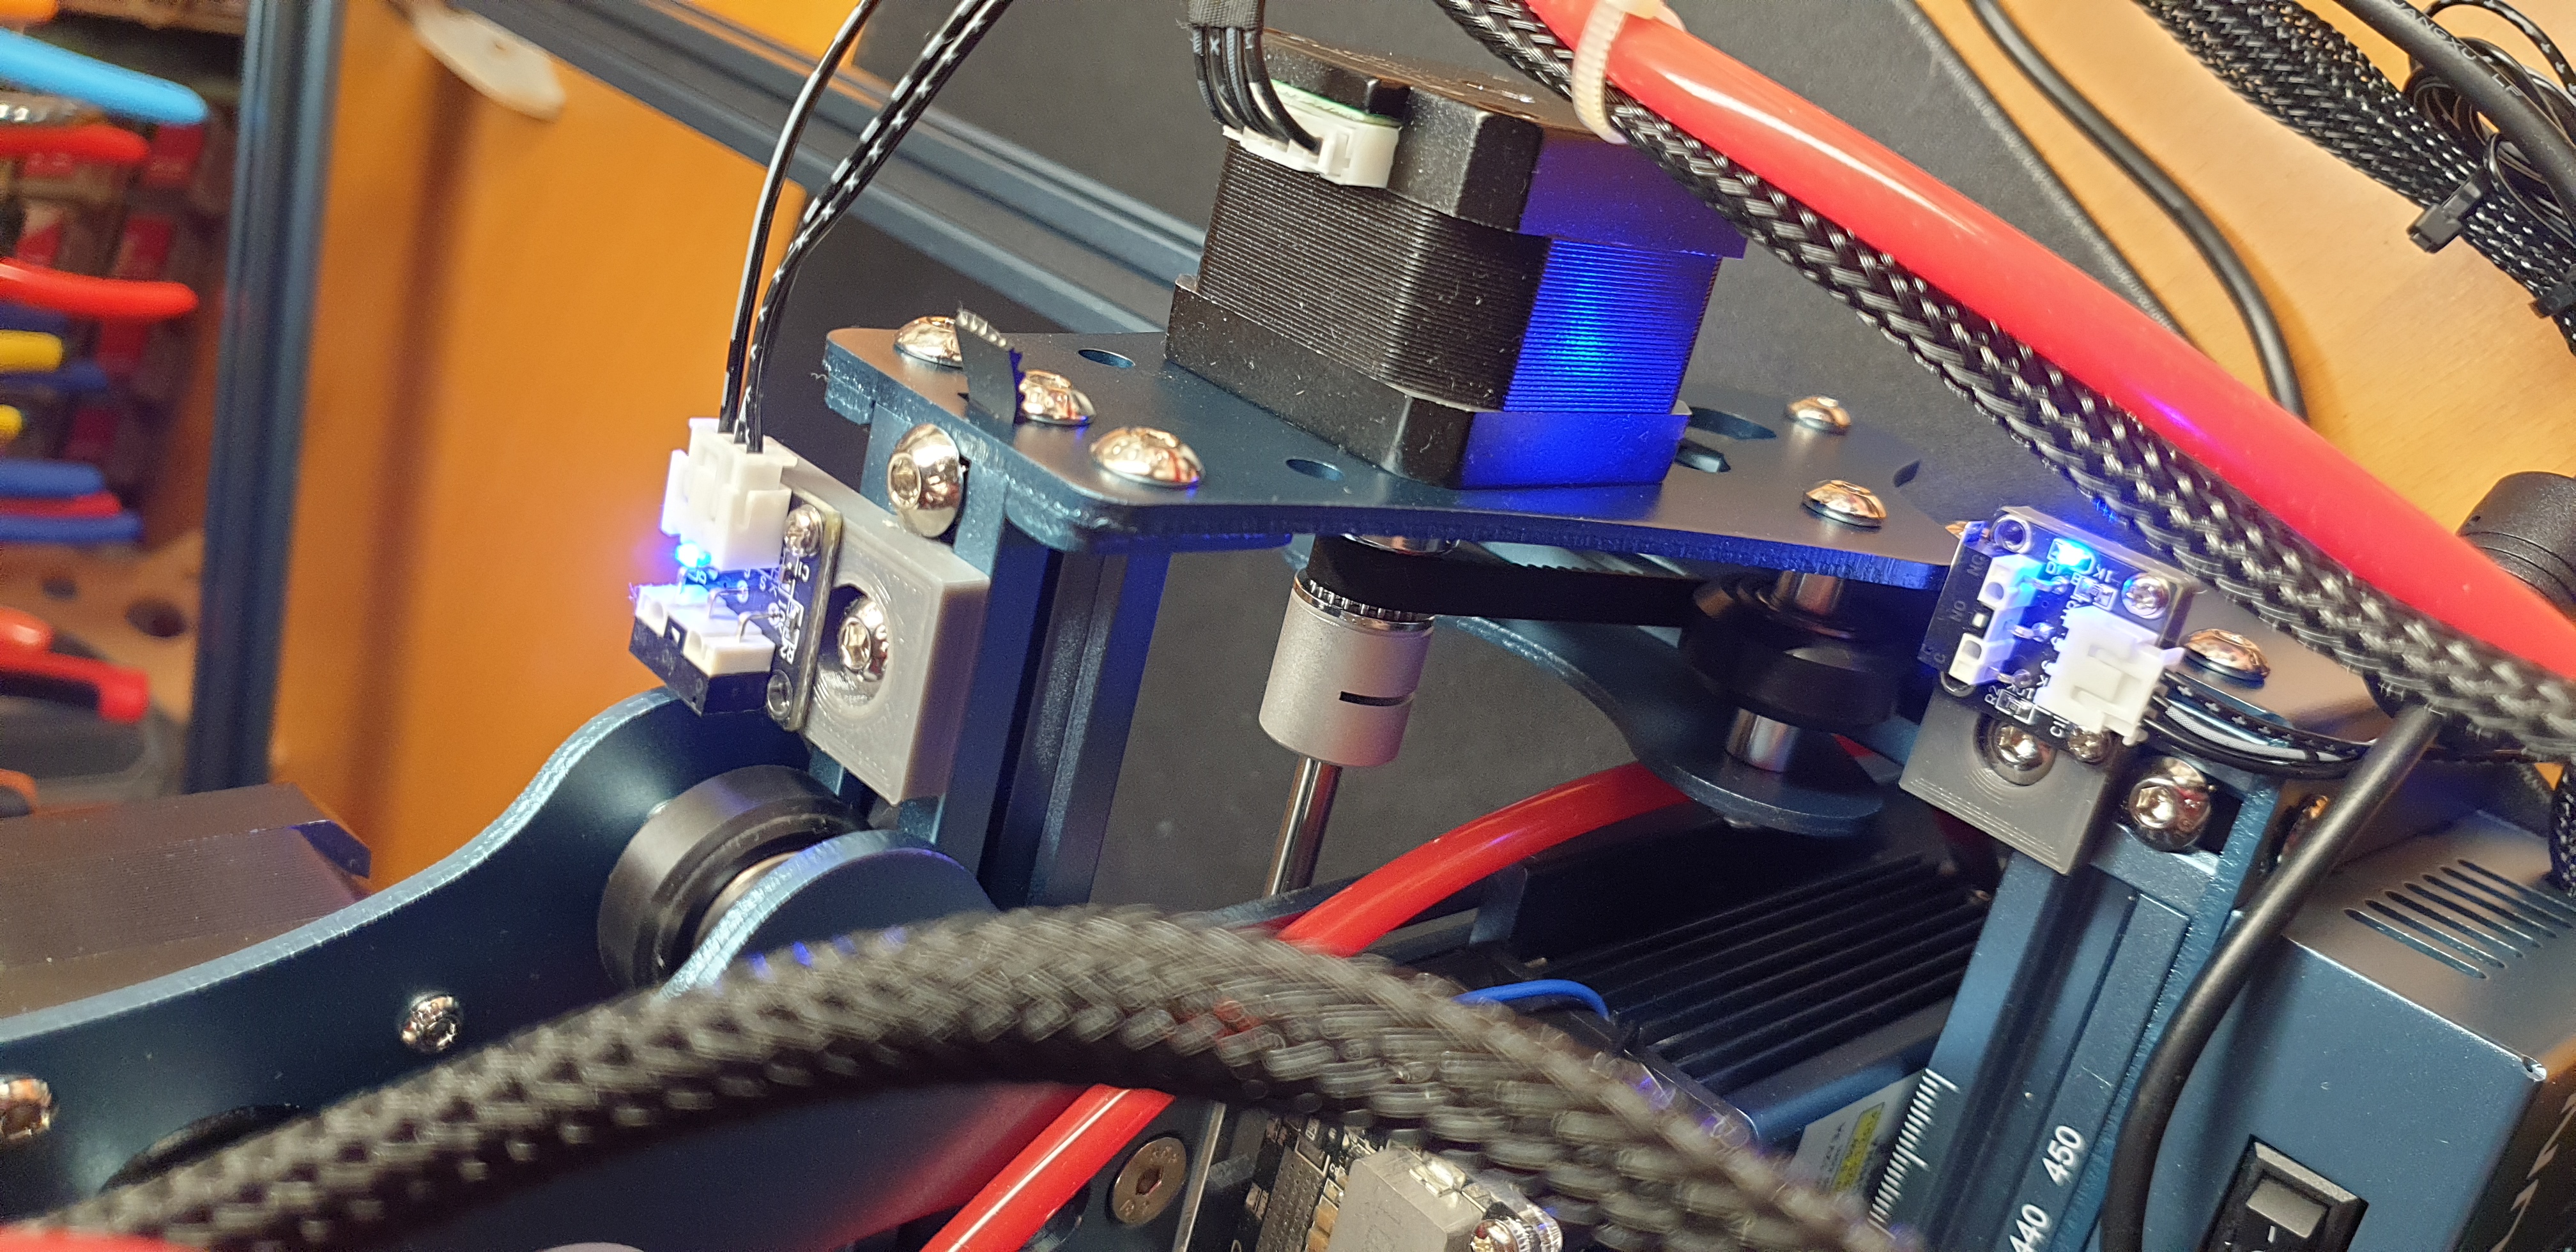
Universal / SculpFun S6 (Pro) / S9 Limit switch / End stop brackets
cults3d
[Scroll way down for this info in 8 easy steps] [EDIT: Yes, you can also combine these brackets with the T-nuts already used for belt tensioning and move back the end stops even further for a couple millimeters extra workspace... And if you are having trouble getting the T-nuts into the track, try putting the nut in first and rotate it in by pushing it with a screwdriver, you can then mount the bracket and slide the complete assembly into position before tightening it...] [EDIT 2: Now also available with integrated drag / cable chain brackets: https://cults3d.com/en/3d-model/gadget/universal-sculpfun-s6-pro-s9-drag-chain-limit-switch-brackets https://youtu.be/41vEdXATwak] A universal 2020 extrusion end stop mount for cheap (but reliable) Aliexpress limit switches. Kept as simple and unobtrusive as possible. The bracket is very quick and easy to print, has pawls that keeps it from rotating and only requires a single T-nut... In a pinch the bracket could even be cut from acrylic or plywood using your laser (.SVG is included in the download)... Printed mine in PETG, no supports, no adhesion, .2 layer height and 100% infill. PLA will work just as well. Needed them for my SculpFun S9 but they'll fit on any standard 20 series aluminium extrusion. Designed for these switches (these have blue leds):https://www.aliexpress.com/item/4000056510361.html?spm=a2g0o.9042311.0.0.28084c4dk6ArcW You can use the two spare M5 T-nuts SculpFun provides with their S9 with these brackets or you can use your own. Use two M2.5x5 or M3x5 screws (or any small screws that are slightly larger than the holes) to fix the switch to the mount. For the S9 simply connect the included cables in the corresponding sockets on the controller. Mount the X bracket in the front right hand corner. Mount the Y bracket on the right of the gantry. Invert the Y $23 homing direction (if you mount your end stops on the same side I did). Disable $20 soft limits and enable $21 hard limits in GRBL Enable $22 homing cycle in GRBL Home your laser (in LightBurn you have to turn on the home button in settings first and restart the software) In LightBurn you then end up with negative coordinates and I like to set my workspace zero to the front left of the machine. To enable this jog your laser as far to the left as you're comfortable with and read the coordinates this gives you ( for me this was X -393 Y -397 ) Set your workspace offset with G10 L2 P1 xx yy (For me this then was: G10 L2 P1 X-393 Y-397) Switch to $10 Workspace Position reporting and voilá your left front is 0.0 and you can use absolute coordinates... Don't forget to jog your laser head to the back right corner as far as possible and tell LightBurn the maximum workspace you have available (for me this ended up being X 393mm by Y 403mm) Or, in 8 easy steps: Step 1: If you've mounted your limit switches like I did... Step 2: Enter in a GRBL terminal: $20=0 $21=1 $22=1 $23=2 Step 3: Home your laser (in LightBurn you have to turn on the home button in settings first and restart the software) Step 4: After homing, jog (in the software, not by hand!) your laser head as far to the left as you feel comfortable with and read the coordinates this gives you (e.g. X:-393 Y:-397) Step 5: Enter in a GRBL terminal: G10 L2 P1 xx yy (xx and yy are the coordinates from step 4 e.g. G10 L2 P1 X-393 Y-397) Step 6: Enter in a GRBL terminal: $10=0 Step 7: Home again and then jog (in the software, not by hand!) the laser head as far back as you're comfortable with and read the coordinates this gives you (e.g. X: 390 Y: 403) Step 8: Enter the max dimensions you got from step 7 in your software as working size dimensions (e.g. Width 390 Height 403) You're done. Don't forget to home the machine when you start it or after everytime you moved it by hand so it knows where it is (or configure your software to do it automatically) Enjoy!
With this file you will be able to print Universal / SculpFun S6 (Pro) / S9 Limit switch / End stop brackets with your 3D printer. Click on the button and save the file on your computer to work, edit or customize your design. You can also find more 3D designs for printers on Universal / SculpFun S6 (Pro) / S9 Limit switch / End stop brackets.
