Universal dispenser
prusaprinters
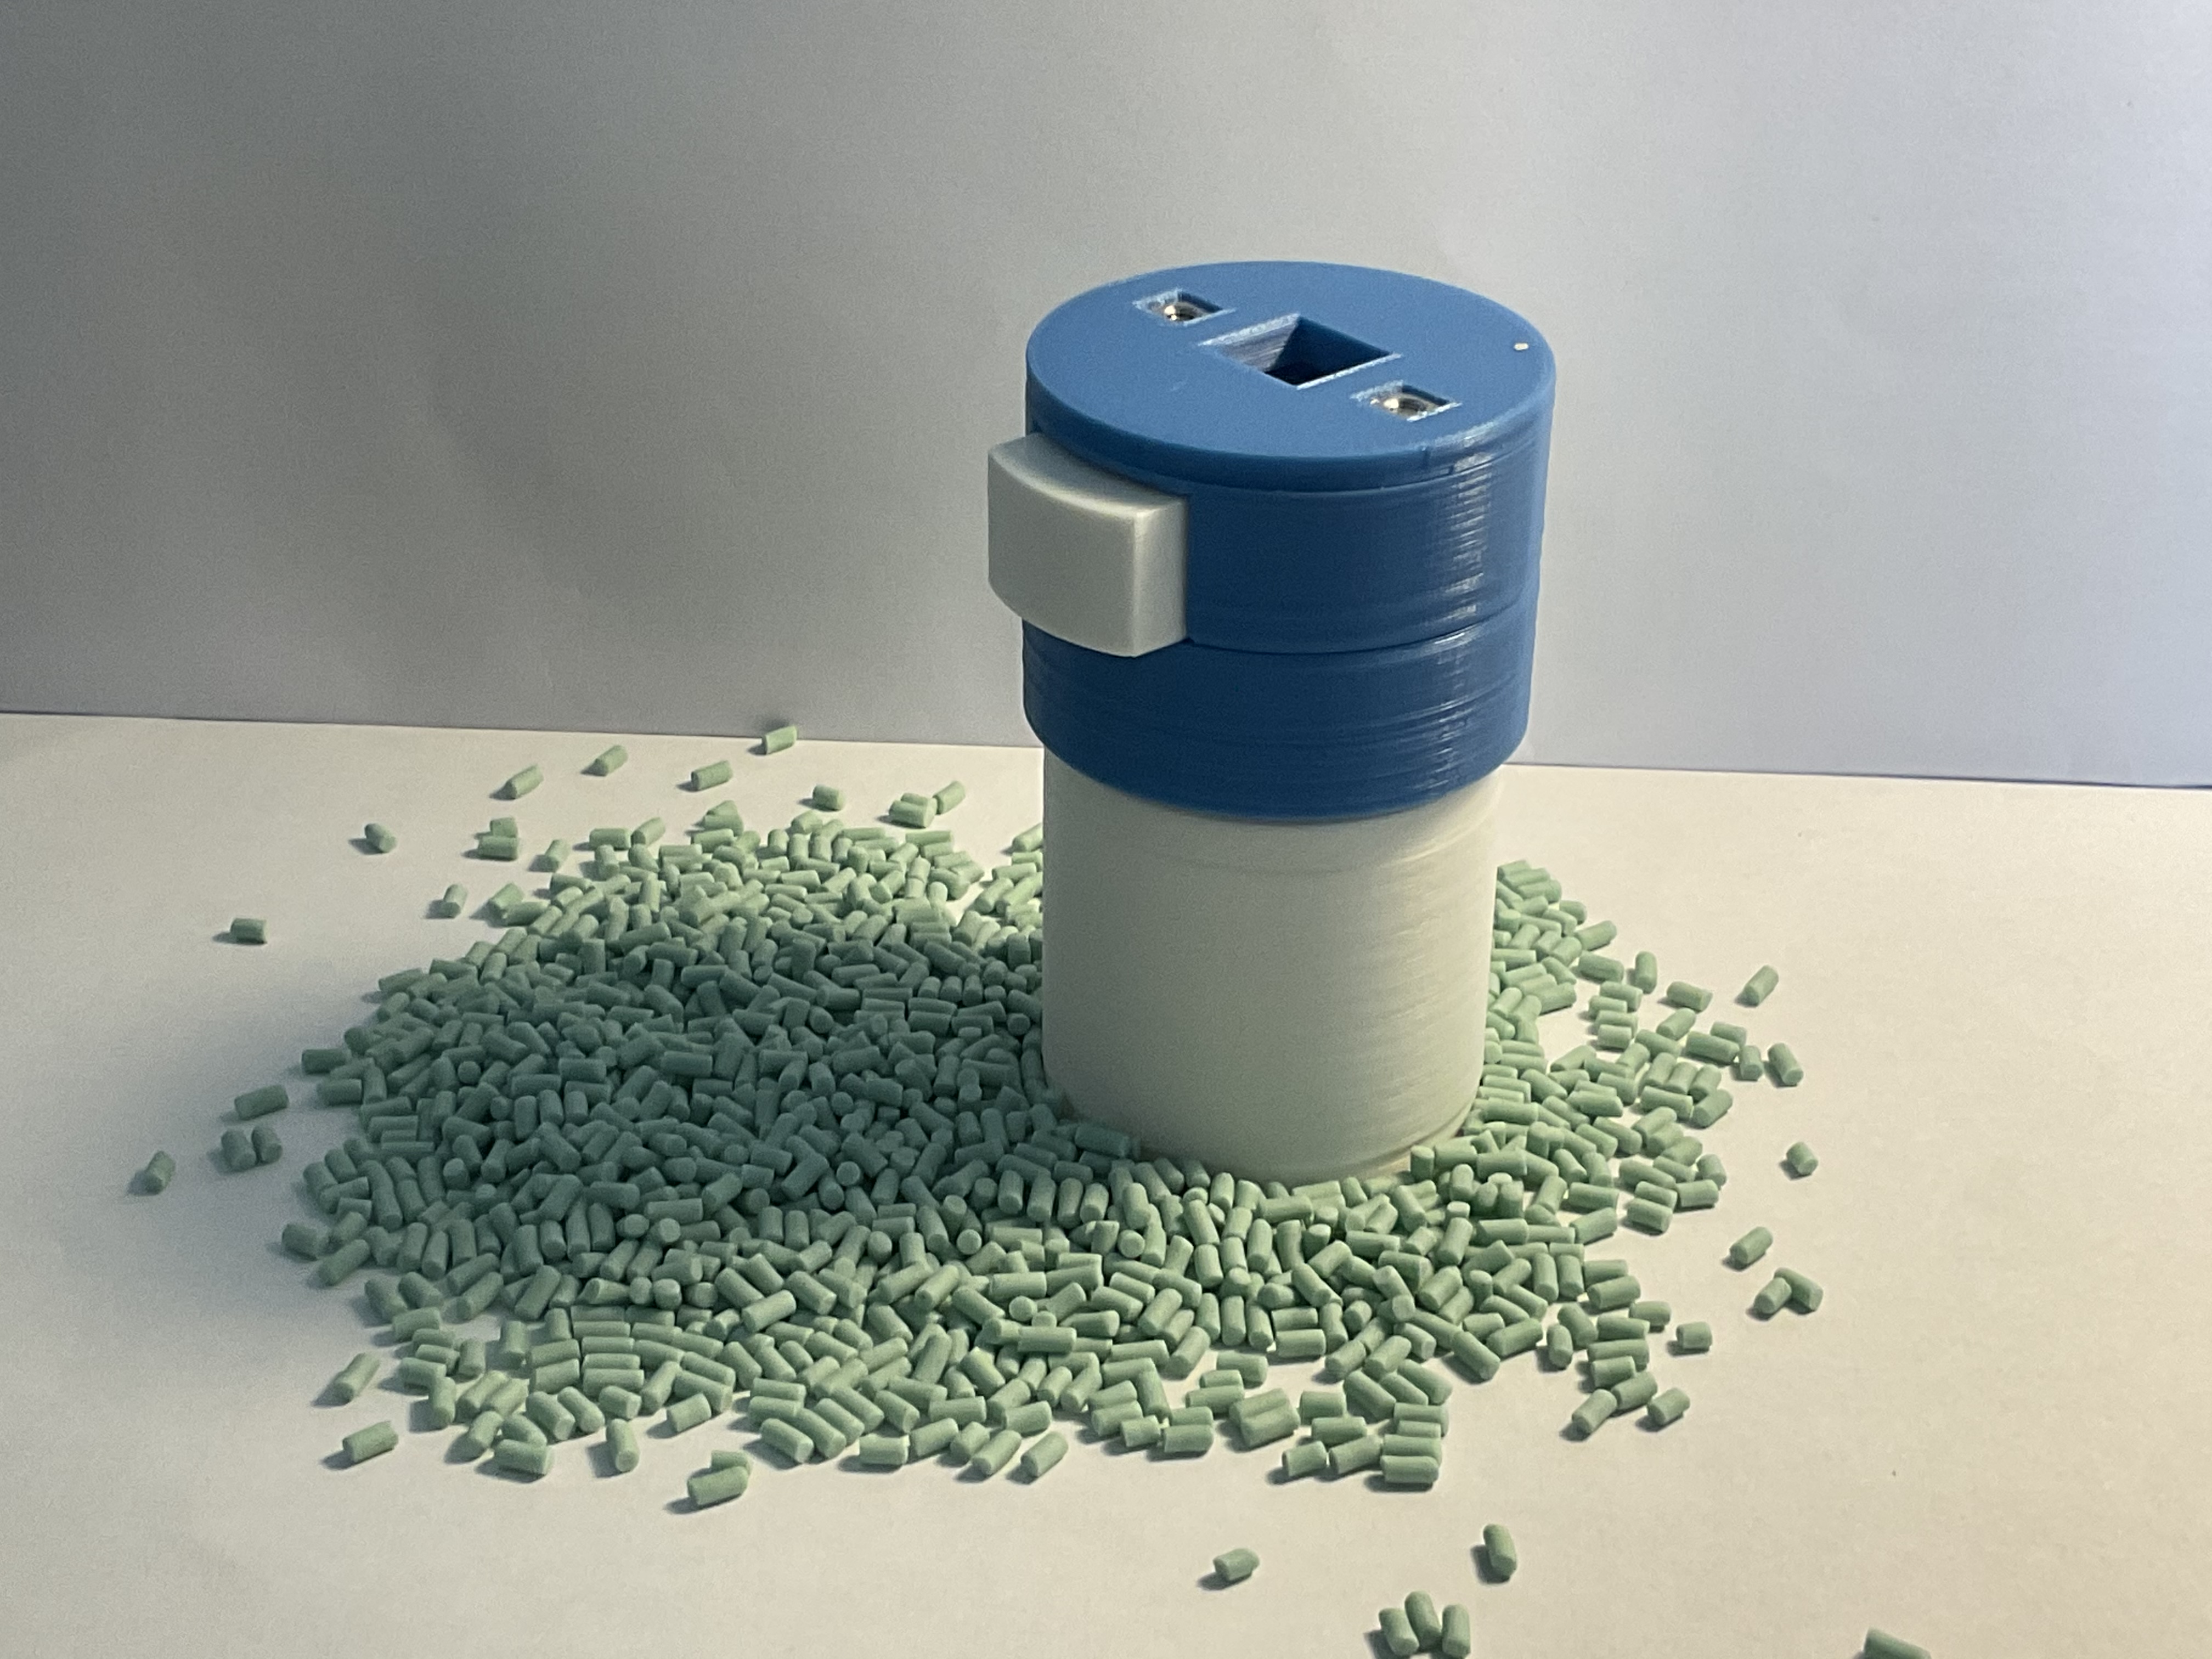
<p>This is a mechanical dispenser for example for fetilizer but you can put in this whatever you want. </p><figure class="media"><oembed url="https://www.youtube.com/watch?v=SMV8v0rb-Kw"></oembed></figure><p> </p><p>things you need apart from the printed parts :</p><p>-2x M3x20 screws (you can find these in the spare bag if you have a Prusa)</p><p>-2x M3nS nuts (you can find these in the spare bag if you have a Prusa)</p><p>If you dont have the screws and nuts you also can glue the parts together, but attention never glue white and blue parts together. And if you want to glue print the top part 3 for gluing instead of the normal top part 3.</p><p>-a little spring (you can find this in the most ballpoints) </p><p>Please follow the instruction below</p><p> </p><p><strong>Instruction</strong></p><ul><li>Print all the parts with your standart print settings, at some parts you need supports, but I wrote it below the models. (there are different sizes of the bottom part, just choose one)</li><li>At first we will assemble the top of the disspenser for this step please prepare the following things:</li></ul><p> -2x M3x20 screws</p><p> -2x M3nS nuts</p><p> -The small spring</p><p> -The 3 printed parts in blue and the small white part</p><figure class="image image_resized" style="width:50%;"><img src="https://media.prusaprinters.org/media/prints/61221/rich_content/ff36d35d-f1b1-44fb-86d6-1a835c0437e8/img_0495.jpg#%7B%22uuid%22%3A%22dbaf7a67-4306-4ecf-944c-11d4981bcae3%22%2C%22w%22%3A640%2C%22h%22%3A480%7D"></figure><ul><li>Now you take the part quite right.</li></ul><figure class="image image_resized" style="width:50%;"><img src="https://media.prusaprinters.org/media/prints/61221/rich_content/5d8bdefe-f9ce-4400-b684-7bdb6e9035e3/img_0496.jpg#%7B%22uuid%22%3A%22683dd612-6b42-4910-a640-7e5a87bdf79c%22%2C%22w%22%3A640%2C%22h%22%3A480%7D"></figure><p> </p><ul><li>Turn this part around and place the part of the left above it, make sure that the opening of the second part is at the side where the hole of the firtst part is.</li></ul><figure class="image image_resized" style="width:50%;"><img src="https://media.prusaprinters.org/media/prints/61221/rich_content/2abd8052-c5d0-4bc6-b43d-d42ab768f195/img_0499.jpg#%7B%22uuid%22%3A%2202cd238c-496d-4c13-a1bf-9d375f47b653%22%2C%22w%22%3A640%2C%22h%22%3A480%7D"></figure><ul><li>Now turn the tow parts together around and screw the two M3x20 screws in, but not allready compleatly.</li></ul><figure class="image image_resized" style="width:50%;"><img src="https://media.prusaprinters.org/media/prints/61221/rich_content/65e14eb8-3953-46e0-a0f7-2b1f4b4fa597/img_0501.jpg#%7B%22uuid%22%3A%22e99cacf1-3ac5-4d3a-8382-79c5e68d371c%22%2C%22w%22%3A640%2C%22h%22%3A480%7D"></figure><ul><li>Turn the parts over</li></ul><figure class="image image_resized" style="width:50%;"><img src="https://media.prusaprinters.org/media/prints/61221/rich_content/ade82875-1e14-480b-995c-4024285fe3a2/img_0502.jpg#%7B%22uuid%22%3A%22dc0f47fe-9a4a-4923-9c1a-daa528c32d04%22%2C%22w%22%3A640%2C%22h%22%3A480%7D"></figure><ul><li>Take the white piece and notice that there is a smaller and one bigger side.</li></ul><figure class="image"><img src="https://media.prusaprinters.org/media/prints/61221/rich_content/efcf8aaa-abe1-4232-8841-9be6195c4699/bild-schieber-universalspender-kopie.jpg#%7B%22uuid%22%3A%2275d9c1b5-0926-42d2-9f79-84dcd8e68a01%22%2C%22w%22%3A640%2C%22h%22%3A480%7D"></figure><ul><li>Place this part as schown in the picture.</li></ul><figure class="image image_resized" style="width:50%;"><img src="https://media.prusaprinters.org/media/prints/61221/rich_content/13daae3e-9baa-4c6c-af9e-fcdfbad590d8/img_0507.jpg#%7B%22uuid%22%3A%2256ff0fc7-a0e9-41cd-a727-3823e871c204%22%2C%22w%22%3A640%2C%22h%22%3A480%7D"></figure><ul><li>Now take the spring and place it between the white and the blue part, there are two small <br>cylinders coming out the two parts, you have too put these into the spring like in the picture. Make sure that the spring is not to strong or to loose, you can change this by stretching or trimming the spring.</li></ul><figure class="image image_resized" style="width:75%;"><img src="https://media.prusaprinters.org/media/prints/61221/rich_content/8a67b023-ea01-47aa-8024-a9e29c7d9d05/img_0508.jpg#%7B%22uuid%22%3A%226e50403b-5154-4545-94c1-e632d4ecdc5a%22%2C%22w%22%3A640%2C%22h%22%3A480%7D"></figure><ul><li>Take the last blue part and notice that there are two different sides..</li></ul><figure class="image image_resized" style="width:50%;"><img src="https://media.prusaprinters.org/media/prints/61221/rich_content/eefea07d-9294-4668-bac7-48b6cd320a52/img_0509.jpg#%7B%22uuid%22%3A%22982624b7-948d-4db8-bfec-bdfe0419a81e%22%2C%22w%22%3A640%2C%22h%22%3A480%7D"></figure><ul><li>Place it like shown in the picture on top of the others parts.</li></ul><figure class="image image_resized" style="width:50%;"><img src="https://media.prusaprinters.org/media/prints/61221/rich_content/6d03c818-3d9b-4492-a3bc-5e01e2dbb0c3/img_0510.jpg#%7B%22uuid%22%3A%22335bc112-f6a2-4b7c-be54-6aa981450ca0%22%2C%22w%22%3A640%2C%22h%22%3A480%7D"></figure><ul><li>Now turn the part around and insert the firtst M3nS nut.</li></ul><figure class="image image_resized" style="width:50%;"><img src="https://media.prusaprinters.org/media/prints/61221/rich_content/94cf3eb2-3070-4bcd-93d7-2fc46de9ca7c/img_0512.jpg#%7B%22uuid%22%3A%22027baca1-a133-4d83-9216-243ec7786cb6%22%2C%22w%22%3A640%2C%22h%22%3A480%7D"></figure><ul><li>After this you place your finger on top of the nut and turn it arround, now you can srew the screw compleatly in. Then repeat this step with the second nut. Make shure that you don't screw it to hard together otherwise it might not work.</li></ul><figure class="image image_resized" style="width:50%;"><img src="https://media.prusaprinters.org/media/prints/61221/rich_content/1c7c3312-b2a1-4525-876a-5d96fb4f279f/img_0514.jpg#%7B%22uuid%22%3A%220156546c-3bfd-4ca7-a980-33289f04722a%22%2C%22w%22%3A640%2C%22h%22%3A480%7D"></figure><ul><li>For the following step you need the bottom part of the disspenser.</li></ul><figure class="image image_resized" style="width:50%;"><img src="https://media.prusaprinters.org/media/prints/61221/rich_content/1f475add-a4bb-4c11-9e95-87068b350fc7/img_0516.jpg#%7B%22uuid%22%3A%22edd1f975-5fcc-4731-98aa-885c8a5a225d%22%2C%22w%22%3A640%2C%22h%22%3A480%7D"></figure><ul><li>Try screwing the two parts together if it wont work smoth, it might be that you have to sand one of the screws.</li></ul><figure class="image"><img src="https://media.prusaprinters.org/media/prints/61221/rich_content/e43a622c-efab-4ae7-99f0-127e0fded67b/img_0518.jpg#%7B%22uuid%22%3A%22ae77f361-72a0-4935-9f87-8eb56b92f0b8%22%2C%22w%22%3A640%2C%22h%22%3A480%7D"></figure><ul><li>Concrats you finished.</li><li>For filling the dispenser just screw the parts apart and fill it with whatever you want.</li></ul><p> </p><p>hope you like the model, give me your feedback in the comments. </p><p> </p><p>best regards</p><p>mlax</p><p> </p>
With this file you will be able to print Universal dispenser with your 3D printer. Click on the button and save the file on your computer to work, edit or customize your design. You can also find more 3D designs for printers on Universal dispenser.