Universal chord / cable fix
cults3d
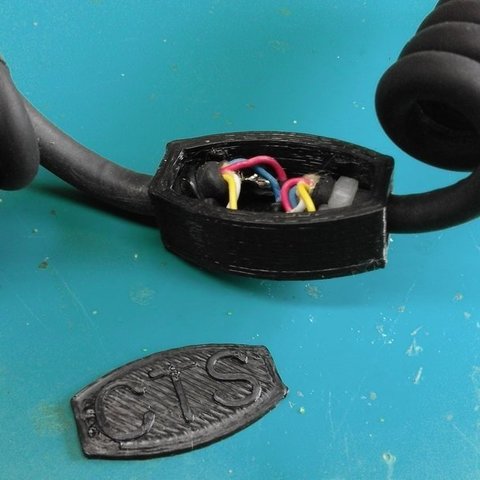
How to Print a Cable Fix: Print the joining box using a 0.2 or 0.3mm layer height option. Slice both the box and its lid in the same file. To increase printing volume and allow each layer to cool before adding the next, slice several boxes into one single file. How to Use Your Cable Fix: Insert both chord cables into the joining box, securing them firmly with cable ties. Solder the wires together and fill the box with hot melt glue using a glue gun, just like in the picture provided. Place the lid on top of the molten glue and allow it to cool completely before moving forward. For More Information: Visit https://hackaday.io/project/46069-3d-printed-universal-cable-fix for additional project details. You can also watch a tutorial video at https://www.youtube.com/watch?v=5iomIrLjF_0.
With this file you will be able to print Universal chord / cable fix with your 3D printer. Click on the button and save the file on your computer to work, edit or customize your design. You can also find more 3D designs for printers on Universal chord / cable fix.