Unicorn Mills Peppergun Spring Cam
prusaprinters
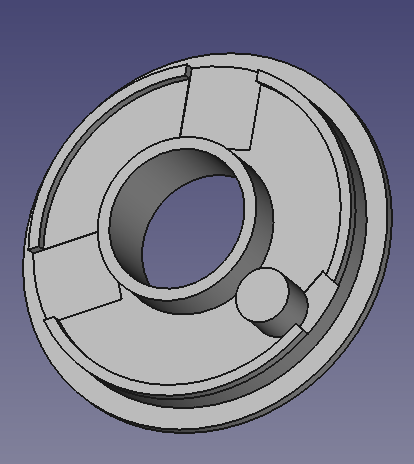
<h3>Why make this?</h3><p>My grandfather's peppergun broke, so he asked me if I could fix it or buy him a replacement. He's been using it for over 30 years. So I looked online on the official website (http://www.unicornmills.org/faqs.html) and the peppergun was discontinued. So I checked ebay and to my surprise it was $100. So I decided to open it up and make the broken part and put it back together for him.</p><p>He was ecstatic. :)</p><h3>Assembly</h3><p>Assembly is somewhat straightforward. Once you open the top of the peppergun (yes it will take some force, and yes you will have to glue a part in place to keep it closed again) you should see at the top a tension spring and a locking ring. Both parts are included here.</p><ol><li>Disassemble peppergun by pulling the top piece off. This should expose the grinder's main shaft it was mounted on.</li><li>Remove the broken spring cam.</li><li>Remove locking plastic piece for the shaft to grinder component.<ol><li>This is also provided as the original one was slightly tighter than the printed one which this makes the printed one a looser fit and better performant.</li></ol></li><li>Replace broken spring cam (it's the part at the top that the shaft fits through)<ol><li>Break and grind off any remaining plastic from the previous spring cam, you are replacing that whole part.</li></ol></li><li>Glue the spring cam back to the edges of the peppergun so it sits in place. The original glue gave way after 30 years. I printed my part in PLA so I used CA glue for this.</li><li>Add spring back. This step is extremely finicky and a huge pain.<ul><li><strong>NOTE: </strong>The spring legs need to be squeezed past each other and then inserted onto the cam. </li><li>One of the legs should be locked in place by the cylinder found on the printed cam. </li><li>The other leg will need to be inserted behind the top <strong>as you are assembling</strong> the peppergun.</li></ul></li><li>Once the top is reassembled, it should be pressure held onto the grind shaft that runs through the center of the device.</li></ol><p><strong>Note:</strong> I would add pictures here but it's already reassembled and I <i>really</i> don't want to go through that again. This is an integral part of the peppergun, but also the most heavily taxed piece through use.</p>
With this file you will be able to print Unicorn Mills Peppergun Spring Cam with your 3D printer. Click on the button and save the file on your computer to work, edit or customize your design. You can also find more 3D designs for printers on Unicorn Mills Peppergun Spring Cam.