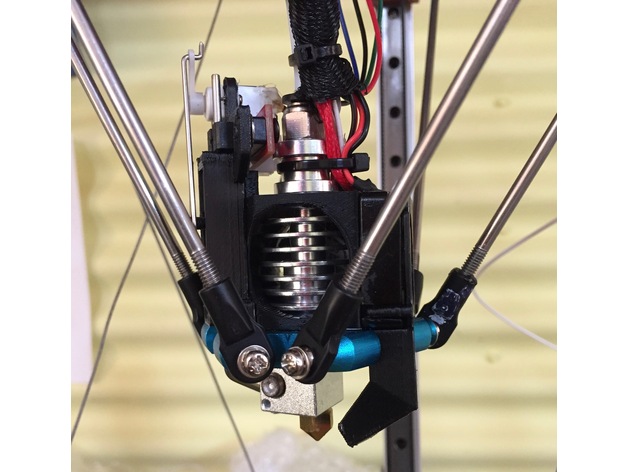
Underslung Delta effector assembly
thingiverse
Human: Parts needed for an underslung effector. Moving the effector plate closer to the nozzle reduces scaling effect of effector tilt. This assembly also uses a Z bend sensor, eliminating inaccuracy caused by effector tilt on measuring Z height. Hotend Modifications This is how a typical clone hotend looks when it arrives from China. Disassemble and drill out guts with a 4mm (or slightly larger) drill bit to allow PTFE tube to slide through. Hack off bottom two fins with a dremel. You should be left with this: Clean it with a file so that fins are completely gone, leaving a rounded cylinder. Spacer Start with a spare heatbreak and grind threads off for a smooth outside surface. Cut it off to be about 5mm long. Grind end of good 30mm heatbreak so that it isn't chamfered on the end. Putting it in a drill while grinding ensures a flat surface. Assemble as shown. Z height sensor Details of Z height sensor are available here: http://www.thingiverse.com/thing:1517363 Note that STL for this effector is slightly different, using a 2 gram servo and different mounts. Use STL provided here. The part connecting Z height rod to screw can be fabricated out of anything. I used a brass screw with a 2mm hole drilled down through the middle, then a 2.5mm hole across it, tapping a thread with a 3mm tap. Effector modifications Start with an aluminium effector and countersink mounting holes so that M3 screws sit flush against surface. Final Assembly The effector goes together as shown in pictures below. You might need some washers to space out optical endstop so that it triggers reliably on the Z height trigger (bicycle spoke).
With this file you will be able to print Underslung Delta effector assembly with your 3D printer. Click on the button and save the file on your computer to work, edit or customize your design. You can also find more 3D designs for printers on Underslung Delta effector assembly.
