Ultrasonic Follower
prusaprinters
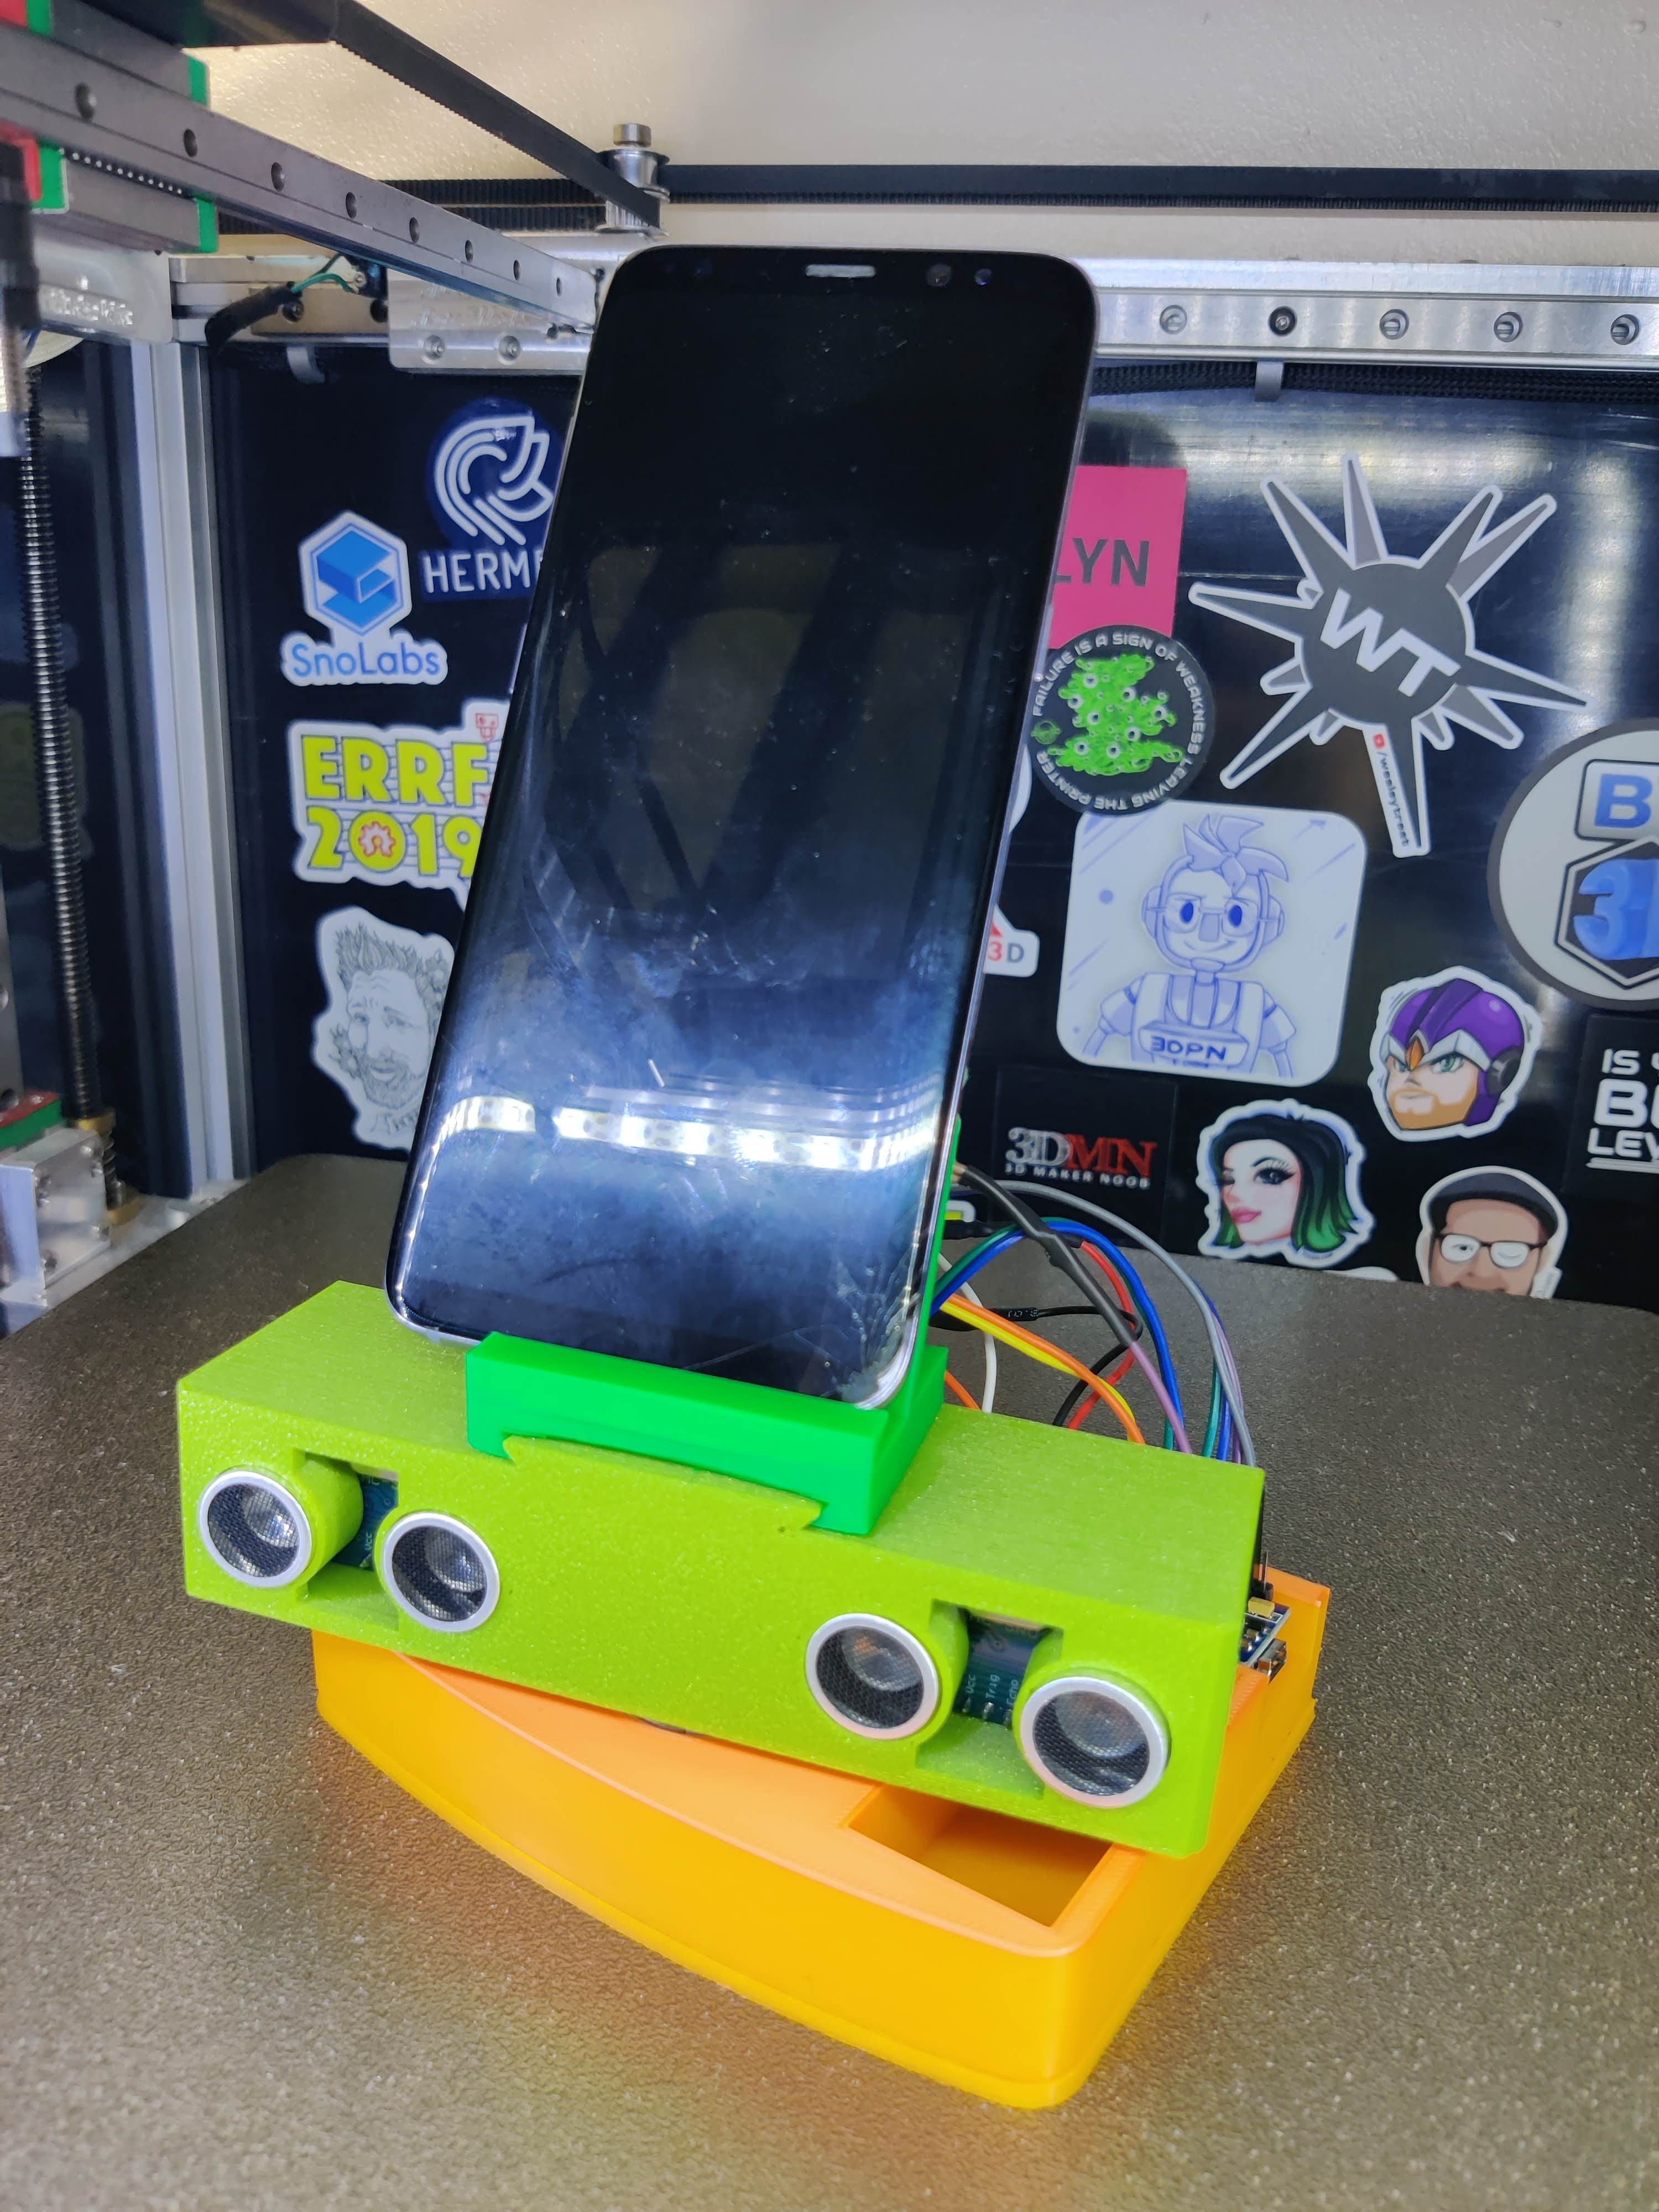
<p>This is a little stand for a phone or a device of your choosing that will use 2 Ultrasonic Sensors to try and follow you. It is inspired by this project: <a href="https://darwindelacruz.wordpress.com/2018/05/05/motion-tracking-robot-using-two-2-hc-s004-ultrasonic-sensor/">https://darwindelacruz.wordpress.com/2018/05/05/motion-tracking-robot-using-two-2-hc-s004-ultrasonic-sensor/</a></p><p>The project works by checking the distance from each sensor and if one of the sensors detects an object is close to it than the other it will rotate until they are equidistant.</p><figure class="media"><oembed url="https://www.youtube.com/watch?v=RDvAdcv9BFg"></oembed></figure><h4>Parts Needed:</h4><ul><li>1 Arduino Nano</li><li>2x HC-SR04 </li><li>1 28BYJ-48 5V Stepper Motor + ULN2003 Driver Board</li><li>9V Battery and battery clip</li><li>Wires</li><li>3x M3x6 Bolts (optional - Used to screw down motor and tighten swivel onto motor shaft)</li></ul><h4>Programming the Arduino:</h4><p>You will need the Arduino IDE installed to be able to program the Arduino,<br>Or if you would like I have made it available in the Arduino Web Editor as well.<br><a href="https://create.arduino.cc/editor/dsk001785/cc647fd3-3af8-40c4-9955-fa9edc9e4fd9/preview">https://create.arduino.cc/editor/dsk001785/cc647fd3-3af8-40c4-9955-fa9edc9e4fd9/preview</a></p><h5>Adding Libraries:</h5><p>One you have the IDE installed you will need to add the New Ping library to it so that the code compiles and has everything it needs.</p><p>You will go to Sketch > Include Library > Manage Library</p><figure class="image"><img src="https://media.prusaprinters.org/media/prints/136812/rich_content/1a4e9885-a61a-4810-845b-3cfac3decaef/snag-0076.jpg#%7B%22uuid%22%3A%227924cb2c-3e2f-4974-a868-d358a81c7e08%22%2C%22w%22%3A620%2C%22h%22%3A225%7D"></figure><p>You will search for <strong>New Ping</strong> and install (mine says update as I have it installed already)</p><figure class="image"><img src="https://media.prusaprinters.org/media/prints/136812/rich_content/e7a468c9-edd6-4822-8f33-90b1fecfa1d5/snag-0075.jpg#%7B%22uuid%22%3A%220d3d4d0f-2381-41f8-bee3-f846033d2183%22%2C%22w%22%3A786%2C%22h%22%3A443%7D"></figure><h5>Selecting Arduino Board:</h5><p>Next select the correct board. Select Tools > Board > Arduino AVR Boards > <strong>Arduino Nano</strong>. Also change the Processor to <strong>ATmega328P (old bootloader)</strong><br>You will also need to select the correct port, Once you plug in the Arduino with the USB cable the new port should appear as one of the options, select that one.</p><figure class="image"><img src="https://media.prusaprinters.org/media/prints/136812/rich_content/4e82c244-12a9-403c-997f-656266c9568f/snag-0079.jpg#%7B%22uuid%22%3A%2230819072-2c63-4d71-9851-9f1bdfe48fd7%22%2C%22w%22%3A834%2C%22h%22%3A386%7D"></figure><p>After that is done you should be able to load the Follower.ino and upload it to your Arduino.</p><h4>Wiring:</h4><h3><strong>DO NOT POWER THE STEPPER DRIVER THROUGH THE ARDUINO!!!!</strong></h3><p>Please wire the stepper driver like below directly to the battery. The driver can use too much current and burn out the Arduino, if you try and use the 5V pin.</p><figure class="image"><img src="https://media.prusaprinters.org/media/prints/136812/rich_content/2650d3d8-3c3f-4031-ba7c-d44f524b1c94/sonic-follower_bb.png#%7B%22uuid%22%3A%22690c16a2-6f53-4180-9b22-f9428e4406a6%22%2C%22w%22%3A2475%2C%22h%22%3A1785%7D"></figure><h4>Printing:</h4><p>All parts should be in the correct orientation, when opened in the Slicer. You only need to print one of the swivel parts, depending on if you are willing to bend the pins on the Ultrasonic Sensor or not. (See assembly below) The only part that might need supports is the phone holder under the opening for threads, as long as you have good bridging. </p><figure class="image"><img src="https://media.prusaprinters.org/media/prints/136812/rich_content/0f5dbab8-d3af-4067-8c7e-47d71029e780/po.jpg#%7B%22uuid%22%3A%227f592eda-7c70-4a06-859b-2650b3a6fd4c%22%2C%22w%22%3A1390%2C%22h%22%3A912%7D"></figure><h4>Assembly:</h4><p>In my case I gently folded back the pins on the Ultrasonic sensors to have a cleaner look. But if you do not wish to do that there is a second version where you can install the sensors upside down and connect the wires to the top and not have to fold the pins at all. Use 2 of the M3 bolts to install the stepper motor and the other bolt is used like a set screw to hold the swivel onto the stepper motor shaft. The other components have their respective places. The Arduino is installed upside down and the 6 pins on the end of the Arduino that usually stick up are used to mount the Arduino, this gives it a solid mount and easy access to the pins.</p><p>Lastly slide the phone holder onto the swivel and screw in the knob to hold it in place. There is also a blank one provided in case anyone wanted to modify it to mount something else.</p><figure class="image image_resized" style="width:50%;"><img src="https://media.prusaprinters.org/media/prints/136812/rich_content/3bb44125-e2c0-47cb-a700-0d2d7c1f1669/img_20220220_130518.jpg#%7B%22uuid%22%3A%22716952ce-f101-41a9-b7af-7e1cb97ed1c9%22%2C%22w%22%3A3000%2C%22h%22%3A4000%7D"></figure>
With this file you will be able to print Ultrasonic Follower with your 3D printer. Click on the button and save the file on your computer to work, edit or customize your design. You can also find more 3D designs for printers on Ultrasonic Follower.