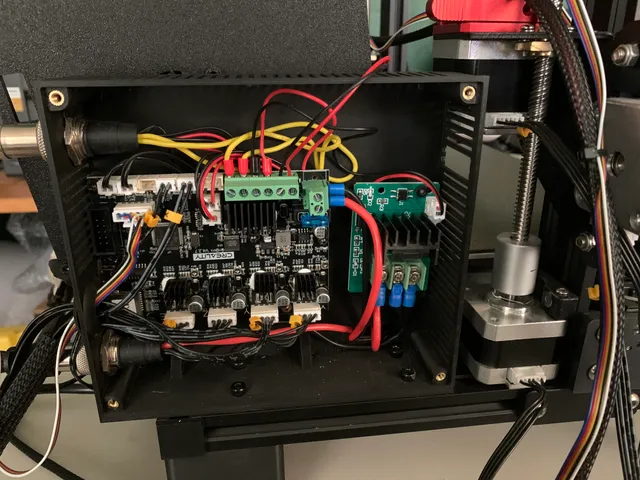
Ultracompact CR-10 Standalone Project - Control Housing
prusaprinters
I picked up a CR-10 V1 and wanted a few upgrades and to get rid of the original control box. I tried a few different standalone projects, didn’t find one that I really liked, or that needed excessive modifications. I decided to build my own and 20 revisions later this is what I have. The print you download is what you see in the pictures and should fit both the original and a BigTreeTech SKR Mini E3 V3.I minimized what was needed for the print itself and did my best to minimize changes to wiring. You will be able to keep the aviator connectors in place but will need to lengthen the Mosfet to Power Supply wires, along with the main power wires. There are a few minor nuts/bolts inserts.This control box has two lids, one that has an opening for a Screen, and one that doesn’t if you are going to run Klipper and connect directly to a Raspberry PI.As part of the Ultimate Standalone project there are also:Ultracompact CR-10 Standalone Project - LegsUltracompact CR-10 Standalone Project - Power Supply MountsUltracompact CR-10 Standalone Project - TFT35 For the Control Box Section Project, I also used:7 - Brass Threated Insertion Nuts and Bolts (Motherboard\Mosfet)4 – Brass Threated Insertion Nuts and Bolts (To secure the lid)4 – T-Slot Nuts and Bolts (Case to Frame)A couple bits of wiring to extend the power lines as needed (You may mount yours differently, so your length may vary. Optional:4 – Bolts (Exhaust Fan)1 – XH-2Y connector for the fan if you are using a Mini E3 Basic guide Disassembly:Remember to label all cables before doing anything.Remember to label all cables before doing anything.Remove the power supply, motherboard, 80 MM fan, and the rubber grommet from the case.Remove the power supply plug.Disconnect and remove both aviator connectors from the case. Remove the screen if you need it too. Basic guide Assembly:Using a soldering Iron install all the Threaded InsertsInstall the grommet.Install the motherboard.Install the Mosfet.Install the two aviator connectors.Connect the case to the frame.Feed all the Stepper motor/end stop wires through the grommet.Attach Fan to the lid.Connect all wires.
With this file you will be able to print Ultracompact CR-10 Standalone Project - Control Housing with your 3D printer. Click on the button and save the file on your computer to work, edit or customize your design. You can also find more 3D designs for printers on Ultracompact CR-10 Standalone Project - Control Housing.
