Ultimate TEVO TARANTULA upgrade.
thingiverse
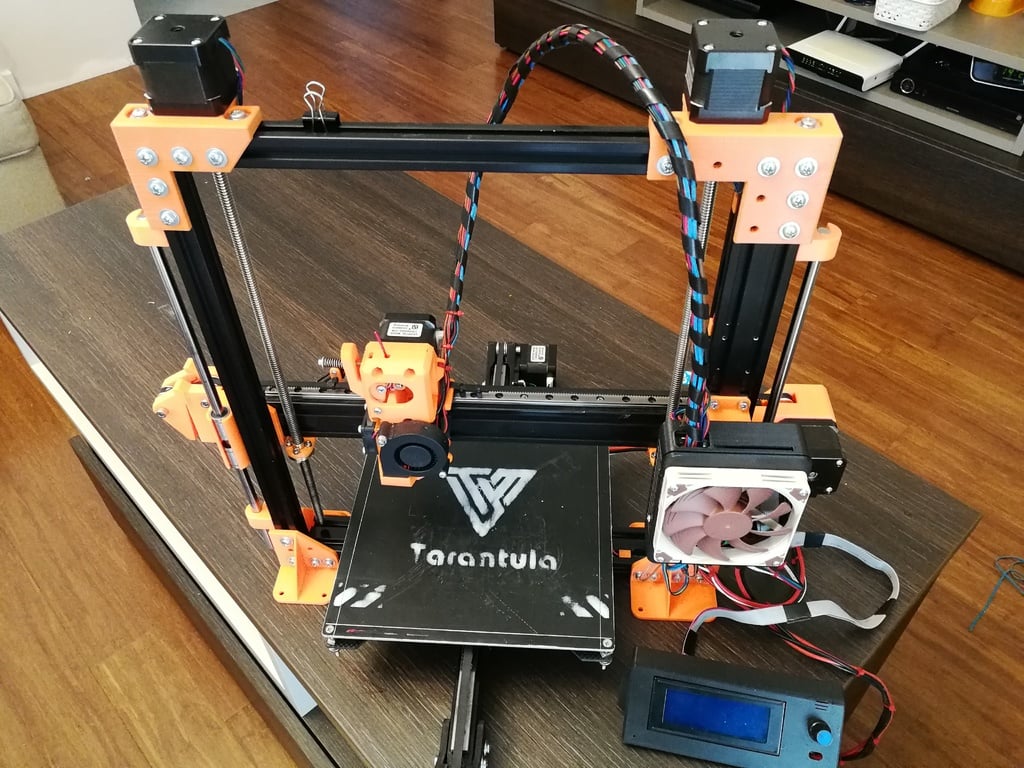
Ultimate TEVO TARANTULA Upgrade. This upgrade is the culmination of months spent upgrading my Tarantula. The goal was to have a reliable and more rigid printer than the stock one. Therefore, all acrylic parts were removed and replaced with elements designed from scratch. I reused some brackets designed by thingirob. See description below. X and Y Axis To get rid of play introduced by stock wheels, I decided to switch to MGN9 linear rail on the X axis and MGN12 linear rail on the Y axis. The X and Y axis parts include belt tensioners. There are two versions of Y-axis belt tensioners available: use Y_YAxisBeltTensioner1.stl or Y_YAxisBeltTensioner2.stl for easier use, or Y_YAxisBeltTensionerShort.stl to fit the Tarantula into an IKEA STUVA cabinet (I use it as an enclosure). To mount linear rails, ensure you have some t-nuts with M3 threads. Order the MGN9 rail in version H, and the MGN12 rail that fits your Y carriage. Z Axis The Z axis was upgraded with 8mm rods and LM8UU linear bearings. The stock stepper motor and lead screw were replaced with two stepper motors with integrated lead screws. I used a 400mm version but a 360mm lead screw should be sufficient. Extruder and Hotend The extruder assembly was reworked as well. Now it is fully printable direct extruder working with genuine E3D V6 hotends and Volcano upgrades. I used an 8mm inductive proximity sensor for bed leveling. WARNING: E3D hotends without Volcano upgrades will be too short to reach the bed and will NOT be compatible with layer fan ducts! Electronics To keep my wires organized, I designed a MKS board case and some helping elements for wiring management (I use an MKS Base v1.2 board). A Noctua fan is used to cool the board; it turned out to be effective enough to skip MOSFET upgrades. The fan used is the Noctua NF-A9x14. How to Print It Use ABS or PETG. If I remember correctly, I used a 0.3mm layer height, three perimeters, and 35% infill. If you decide to use ABS, it is recommended to use Skirt/Brim to prevent corners from lifting. Additional Parts To complete this build, you will need brackets designed by thingirob. You can find them in the description below. You Can Support Me If you like this design, feel free to tip me: BTC: 13AEKFmn1r79gNLHWdB42Gnv6a8yWiyJw4 XVG: DC161Z1hRz9qTzTEmEJiE471K5exHFjUKs XRP: rPVMhWBsfF9iMXYj3aAzJVkPDTFNSyWdKy tag 1891839536 LTC: LRtdNU5ei4xuSX6FcVXMdR3U7qZBn6rj8F ETH: 0x1678785c945c1bb8916bbf014e3d8b16783f7d1c LSK: 9185718860764114610L Thank you!
With this file you will be able to print Ultimate TEVO TARANTULA upgrade. with your 3D printer. Click on the button and save the file on your computer to work, edit or customize your design. You can also find more 3D designs for printers on Ultimate TEVO TARANTULA upgrade..