ULTIMATE PHONE BIKE HOLDER & CHARGER GBI-2018 EDITION
thingiverse
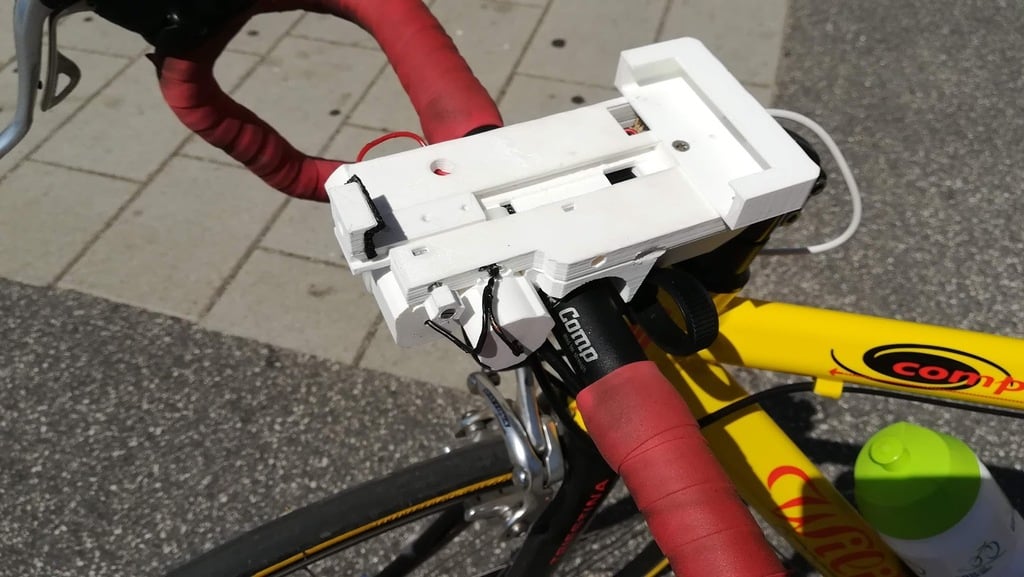
This is a versatile phone holder and charger designed specifically for biking. Proven over 700 kilometers at the GBI-Europe-2018 event on https://www.gbi-event.org/en/events/gbi-europe-2018.html. During extended bike trips lasting more than eight hours, it's essential to have both a holder and charger to track your route using GPS. I utilize OruxMaps (https://www.oruxmaps.com) for this purpose, which allows me to upload offline maps and conserve battery life. The device has been successfully tested with both the Huawei P8 Lite (with case) and the Pocophone F1. For optimal fit, you can modify the lower support to accommodate your phone model. A small USB cable is used for connectivity. Key dimensions include a handlebar diameter of up to 36mm and a stem width of 36mm. Power is supplied by two 18650 batteries. You have the option to bring extra batteries and switch them out as needed during your journey. However, it's crucial to ensure both batteries are charged equally since they're connected in parallel. For charging, you can use either the module or a mini-USB port; it's recommended to keep the support stationary on the bike to minimize movement. The 18650 battery cases were inspired by designs found at https://www.thingiverse.com/thing:1048858 and https://www.thingiverse.com/thing:3225917. Materials required for this project include: - PLA filler - Two lithium-ion batteries (18650) - The 134N3P module, available at https://es.aliexpress.com/wholesale?catId=0&initiative_id=SB_20181119030218&SearchText=134N3P - One M3 nut and screw (preferably 40mm or longer) - Red and black cables - Four metal or copper surfaces, approximately 5x5mm in size - Adhesive sealant rubber - Zip cable ties To assemble the device, follow these steps: - Print all required parts with an infill of 40% to 60%. The base part should not require additional support due to its design. - Also print two battery holders and tap components. - Secure the battery holders to the main base using glue or zip ties. - Install the 134N3P module and cabling through internal holes. First, solder the metal surfaces to the cable, leaving enough wire for easy removal of batteries. Be cautious when handling positive and negative terminals to avoid short-circuiting. Place the batteries in parallel, ensuring they are charged equally. Warning: Do not attempt to connect batteries directly without proper protection, as there is no indication or safeguard against polarity reversal. It's highly recommended to use colored cables for identification. Next steps include: - Installing the lower part and securing it with an additional screw. - Mounting a handle on a 40mm screw and attaching a nut that fits onto the base part. This serves as a means to attach the upper part, holding your phone in place. - Applying adhesive sealant rubber along the bottom of the device to prevent vibrations caused by bike movements. - Securing the holder to the bike using zip ties (preferably reusable ones for easy removal). Utilize the internal hole for this purpose. With these simple steps, you'll be ready to enjoy your next biking adventure!
With this file you will be able to print ULTIMATE PHONE BIKE HOLDER & CHARGER GBI-2018 EDITION with your 3D printer. Click on the button and save the file on your computer to work, edit or customize your design. You can also find more 3D designs for printers on ULTIMATE PHONE BIKE HOLDER & CHARGER GBI-2018 EDITION.