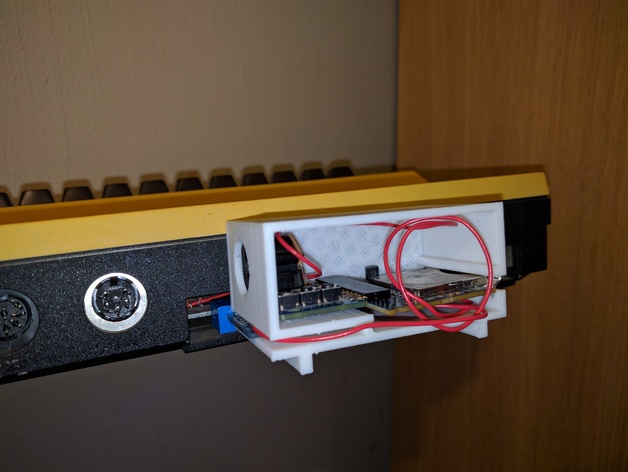
uIEC v3.2 case for C64
thingiverse
This is a simple case for the uIEC v3.2 device from Retro Innovations, for the C64. I'm fortunate to have a uniquely designed version that they no longer sell. For those with the same version as me, this case will fit perfectly. I wanted to attach it directly to the interface but due to the thick and close-by cable, it's best to leave the uIEC next to or on top of your C64. Feel free to snap on the left and right panels to close it up. You can glue these shut too if you like or perhaps drill and screw into it. I just glued the side closest to the C64 case and left the other side to snap into place. I'm new to this, so please forgive me if it's not great. Print Settings Printer: Wanhao Duplicator i3 Rafts: No Supports: No Resolution: 0.2mm Infill: 20% Notes: No rafts or supports needed, as long as you have a level base. Use anything that fits as buttons. Post-Printing Step 1: Plug the tape connector into the C64 first. Step 2: Glue side panel closest to C64 to the main body print. Step 3: Slide the tape connector in from the C64 side again and run the wire out the other side. Step 4: Slide the uIEC device into position. Step 5 (optional): Slide your printed buttons in from underneath and push up above the uIEC buttons and rest them on top. Step 6: Snap on/glue/screw in the side panel to main printed body. Step 7: Slide the uIEC box onto the tape connector, wedging it as seen in the photos, or leave it on the side/on top if your serial cable is too thick. How I Designed This Tinkercad You can modify these prints here: https://tinkercad.com/things/9L7hU5g5AtWhttps://tinkercad.com/things/8IZNGdPWvoxhttps://tinkercad.com/things/f9jbHRCbK94
With this file you will be able to print uIEC v3.2 case for C64 with your 3D printer. Click on the button and save the file on your computer to work, edit or customize your design. You can also find more 3D designs for printers on uIEC v3.2 case for C64.
