U30 Extruder
prusaprinters
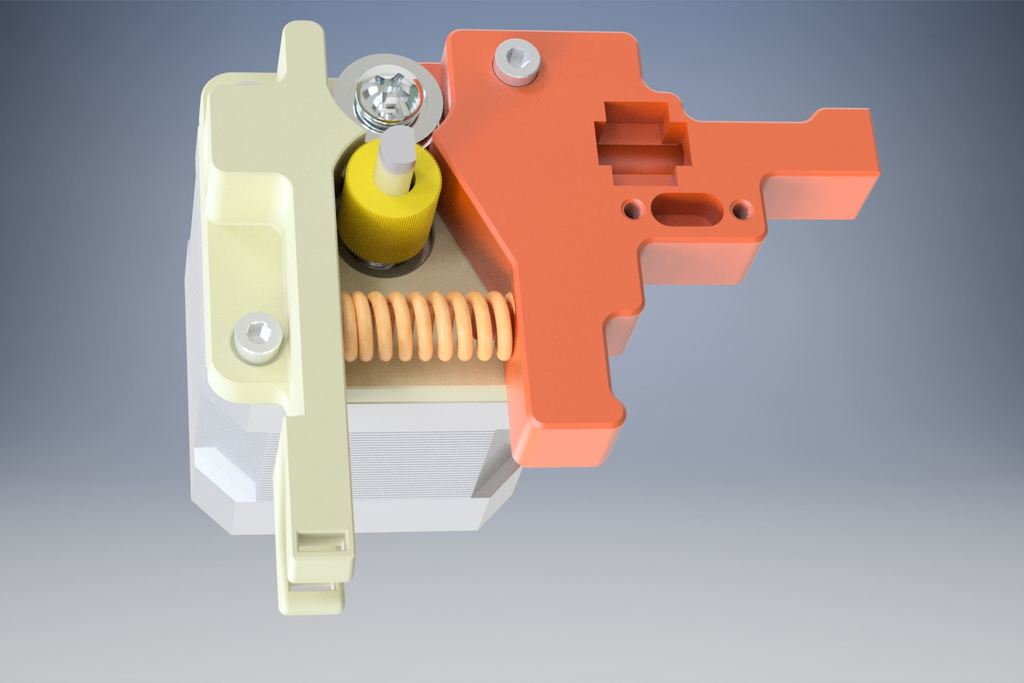
<p>This is a replacement for the original Extruder. You have to put PTFE tubes in the the Parts so that the Filament runs through them. I designed this because the original Extruder was squeaking sometimes due to the filament rubbing on it. Everything is a tight fit so depending on your printer calibration you need to do some finishing by hand.</p> <h3> Print Settings</h3> <p><strong>Printer:</strong></p> <p>Alfawise U30</p> <p><p class="detail-setting rafts"><strong>Rafts: </strong> <div><p>Doesn't Matter</p></div><strong>Supports:</strong></p> <p>Yes</p> <p><p class="detail-setting resolution"><strong>Resolution: </strong> <div><p>0.1</p></div><strong>Infill:</strong></p> <p>20%</p> <p><strong>Filament:</strong> Formfutura HDGlass see through black <br/> <p class="detail-setting notes"><strong>Notes: </strong> </p><div><p>Print in 0.1mm because of the threads.<br/> One Extruderfeed file is using a Hexnut (m4) as the thread for the guidewheel screw. The other uses just plastic threads.</p> <p>Use PC4-M6 fittings (<a href="https://www.captubes.com/fittings.html"></a><a href="https://www.captubes.com/fittings.html">https://www.captubes.com/fittings.html</a>).</p> <h3> Post-Printing</h3> <p><strong>Step 1</strong></p> <p><div><p>Screw all screws in the parts to test the fit and tap the holes if the threads did not came out perfect. The small holes for the filament sensor screws never came out good for me.<br/> If you printed the hexnut part then pull the hexnut in using a screw. It is a very tight fit. Maybe warm up the plastic a bit so it is more forgiving.</p> <p><strong>Step 2</strong></p> <p><div><p>Losen the pc4-m6 connector a bit and push the PTFE tube in from the opposing side of the pc4-m6 connector. You should use some pliers for that. When the tube is fully inserted you screw the pc4-m6 connector back is so it is flush with the tube. Now cut the end of the tube flush with the printed part.</p> The extruder feed part can be a bit hard. You can use a drill or a file to widen it a bit or push two tubes in from opposing sides until they have contact.</div></p> <p><strong>Step 3</strong></p> <p>Cut out the area for the filament sensor. The upper half of the tube should be removed in the hole cutout.</p> </div></p></div></p></p></p> Category: 3D Printer Extruders
With this file you will be able to print U30 Extruder with your 3D printer. Click on the button and save the file on your computer to work, edit or customize your design. You can also find more 3D designs for printers on U30 Extruder.