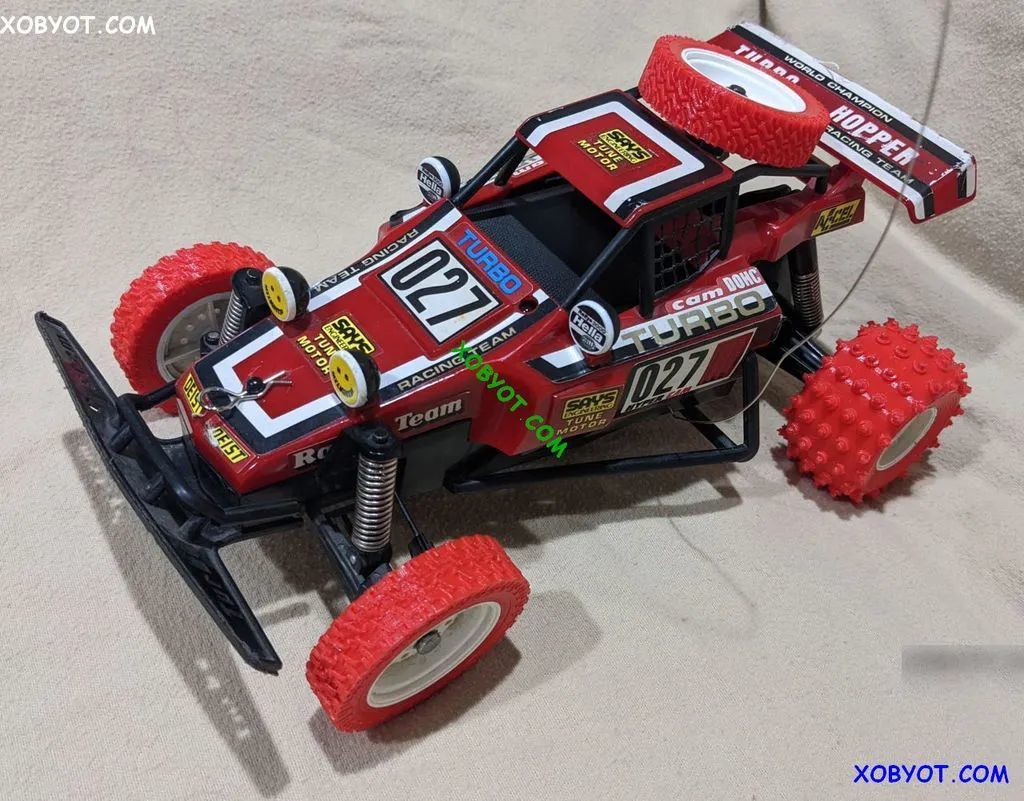
TYCO TURBO HOPPER TAIYO JET HOPPER TIRES
prusaprinters
<h3>Tyco Turbo Hopper / Taiyo Jet Hopper Tires!</h3> <p>I have now uploaded the original looking designs. I have printed and tested these and they are functional. There are a few different files with various thicknesses. You can load them in your slicer and experiment with different Layer Heights, Line Widths, and Number of Walls.</p> <ul> <li>Rear Tire Size: 66.00-28-33<em>(Fits original Turbo Hopper AAA Battery Version. Does Not fit 9.6V)</em></li> <li>Front Tire Size: 58.00-41-14<em>(Fits original MK2, MK3, and some 9.6V. Does not fit MK1 "Fat Tire")</em></li> </ul> <p>Note: The Z tire tread pattern is just for fun.</p> <p><strong>Want More Free Designs? Like and Comment! If you enjoy this design, please leave a like and/or a comment. It keeps me motivated to make more, when I know people are using my designs.</strong></p> <p><strong>Information about Tyco Turbo Hopper / Taiyo Jet Hoppers variations:</strong></p> <p>[<a href="https://rctoymemories.com/2012/05/06/tyco-taiyo-turbo-hopper-1986/">https://rctoymemories.com/2012/05/06/tyco-taiyo-turbo-hopper-1986/</a>]</p> <p>[<a href="https://rctoymemories.com/2014/06/08/taiyo-jet-hopper-1986/">https://rctoymemories.com/2014/06/08/taiyo-jet-hopper-1986/</a>]</p> <p><strong>I'm releasing these files under the Creative Commons Attribution-NonCommercial-NoDerivs (CC BY-NC-ND) License. This license is the most restrictive, only allowing you to download and share them with others as long as you credit me. You can not change them in any way, or use them commercially.</strong></p> <h3>Print Settings</h3> <p><strong>Printer:</strong></p> <p>Kingroon KP3S 3.0</p> <p class="detail-setting rafts"><strong>Rafts: </strong> <div><p>No</p></div> <p><strong>Supports:</strong></p> <p>Yes</p> <p class="detail-setting resolution"><strong>Resolution: </strong> <div><p>0.2</p></div> <p><strong>Infill:</strong></p> <p>15%</p> <p><strong>Filament:</strong></p> NinjaFlex TPU <p>Black</p> <p><br/> <p class="detail-setting notes"><strong>Notes: </strong></p> </p><div><p>Printing with TPU is tricky but I have have been able to make it work. The tires are very usable, once you get your setting right. </p></div> Post-Printing ============= <p><strong>Support Removal and Tire Installation</strong></p> <div><h3>Removing Supports</h3> ### Removing the supports from the inside of the rear tire can be a challenge because the support is bigger than the inner diameter. <ul> <li>Squeeze the tire in all directions to loosen up the interior supports.</li> <li>Use a screwdriver or similar and work it around the inner lip on top and bottom of the tire. Work it back and forth to break the supports loose from the top and bottom layers.</li> <li>Grab the supports with a needle nose plyers that have good teeth. Pull the supports loose little by little working around the tire.</li> <li>Once it feels like the supports are loose, grab it with a big pair that has large teeth.</li> <li>You should be able to pull the supports out of the tire in one piece.</li> <li>The rim of the tire will turn inside out when you do this. If your printer is working correctly this will not damage the tire. TPU is very strong. Just pop tire back into place.</li> </ul> <h3>Installing Tires</h3> <h3>Installing the tires is also a bit of a challenge. TPU is pretty flexible, but not as "stretchy".</h3> <h4>Rear</h4> <ul> <li>Put the tire at an angle to the hub.</li> <li>Grab the opposite wheel with one hand, and the new tire with the other</li> <li>You can kind of screw the tire onto the wheel this way.</li> <li>It takes a bit of strength, but you can muscle it on this way.</li> <li>If that is not working for you, then you can also small screwdriver like a tire spoon to work it onto the wheel. Similar to how you install a bicycle tire. If you have never installed a bicycle tire, then look it up. ;-)</li> </ul> <h4>Front</h4> <ul> <li>These vintage toy cars break easy. Be careful! Don't break and A-Arm or Hub. It's best not to force the front tires on. Use finesse.</li> <li>The front wheels have a small lip on the outside. It's very small, but does tend to catch on the tire.</li> <li>I recommend removing the front wheel. Much easier to install the tire into the rim by pushing the rim onto the tire from the inside.</li> <li>The front wheel is held on by a pin this is just pushed into the hub. You can grab it with a plyers and pull it out. Take your time and pull steadily while screwing it back and forth. Don't force it.</li> <li>If you don't want to remove the front wheels the then it's also possible to use a small screwdriver like a tire spoon as described above.</li> </ul> <p>Good luck!</p> </div></p></p> Category: R/C Vehicles
With this file you will be able to print TYCO TURBO HOPPER TAIYO JET HOPPER TIRES with your 3D printer. Click on the button and save the file on your computer to work, edit or customize your design. You can also find more 3D designs for printers on TYCO TURBO HOPPER TAIYO JET HOPPER TIRES.
