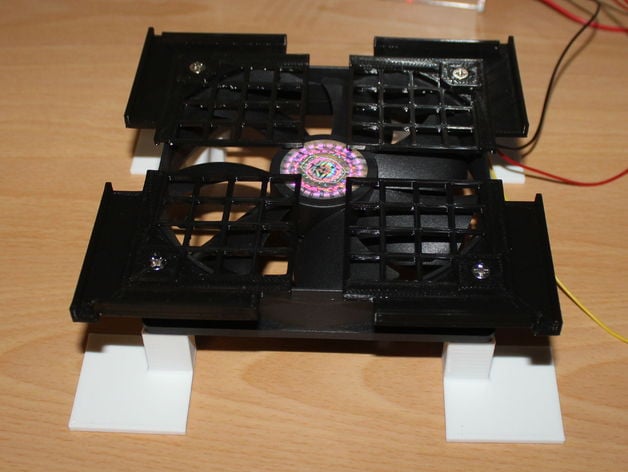
Turnigy Fabrikator Mini Cooling Fan stand
thingiverse
While the Turnigy Fabrikator Mini offers great value for money it suffers from a design flaw: servos quickly become excessively hot. After approximately forty minutes of each print the X-axis servo, which moves the platform, began squealing and radiating intense heat, prompting concern that it might fail at any moment. I initially attempted to rectify this issue by installing simple feet as suggested in online forums; however, the outcome was minimal. It became evident that active cooling was necessary to prevent servos from overheating rapidly. This led to the creation of a fan stand. For $5, I obtained a 120mm computer case fan and used some additional components, including feet to position it away from the table and an attachment to support the printer underneath. The results were exceptional – with no warmth emanating from the X-axis servo, while the Y-axis too showed noticeable improvements due to being in close proximity to the cooler air. The attached design represents a final product following a series of iterative optimizations aimed at optimizing functionality and airflow efficiency. It's my hope that this project contributes to enhancing your printers' longevity. As a beginner, please be aware that the Repetier printer software generates complaints about non-manifold models; but I've discovered that using Cura for slicing eliminates such concerns when executed with specific print settings (review print parameters). Please note: to create this fan stand successfully you need to only 3D print two instances of the top component, generate their mirror images and then proceed with the rest of your printing operation as instructed. Important Notes: * The entire fan holder can be made with an 80 mm deep design for printers. Print Settings: - Rafts: No - Supports: Yes - Resolution: 0.2mm Printing Considerations: Given that the components must sustain the entire weight and balance of your printer along with a spool holder, it is critical to print the parts using higher strength and resolution settings – preferably solid, and in some areas 3-layer-thick walls where applicable. Important note: to ensure balanced operation you should create two identical parts (see mirror image attachment). This would not work for an eight-sided or hexagon shape. You Need: * One computer fan. I chose a 120 mm Coolermaster SilentFan, which turned out to be more than sufficient to dissipate heat evenly. * Four small screws and six wire splices (3mm wide by about the length of an electrical cable – you'll use two for positive, and two for negative). A little electric switch connected at some point in line to the hot leads (preferably 2 x black/2 x red cables – the exact size should match whatever kind-of-hot-switch-contacts available locally) A standard switch box to place under each component part. Assemble then by carefully screwing all of four sides into their respective mounting spots on fan housing and make sure you do not obstruct airflow or anything like that - once everything feels steady tighten firmly before securing parts down with more screws. Discontinue electricity connection right now! Now locate wire splices inside outlet casing at one end (two green insulated pieces only needed since they are directly hooked onto main board components themselves ) connect both red/yellow/brown color-inside-cable pieces going straight up top fan inlet while being mindful to not jam air passages by excessive amounts plastic etc. After some testing found an interesting design tweak in order get most airflow with a balanced and smooth movement (no wobbling motion occurring during each turn-around). All assembly done – just insert your turnigy printer parts inside it now so as make sure all electrical connections properly hooked together (remember, fan runs at low volt which must match power input for optimal performance - consult printer specs). You should notice significant reductions heat generated while operating under usual usage conditions and still manage print with perfect results - good luck!
With this file you will be able to print Turnigy Fabrikator Mini Cooling Fan stand with your 3D printer. Click on the button and save the file on your computer to work, edit or customize your design. You can also find more 3D designs for printers on Turnigy Fabrikator Mini Cooling Fan stand.
