Turnigy 9X antenna mod
thingiverse
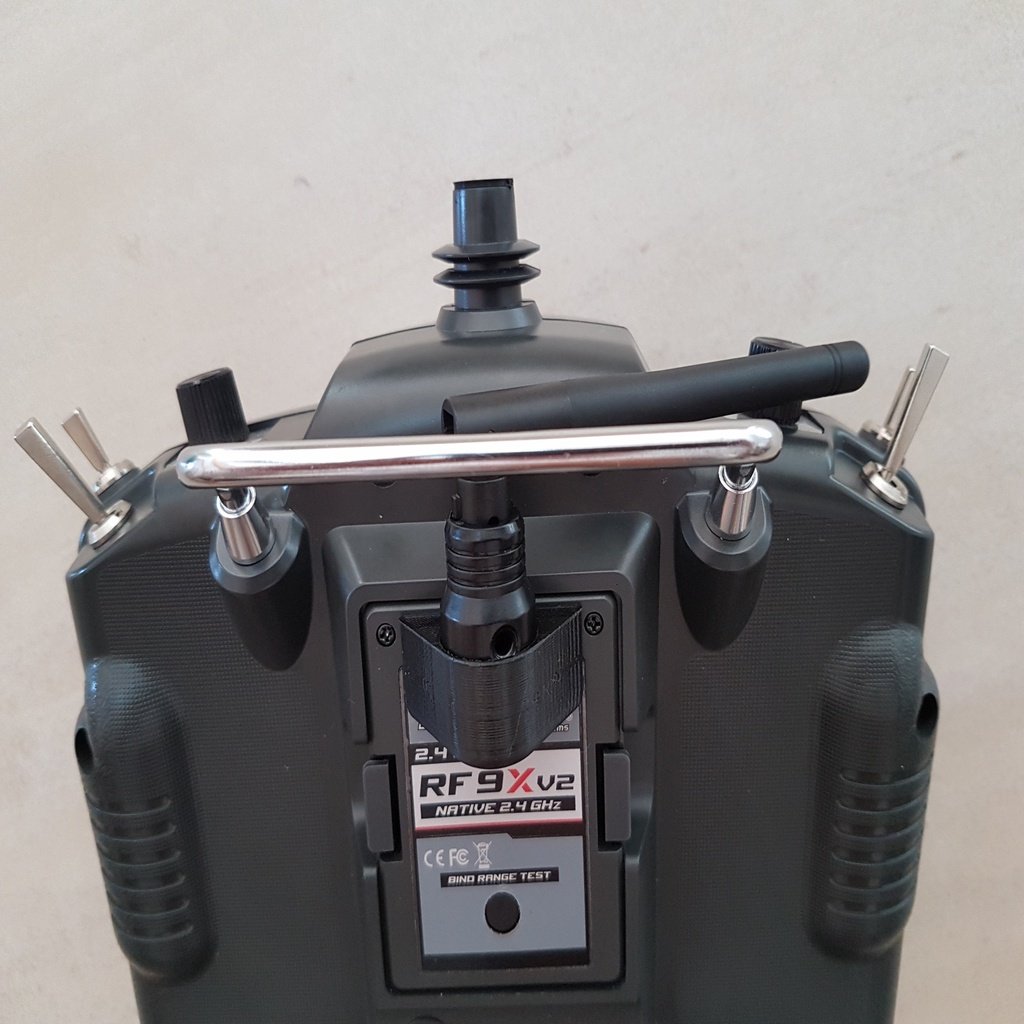
When you want to replace the Tx module in your Turginy 9X radio, you'll soon discover that the antenna is hardwired into the radio, making it impossible to remove the Tx without some creative problem-solving. Just open up the Tx module, unsolder the antenna wire (be sure to take a picture beforehand, as you'll need to resolder the wire later). Unscrew the antenna support and gently pull out the wire. Next, open up your radio and carefully unscrew the antenna axis. Once you've completed these steps, screw the radio back together. Print out two small pieces: one for the antenna support and another for a cap that will cover the original antenna hole. Use a drill to create a 3mm hole in the Tx cover and then saw through the front edge of the cover until you reach the hole (this will give you room to insert the wire). Now it's time to resolder the antenna back onto the PCB. Perform a radio test to ensure everything is working as expected. The support piece, which was printed with two holes for screws, ended up being glued into place using CA glue instead. The antenna support is then inserted into its designated hole. Fill in the original antenna hole with the small printed cap. As you can see, this modification offers several benefits: - The antenna is tucked safely under a metal support, leaving enough room to unplug the Tx module. - The antenna is well protected when it's parked close to the switches. - When laid flat, the radio remains on its feet, avoiding any contact with the Tx module. - The orientation of the antenna can still be adjusted from nearly vertical to full horizontal. And there you have it!
With this file you will be able to print Turnigy 9X antenna mod with your 3D printer. Click on the button and save the file on your computer to work, edit or customize your design. You can also find more 3D designs for printers on Turnigy 9X antenna mod.