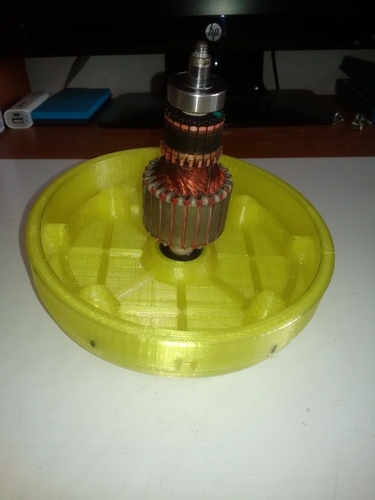
turbine and rotor support plate for Karcher WD3 vacuum cleaner
pinshape
WD3 is a fantastic vacuum cleaner, but it has one major weakness - the turbine bearing area. The thin bearing wall can't withstand intense use, leading to widening or even breaking. If your WD3 makes a loud noise while in use, this usually indicates that the bearing wall has widened, and a serious defect will soon follow. I recently tried replacing the plate with a new one, but only found the engine with the turbine as the spare part - it cost about 75% of the vacuum cleaner's value. I designed and built this board to save my WD3 from disaster. The new part features six holes for joining with the turbine housing (making it removable). To disassemble the original casing, simply heat the plate with a hot air gun and use a flat screwdriver to remove the turbine housing safely without damaging it. The six holes will accommodate screws measuring 4-5 mm in length, 2.5mm in inner diameter, and 3mm in outer diameter. If the holes are not well-shaped during printing, a drill can be used to clean them up. The turbine casing should be gently forced into the new part. On the turbine casing wall, six through holes measuring 3-3.5 mm should be drilled. The original screws will remain in all other holes. I used PETG as the material for my design because it withstands heat up to 80 degrees Celsius and retains its dimensions when cooling down. For faster printing, use a 0.6 - 0.8 nozzle, 0.45 - 0.6 layer height, medium speed (40-60mm/sec), and low outer/inner shell speed (20-30 mm/sec). Be cautious of under-extrusion and ooze on your printer. If necessary, sand the contour of the plate and bearing area carefully to prevent issues.
With this file you will be able to print turbine and rotor support plate for Karcher WD3 vacuum cleaner with your 3D printer. Click on the button and save the file on your computer to work, edit or customize your design. You can also find more 3D designs for printers on turbine and rotor support plate for Karcher WD3 vacuum cleaner.
