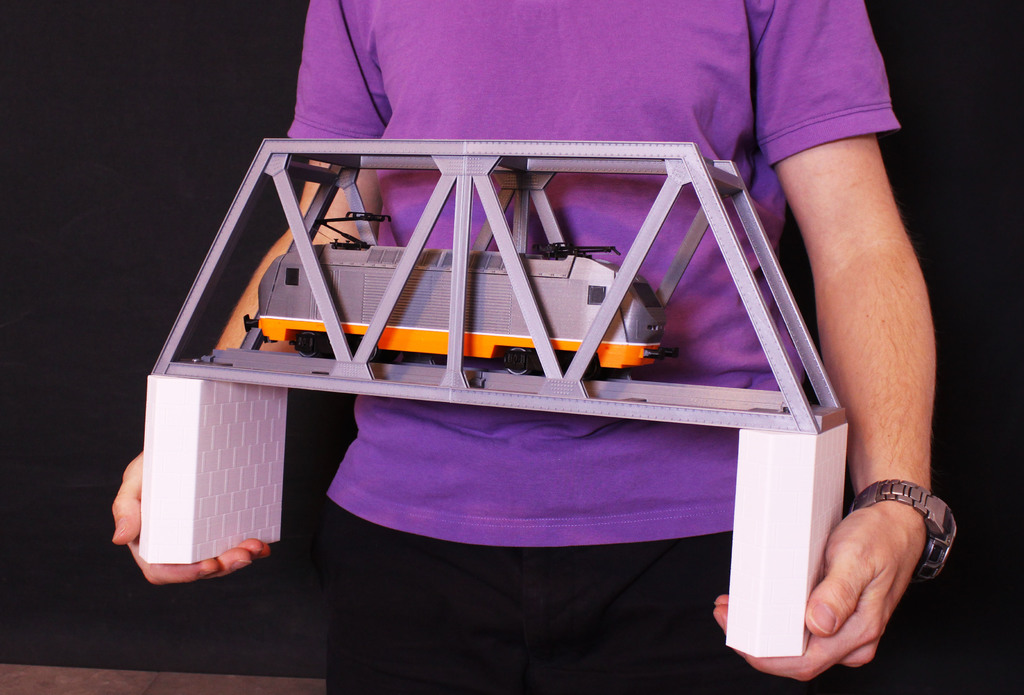
Truss bridge for OS-Railway - Fully 3D-printable railway system
thingiverse
Truss bridge for the OS-Railway system is being designed with precision. It's not modeled after a specific full-scale bridge, but rather a composition inspired by numerous pictures on Google. The OS-Railway system aims to create a fully 3D-printable and functional toy/model railway system in O-scale (1:45), which means a track width of 32mm. If you visit this page for the first time, be sure to check out other related designs here: https://www.thingiverse.com/Depronized/designs <b>Important!</b> You can utilize the slope found on the arc bridge page; these bridges share the same height: https://www.thingiverse.com/thing:2172709. Building is straightforward, despite being time-consuming due to its large size. Printing is pretty simple, but it requires a lot of time and patience. <b>Note!</b> All STLs starting with Buildplate are the ones you should use; the others are only included for printing spare parts. The prototype was 100% PLA. 1. Print the "Build plate accessories" first to start assembling when the sides are ready. This plate needs support, so be sure to orient it correctly for optimal layer strength. 2. Print <b>two pieces of each</b> STL called "Buildplate_Side_XXX". It's recommended to use a 0.2mm layer height for best results. 3. Print the STL called "Buildplate_track_2pcs", or the one simply called track if you need to arrange it differently; it's the same part printed twice and turned 180 degrees. The prototype was printed with the Prusa profile "FAST" at a 0.35mm layer height, but I recommend using 0.2mm for better quality. 4. Print the STL called "Buildplate_tower_2pcs". Note that the towers are hollow, so you can stop the print at any desired height if you want a shorter bridge. Standard height of the towers is 130mm (translates to 140mm to track base, same as my Arc Bridge). You can use 0.35mm layer height to speed up this process; it gives acceptable results on the Prusa i3 MK2. 5. Insert the "Connectors" into the outer sides and glue the inner sides in place. This will lock the connectors securely (CA, Superglue, or Cyanoacrylate work well). The connectors have been designed with a large play/tolerance to accommodate any printing imperfections and ensure smooth assembly. It's essential to check the bond in the middle section where the two mirrored parts meet, as this area is critical for supporting heavy trains on the bridge. Although there are screw holes for most parts, glueing is sufficient; you can use melt glue or epoxy if needed. There are two ways to mount the bridge to the towers: either use the two M3 screw holes in the middle and place it edge-to-edge, or put it halfway over the tower to build a two-section bridge using only three towers. A small connecting piece of track will be added later.
With this file you will be able to print Truss bridge for OS-Railway - Fully 3D-printable railway system with your 3D printer. Click on the button and save the file on your computer to work, edit or customize your design. You can also find more 3D designs for printers on Truss bridge for OS-Railway - Fully 3D-printable railway system.
