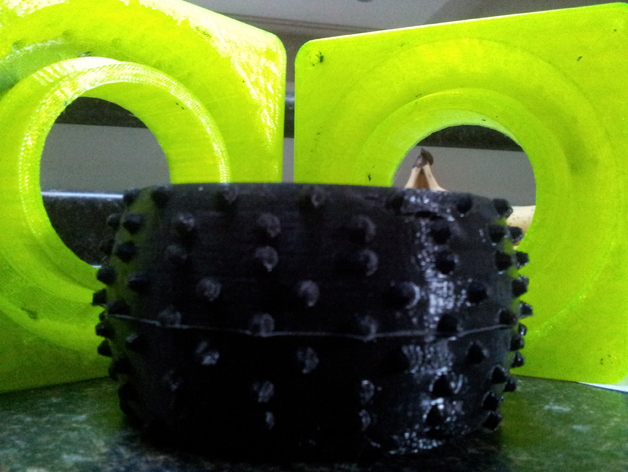
Truggy Tire Mold
thingiverse
I've created my own brand of ultra flexible filament that is budget-friendly and consistently delivers great results with any printer. After all, who wouldn't want high-quality tires and the freedom to produce them on demand? I'm thrilled to share my truggy tire mold design with you, a masterpiece crafted from scratch. My trusty recipe for Oogoo, a substitute for expensive commercial adhesives, can be found online here: http://www.instructables.com/id/How-To-Make-Your-Own-Sugru-Substitute/. Oogoo sets at an impressive rate, allowing me to quickly demold my creations in as little as half an hour. I mixed a substantial batch for my mold (a full tube of caulking is more than enough) and successfully produced multiple tires using just one print. The beauty of Oogoo lies in its adaptability; add some oil-based paint to give it any color you desire, and your creations will shine with vibrant hues. Important note: be cautious when mixing large quantities of Oogoo, as it may become stubborn and even break a Popsicle stick. Instead, opt for a sturdy metal stir stick, and work rapidly to avoid complications. I encourage beginners to experiment with my smaller molds before attempting this project, as experience has taught me that haste is crucial when working with Oogoo. Take heed: I made the rookie mistake of not mixing enough Oogoo initially, resulting in imperfect castings; a second attempt yielded far superior results as I refined my technique. To get started: First, print the mold according to your specifications. Next, prepare a generous amount of Oogoo by referring to this recipe http://www.instructables.com/id/How-To-Make-Your-Own-Sugru-Substitute/. Mix an abundance more than you think necessary for maximum effectiveness. Fill the mold with the Oogoo using a sturdy Popsicle stick or your chosen mixing tool. Don't hesitate to push excess Oogoo into both halves of the mold for seamless joining. Jam the mold pieces together firmly, taking care not to create air pockets as they unite. Oogoo will begin to squirt out the sides during this process – this is a good sign! Apply vice or clamps to hold the mold pieces firmly in place while the Oogoo hardens. After a minimum of 30 minutes have passed, work carefully to disassemble the mold by gently prying one side at a time. Avoid force, as this may result in damage or distortion. Finally, admire and cherish your newly crafted tires, proudly bearing your personalized touch.
With this file you will be able to print Truggy Tire Mold with your 3D printer. Click on the button and save the file on your computer to work, edit or customize your design. You can also find more 3D designs for printers on Truggy Tire Mold.
