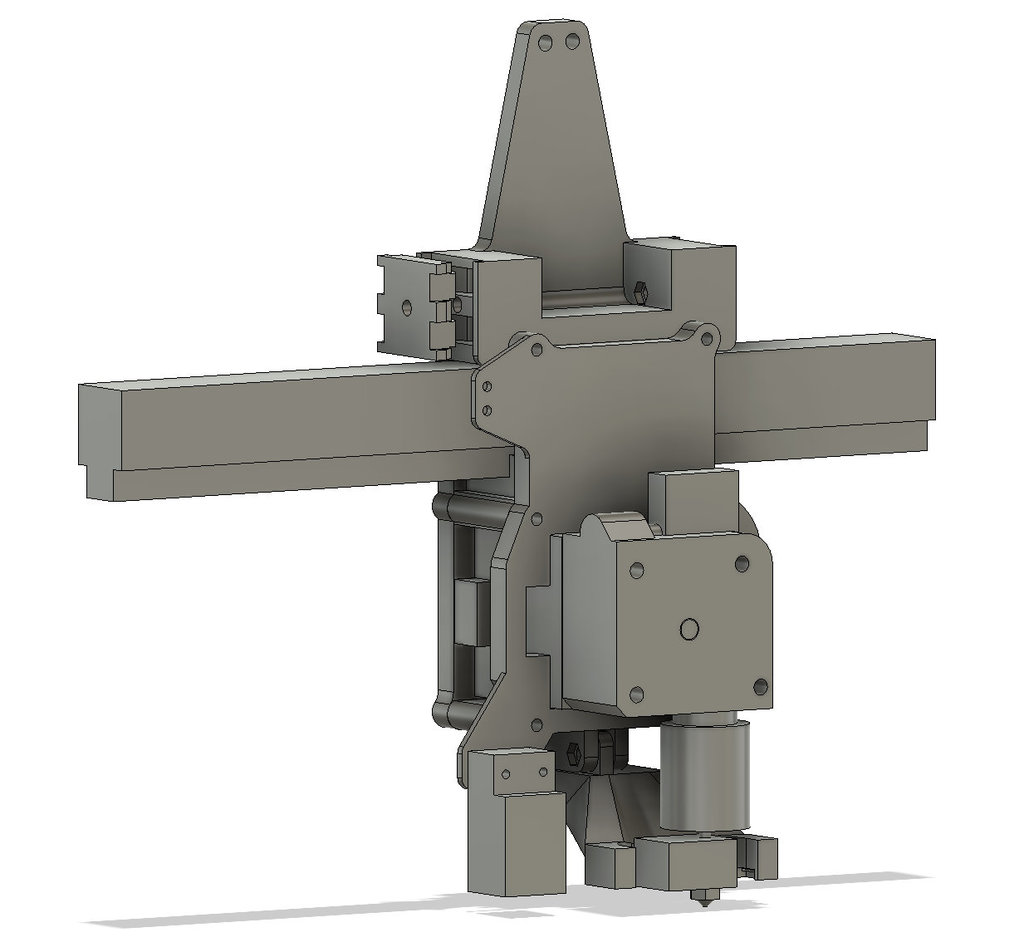
TronXY X5SA Direct Drive Linear Rail Under Carriage Gantry
prusaprinters
<p>This is my design for a direct drive extruder setup on a TronXY X5SA (400 in my case) utilizing a linear rail (MGN12H) mounted on the bottom side of the X-axis 2020 extrusion.</p> <p>This gantry can use the supplied stepper, extruder, X end-stop, and Z sensor. You should be able to use any standard V6 extruder (titan, BMG, etc) as well. I'm using my own stepper motor and an E3D Titan on mine. The supplied stepper cable will likely not be long enough - so keep that in mind before you convert.</p> <p>You will need a selection of m3 bolts and nuts. I'm using 6x 45mm to hold the front and back together but you'll need a handful of shorter ones to mount the motor, fan assemblies, cable clamps, etc.</p> <p>I'm not a<em>huge</em> fan of the under-side mount mainly because the GT2 drive cables are suspended above the railing. Holding the weight below and the drive above means there's probably a bit of torque and you might need to adjust speed/outer perimeter acceleration a bit to compensate. The whole reason I designed the under-mount was the 500mm linear rail was just a mm or two too long to fit between the Y-axis gantries - so be on the lookout for a redesign.</p> <p>Given the style of cable clamps I strongly suggest you also utilize my motor mounts which let you adjust tension at the motor and not just at the cables. Those are available here: <a href="https://www.thingiverse.com/thing:4798455">https://www.thingiverse.com/thing:4798455</a>.</p> <p>Video of it in action is available here: <a href="https://youtu.be/UfDU0BjnJ9I">https://youtu.be/UfDU0BjnJ9I</a></p> <p>Check out this and my other TronXY X5SA upgrades at: <a href="https://www.youtube.com/watch?v=B6CcgPO909s">https://www.youtube.com/watch?v=B6CcgPO909s</a></p> <p>The new 'above-rail' version is available here: <a href="https://www.thingiverse.com/thing:4852310">https://www.thingiverse.com/thing:4852310</a></p> <h3>Print Settings</h3> <p><strong>Printer:</strong></p> <p>TronXY X5SA-400</p> <p class="detail-setting rafts"><strong>Rafts: </strong> <div><p>No</p></div> <p><strong>Supports:</strong></p> <p>No</p> <p class="detail-setting resolution"><strong>Resolution: </strong> <div><p>200</p></div> <p><strong>Infill:</strong></p> <p>20</p> <p><strong>Filament:</strong></p> PolyMaker PLA <p><br/> <p class="detail-setting notes"><strong>Notes: </strong></p> </p><div><p>STL orientation should be correct and no supports should be required except for the blower channel. You may want to use Bed Only supports - I printed with no supports - however do not try to print with all supports as it may not be possible to remove some of the internal ones.</p></div> </p></p> Category: 3D Printing
With this file you will be able to print TronXY X5SA Direct Drive Linear Rail Under Carriage Gantry with your 3D printer. Click on the button and save the file on your computer to work, edit or customize your design. You can also find more 3D designs for printers on TronXY X5SA Direct Drive Linear Rail Under Carriage Gantry.
