Tronxy x5s Mosfet Mount
thingiverse
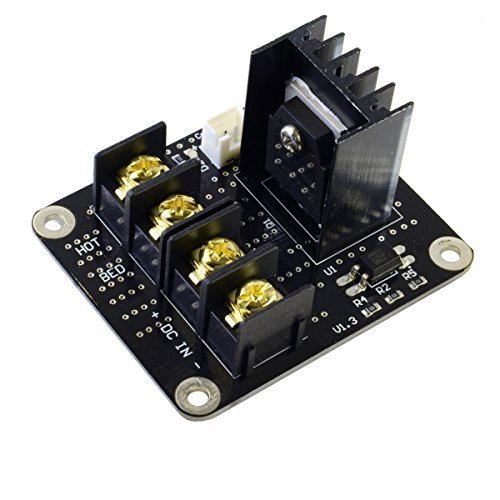
Mounting a MOSFET on your Tronxy X5S printer is a straightforward process that requires some basic electronics knowledge and tools. The MOSFET, or Metal Oxide Semiconductor Field-Effect Transistor, acts as an electronic switch to control the flow of power to the heating bed and hotend in 3D printing. To begin, you'll need to source a suitable MOSFET rated for high current applications. Some popular options include the IRF520 or IRF540. When selecting a MOSFET, ensure it can handle at least 30 amps of current, as the Tronxy X5S's heating bed and hotend require a significant amount of power. Next, gather your tools: wire strippers, pliers, a soldering iron, and some electrical tape. You'll also need a breadboard or perfboard to mount the MOSFET and connect the necessary wires. Begin by identifying the appropriate pins on your MOSFET. Typically, these are labeled as Drain (D), Gate (G), and Source (S). The Drain pin should be connected to the positive terminal of your power supply, while the Source pin connects to the negative terminal. Using your wire strippers, strip a small portion of insulation from each end of two pieces of copper wire. One piece will connect the Drain pin to the positive terminal, while the other connects the Source pin to the negative terminal. Twist these wires together and solder them in place. Now, attach the MOSFET to the breadboard or perfboard using your pliers and electrical tape. Be careful not to touch any of the components with your fingers, as static electricity can damage sensitive electronics. Finally, connect the gate pin to a suitable control signal from your printer's main board. This is usually a simple on/off switch but can also be a more complex circuit depending on the specific requirements of your project. With the MOSFET mounted and connected, test it by applying power to the heating bed or hotend and verifying that the MOSFET switches on and off correctly. In conclusion, mounting a MOSFET on your Tronxy X5S printer is a simple process that requires basic electronics knowledge and tools. By following these steps, you can create a reliable and efficient electronic switch for your 3D printing needs.
With this file you will be able to print Tronxy x5s Mosfet Mount with your 3D printer. Click on the button and save the file on your computer to work, edit or customize your design. You can also find more 3D designs for printers on Tronxy x5s Mosfet Mount.