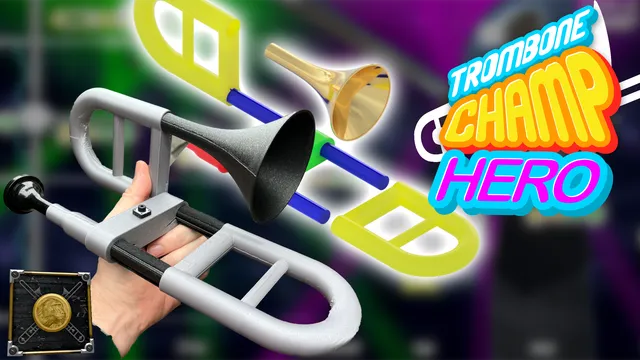
Trombone Champ Hero controller
prusaprinters
WARNING: there's bugs in this that can cause really annoying problems programming your Arduino! I have updated models and code coming in the next couple days. Sorry for the inconvenience. First time I laid eyes on Trombone Champ I knew a mouse was insufficient. This game deserved… nay… demanded a trombone controller!This is an Arduino 32u4 powered custom controller for the video game Trombone Champ! http://trombonechamp.comI had a few design goals with this:minimal unique partsno screws or fasteners - annoying to order specific sizestrombone vibesfeel solid as a real toy There's 5 unique 3d printed parts. The slide piece doubles as the back and holds the horn. The peg acts as a guide for the slide (and holds the potentiometer) on the front (x2), and provides a connection on the back (x1).So 5 unique models, 8 total printed. You can see the arrangement in the color-coded exploded view. Everything is designed to print vertically, with only the slide pieces needing supports (could be optional, but it'll look better).The compartment and lid (mouthpiece) snap together. Apply 1mm adhesive felt strips to the pegs so smooth and quiet the slide, and provide a pressure fit for the back piece.The one tricky and annoyingly-clever bit of construction is how the pins, potentiometer, and slide go together. The potentiometer slide in to the pin, then both slide in to the case at an angle. Then you turn the pin, and the potentiometer won't be able to slide back out (so solder the wires on first). The slide has the same type of fitting, with a hidden crevace that the potentiometer arm twists in to to lock the potentiometer in to the slide. When you figure that out and have the wiring all good, put a dab of hot glue in the case to hold the pin in there. (Don't use super glue or any other liquid glue… it may seep in to the potentiometer and lock it up. Happened to my first build. It sucked.) It's less complicated than it sounds. I tried to make a diagram… see pics.Non-3d-printed parts:Beetle - and small Arduino 32u4 will work. MUST BE 32u4!!!70mm slide potentiometersAudio SensorsTrombone Mouthpiece1mm thick adhesive felta button (really any button will work)some usb cable for whatever Arduino you use, you probably have an extra. Go look in that one drawer.Wiring is pretty simple, everything connects to the Arduino. Button - digital pin + groundAudio Sensor - analog pin + ground + powerPotentiometer - analog pin + ground + powerJust 6 wires. I suggest soft, flexible wires like these cute little silicon wire kits. There's a lousy pic of it you can check out. Sorry, didn't think For the button I just poked two little holes in the side of the case and glued it on the outside… forgot to design that in to the case model.You specifically need an Arduino 32u4 because it's automatically detected as a Human Interface Device, in this case a mouse. Makes the code a lot easier. Most custom controller projects rely on this chipset.CODING!The Arduino IDE called 32u4's “Arduino Leonard" so set that. And use the “Manage Libraries” option to include a library called AbsMouse (https://github.com/jonathanedgecombe/absmouse).The Arduino IDE .ino file with the code is attached. It's fairly simple. You should have to edit anything except to make sure the “// PINS” section matches the pins you soldered your button, potentiometer, and audio sensor to.If this part is daunting, hit up YouTube to see how to program an Arduino… but also, how'd you get this far without already knowing about this stuff? I'm impressed. You've got moxie. You'll do fine. This is a first draft of this info, casually written late on a Friday night. Please, hit me up and let me know what needs clarification.You can comment here or find me via my Twitter thread about this project: https://twitter.com/kevinmmangan/status/1573169853737111552Or on my barely-a-youtube-channel, where I will hopefully post a tutorial video soon: https://www.youtube.com/channel/UCDcX7EZRVdjptyaqf8GQQ9w
With this file you will be able to print Trombone Champ Hero controller with your 3D printer. Click on the button and save the file on your computer to work, edit or customize your design. You can also find more 3D designs for printers on Trombone Champ Hero controller.
