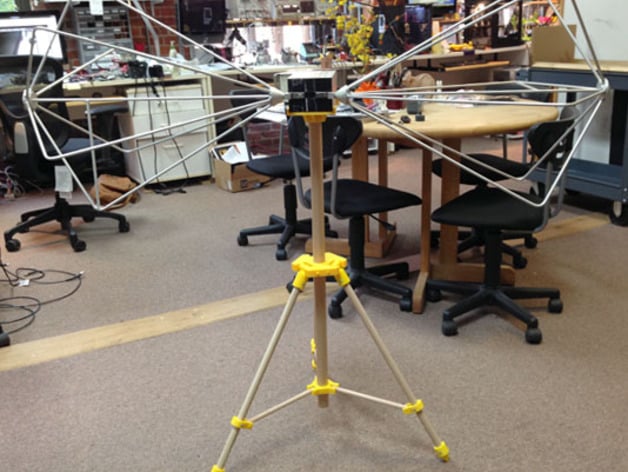
Tripod
thingiverse
I need a solid, non-metallic tripod for RF/EMC testing that's also easy on the wallet, and most commercial ones are out of my budget. I stumbled upon this affordable option and found it extremely stable despite its lower price tag. The device doesn't require any height or tilt adjustments but adding these features is certainly doable. With the dowel lengths specified in the instructions, the top post sits 36 inches above the floor.\nAll plastic components except the hub were printed using an Afinia printer, while the hub itself had to be printed on a Zortrax M200 due to its larger size; trimming it down to fit on the Afinia is possible if needed. To get access and edit the design source files visit https://tinkercad.com/things/dg7uzMdPeZh Instructions I use oak dowels for assembly because they work better than pine or fir, according to my experiments. The center post is 1-1/4" in diameter while the legs are 3/4" and the braces 1/2". The unique aspect of this tripod is its high level of customizability due to adjustable dowel lengths; applying the Pythagorean theorem can get you any desired setting quickly. My prototype features a center post of 33", 21-1/2" long legs, and 9-1/2" long braces.\nThe hub is secured to the post with 3 counter-bored #8 x 3/4" sheet metal pan-head screws located approximately 16" from the top. I used 5/8" #6 sheet metal pan-head screws for attaching the pivots, straps, and feet onto their respective legs. To ensure proper angle positioning, the strap's vertical alignment relative to the pivot is important. In terms of the joints you can choose either bolts or dowels but in my design I've used printed dowel pins, with an exceptionally tight fit which leaves no room for compromise. You'll notice I'm likely going to use a solvent to fix them into place when finished. To prepare the braces and drill their respective holes requires using a 4mm bit and employing either a drill press or vice to do this precisely due to potential issues of holes' angles causing complications; making parallel hole endings is absolutely vital. Since all parts are in ABS, it's key to remember you must place dowel pins facing horizontally with its longitudinal axis running the right way. When working on printing pivots I've set them vertical while positioning other objects 'on top'. You may consider incorporating a layer of cushion or rubberised bottoms onto pointy ends when dealing with very smooth surfaces in my space since all points down aren't exactly ideal there.
With this file you will be able to print Tripod with your 3D printer. Click on the button and save the file on your computer to work, edit or customize your design. You can also find more 3D designs for printers on Tripod.
