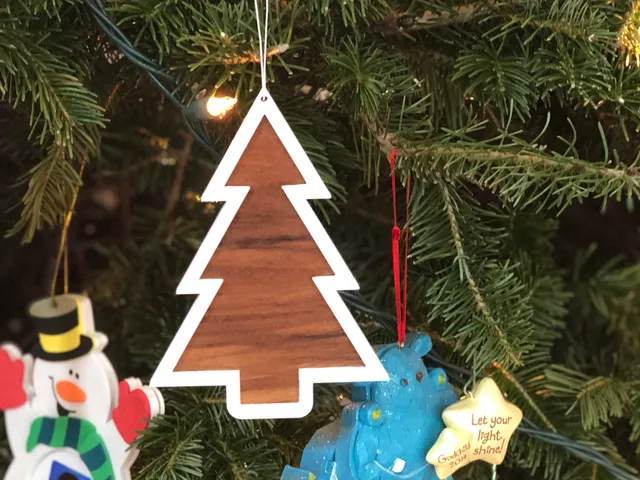
Tree Ornament w/ Embedded Wood (or Metal)
prusaprinters
I've seen people embedding things like magnets and nuts into prints. In fact, Prusa recently released a YouTube video on this. However, the embedded materials have usually been for practical and mechanical purposes.I have been thinking about adding other materials for purely aesthetic reasons because large, uninterupted plastic surfaces are not always the most visually appealling. After some experimentation, I've developed a couple of techniques for embedding sheet material (wood, stainless steel mesh, etc) into prints. [I suspect this has been done before but I figured it out on my own, which is at least half the fun. This “Print” consists of both a Template and an Ornament.Step 1. Print the Template. [Note: the template file is actually thicker than the version pictured below to reduce flex during marking.]Step 2. Prepare the embedded material.Use the inside of the template to mark the sheet material (wood veneer, stainless steel mesh, etc) to be embedded in the print. Cut on the line. Add a thin layer of glue (from a glue stick) around the outside edge of the material.Step 3. Slice the Ornament. The ornament should be sliced with a pause print (M601) inserted at the 4.6mm layer. [Go to 1:04 in the Prusa video linked above for details on scheduling a pause.]Step 4. Print the Ornament.While the print is paused, add the veneer to the recess to see how it sits on the print. Note any areas where the veneer may be sticking up. WIth this in mind, add a few drops of CA glue to the print to hold down the veneer during printing. Then insert the veneer into its recess. After the glue sets, restart the print using the control panel. If the first layer does not go down perfectly, let the printer lay down a few more layers. My first attempt didn't start great at first but looked really good by the end, requiring almost no clean-up.Step 5. Finish the Wood Veneer.Wipe away any visible glue with a wet cotton swap. Let dry and then apply preferred finish to the wood veneer. I used a Teak Oil applied with a cotton swab.Step 6. Hang using skirt.Use skirt material to create a loop through the hole at the top of the ornament. (I'm far too pleased with this little bit of upcycling than is reasonably warranted …) Hang from Christmas Tree or Festivus pole.Alternative Material: I also used a stainless steel mesh (pictured below left). It didn't turn out as well. A solid material would have been a better choice as some of the plastic melted into the mesh, creating areas of slight discoloration. I've had better luck embedding stainless steel mesh by inserting it into a vertical channel and then printing over the very thin opening (pictured below right), but that wasn't possible with this design.
With this file you will be able to print Tree Ornament w/ Embedded Wood (or Metal) with your 3D printer. Click on the button and save the file on your computer to work, edit or customize your design. You can also find more 3D designs for printers on Tree Ornament w/ Embedded Wood (or Metal).
