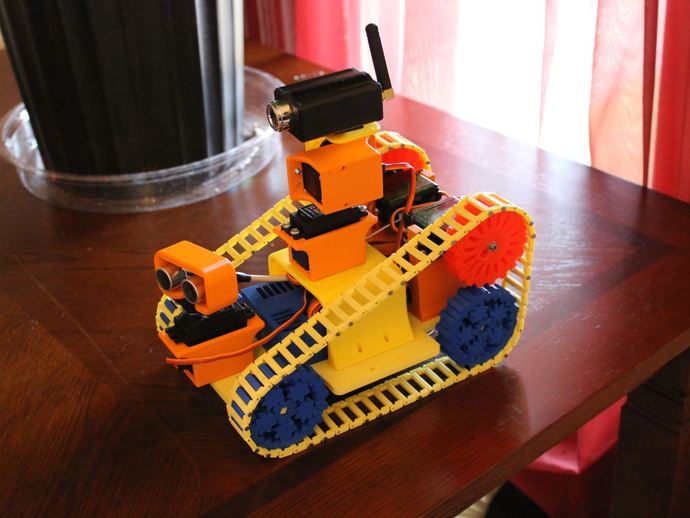
Traxbot - an EZ-robot build
thingiverse
I acquired the EZ robot kit since I wanted to create a 3D-printed robot and it seemed user-friendly without much of a learning curve. The setup has some great features and I am already playing around with the software. Although this project may never be complete, I decided to share my progress. I also plan on uploading a video soon. I would like to acknowledge Nevil_Clavin for his gear bearing derivative and Emmett for his original creation as they inspired my robot project. I have added Solidworks files that might help others make necessary changes. A recent update includes version 2 of the servo holder for drive servos, which brings the tracks closer to the base's posts and has thicker arms. It is taller, providing better adjustments for the tracks. I tested this version and it works perfectly. If you decide to build this with the EZ-robot kit, note that it comes with a bulky screw-on battery disconnect which will not fit in this orientation. I used an old battery charger and soldered it to an on/off switch mounted under the car. However, the kit also comes with a bulkier plug, so you may need to adjust the board's orientation accordingly. I started by purchasing the EZ-robot Kit from http://www.ez-robot.com/. It contains all the electronics required for this project. To assemble the robot, print off the necessary pieces including 106 tread pieces, 2 drive gears, 3 servo holders, and 4 of Nevil_Clavin's gear bearing derivative, along with one of everything else. The track is assembled by attaching 53 tread pieces using 17Ga wire nails. I used one-inch nails but had to alternate the starting side due to differences in nail lengths. The holes are tight to ensure that the smaller side holds the nail in place while the outer side pivots. Servo holders for drive servos can be adjusted by pushing them up to tighten the track, and this can be done with or without the drive gears installed. Servo-mounting pieces, such as camera, ultrasonic sensor, and drive gears, are designed to accommodate servo horns attached using screws. Some horns may need drilling to fit the screws properly. For the ultrasonic sensor, a 4-pin connector requires wiring with USB header cut from an old tower for easy connection to the EZ board. The kit includes a 6 AA battery pack that is mounted underneath the base, with pre-made holes for easy attachment. I will update more as time permits and answer any questions you may have.
With this file you will be able to print Traxbot - an EZ-robot build with your 3D printer. Click on the button and save the file on your computer to work, edit or customize your design. You can also find more 3D designs for printers on Traxbot - an EZ-robot build.
