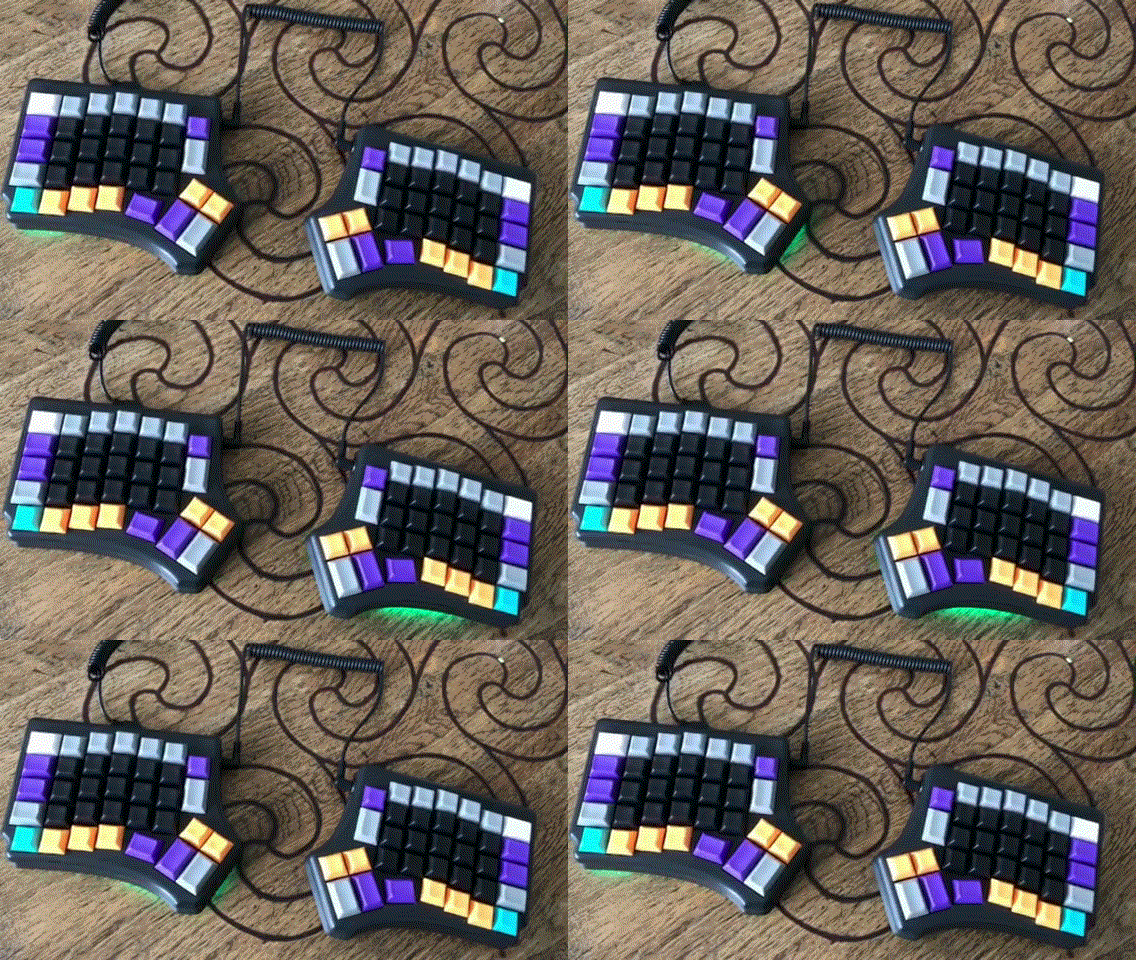
Travel-friendly Redox Keyboard
prusaprinters
<p>After 2 months of using it full time, I am really satisfied with my Redox Manuform keyboard (<a href="https://www.prusaprinters.org/prints/23522-redox-manuform">https://www.prusaprinters.org/prints/23522-redox-manuform</a>). It is very comfortable to type on.</p> <p>The only downside is that it is quite bulky when i need to go on business trips.</p> <p>This is why I decided to build a second keyboard which would be flatter for better portability.</p> <p>Instead of the handwired version, I started with the PCB (Rev1) version of the Redox keyboard with the following modifications:</p> <ul> <li>Case goes to the bottom of the key caps rather than stopping at the bottom of the switches (hopefully, this will protect the switches better when the keyboard is lugged around in a bag).</li> <li>The case screws from the bottom rather than from the top so the screw heads are not normally visible. This way, it is easy to print only the bottom with transparent filament.</li> <li>Used a TRRS socket that screws onto the case rather than solders onto the PCB (mostly because I had some leftover from my last keyboard build and because I find the new location for the socket more pleasing visually)</li> <li>Arduinos can be soldered on with a standard header.</li> <li><p>Case sides are curvy.<br/> Some of these modifications come at a price: more filament is used and some slight sanding is required on the top of the keyboard since you cannot benefit from the buildplate surface for getting a smooth top. The overall keyboard is also slightly thicker than the original design.</p> <p>In order to bend all the diodes I used a very simple bending jig: <a href="https://www.prusaprinters.org/prints/23523-1n4148-diodes-bending-jig">https://www.prusaprinters.org/prints/23523-1n4148-diodes-bending-jig</a></p> <p>On the left side, the arduino Pro Micro gets soldered upside down. I printed 2 spacers to add to the standard header to get the proper height.</p> <p>As the micro USB connectors on the Pro Micro are notoriously weak, I preemptively added a good dollop of epoxy on them to reinforce that location.</p> </li> </ul> <h3>Print instructions</h3><h3>Category: Computer Print Settings</h3> <p><strong>Printer Brand:</strong> Prusa</p> <p><strong>Printer:</strong> <a href="http://amzn.to/2DxjZlB">i3 MK2S</a></p> <p><strong>Rafts:</strong> No</p> <p><strong>Supports:</strong> Yes</p> <p><strong>Resolution:</strong> 150µm</p> <p><strong>Infill:</strong> 20%</p> <p><strong>Filament:</strong> No Name PLA Black for body, transparent for bottom<br/> <strong>Notes:</strong></p> <p>Slight sanding of the main body with wet sand paper up to 3000 grit.</p> <p>All parts should be rotated and printed in their final orientation (ie: same orientation as when the keyboard is in use)</p>
With this file you will be able to print Travel-friendly Redox Keyboard with your 3D printer. Click on the button and save the file on your computer to work, edit or customize your design. You can also find more 3D designs for printers on Travel-friendly Redox Keyboard.
