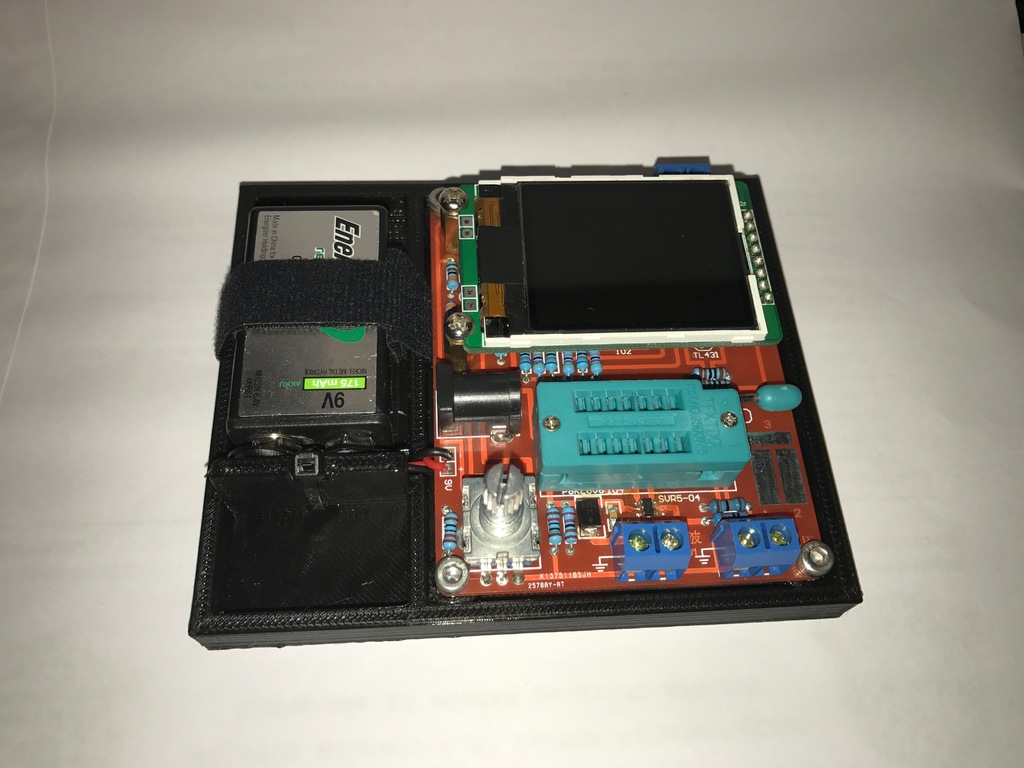
Transistor Tester Base - Hackerboxes #18
thingiverse
This isn't my first Transistor Tester, so I'm not starting from scratch with this case. When I got my hands on this kit from Hackerboxes #18 (http://www.instructables.com/id/HackerBoxes-0018-Circuit-Circus/), I was impressed by its compact design and variety of tools like frequency and voltage meters, etc. This time, I wanted to take a different approach from traditional bulky cases and create a light, minimalist base that could accommodate the pcb and the 9v battery while still allowing access to an external power adapter when needed (replacing the 9v battery). Here's how I achieved it using a Printrbot simple metal 3D printer with black PLA, but feel free to use different materials and colors to suit your taste. I'm not a fan of metal-plastic friction, so I used four M3 x 5mm x 5.3mm Brass Insert nuts (https://tinyurl.com/yavo62ou) along with four M3-0.5 Metric 6mm Length Screws (https://tinyurl.com/ya6s3gjd) for a perfect fit. Usually, the inserts fit tightly in the base without any glue, but you can use hot glue to ensure they don't slip out. I used a small velcro through the slots on the battery compartment sides to keep the battery securely attached to the base. I also fixed the battery connector to the base with a nylon zip tie. Check the pictures I've attached to see where and how all parts fit together. If you want to take a different approach on the inserts or anything, feel free to edit the project to your needs.
With this file you will be able to print Transistor Tester Base - Hackerboxes #18 with your 3D printer. Click on the button and save the file on your computer to work, edit or customize your design. You can also find more 3D designs for printers on Transistor Tester Base - Hackerboxes #18.
