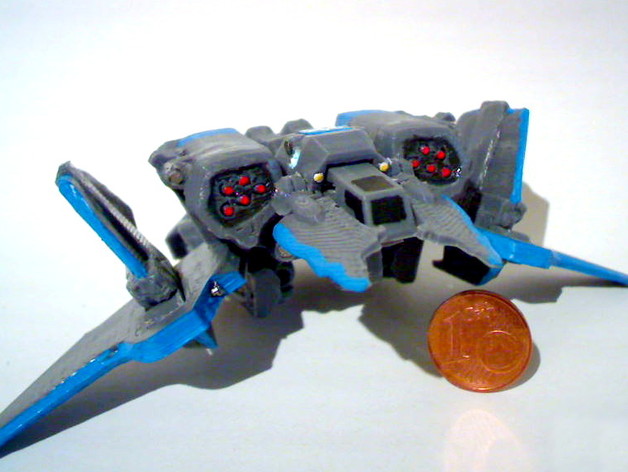
transforming Viking
thingiverse
Human: "transform and roll out!" This miniature model is inspired by the Viking out of Starcraft 2 and can change from a fighter mode to an assault/mech mode. It's somewhat poseable in mech-mode, as the legs are ball-jointed while the rest sits on 1-DOF joints/pins... so don't expect much posing from them :-P This miniature model is most likely not suitable for small children since it's somewhat fragile... I'm targeting more mature individuals who like to display toys on shelves. The transform sequence (fighter -> assault): Unfold the legs. Fold the fins on the wings. Sweep back the wings. Rotate and extend gattlings. In one motion, rotate rear (with the wings) and lower rocket-pods (with gattlings attached). Push-back cockpit and lower attached frontal fins. Enjoy :-D Instructions: Printing goes well: Use PLA material. Set a 0.4mm nozzle size. Choose a layer height of 0.1 or 0.2mm. Don't add (additional) support structures. The parts have built-in clearance, but depending on the tolerances your printer produces, you may need to sand the parts around the joints for an optimal fit. Recommended print settings: (RH = layer height, IYF = infill, SH = perimeter/shells): Rear: 0.1mm LH, 3 shells, no fill. Wing parts: 0.1mm LH, 8 shells. Other parts: You can set these to your preference :-). Print one of each part and a second mirrored copy for the wings, fins, legs, gattlings and rocked-pods as well as the backbone (for the stand print either stand_B_1 or stand_B_2). You will need the following things: ~1mm diameter wire for all the joints. I used small nails, sawn to length; paperclips also work. A short cylindrical piece with 3mm diameter for the joint connecting the pelivis pin to the backbond (white filament in the picture) - you can make this from a short piece of 3mm filament :-) Glue to combine parts and secure pins in place. For the stand: an 8mm diameter acrylic rod. Assembly steps: Attach the two-part fin_fold_AB together, back to back. Push gattling_D into gattling_B, then both in gattling_A. Assemble wings and fins with three wire-pins each (two for the fin and one to connect the wing to rear). Put both backbone and body_mount parts into the base. The cockpit_fins part is attached to body_mount with a single long pin. Mount the (pelvis-)pin to the backbone using a 3mm rod, making sure it's level with the backbone sides. Attach the gattling to the rocket-pod assembly to the base with wire-pins. Pop ball-joints of the legs together onto the pelvis and connect them to the rest. Paint
With this file you will be able to print transforming Viking with your 3D printer. Click on the button and save the file on your computer to work, edit or customize your design. You can also find more 3D designs for printers on transforming Viking.
