TP-Link Tapo C100 mount
prusaprinters
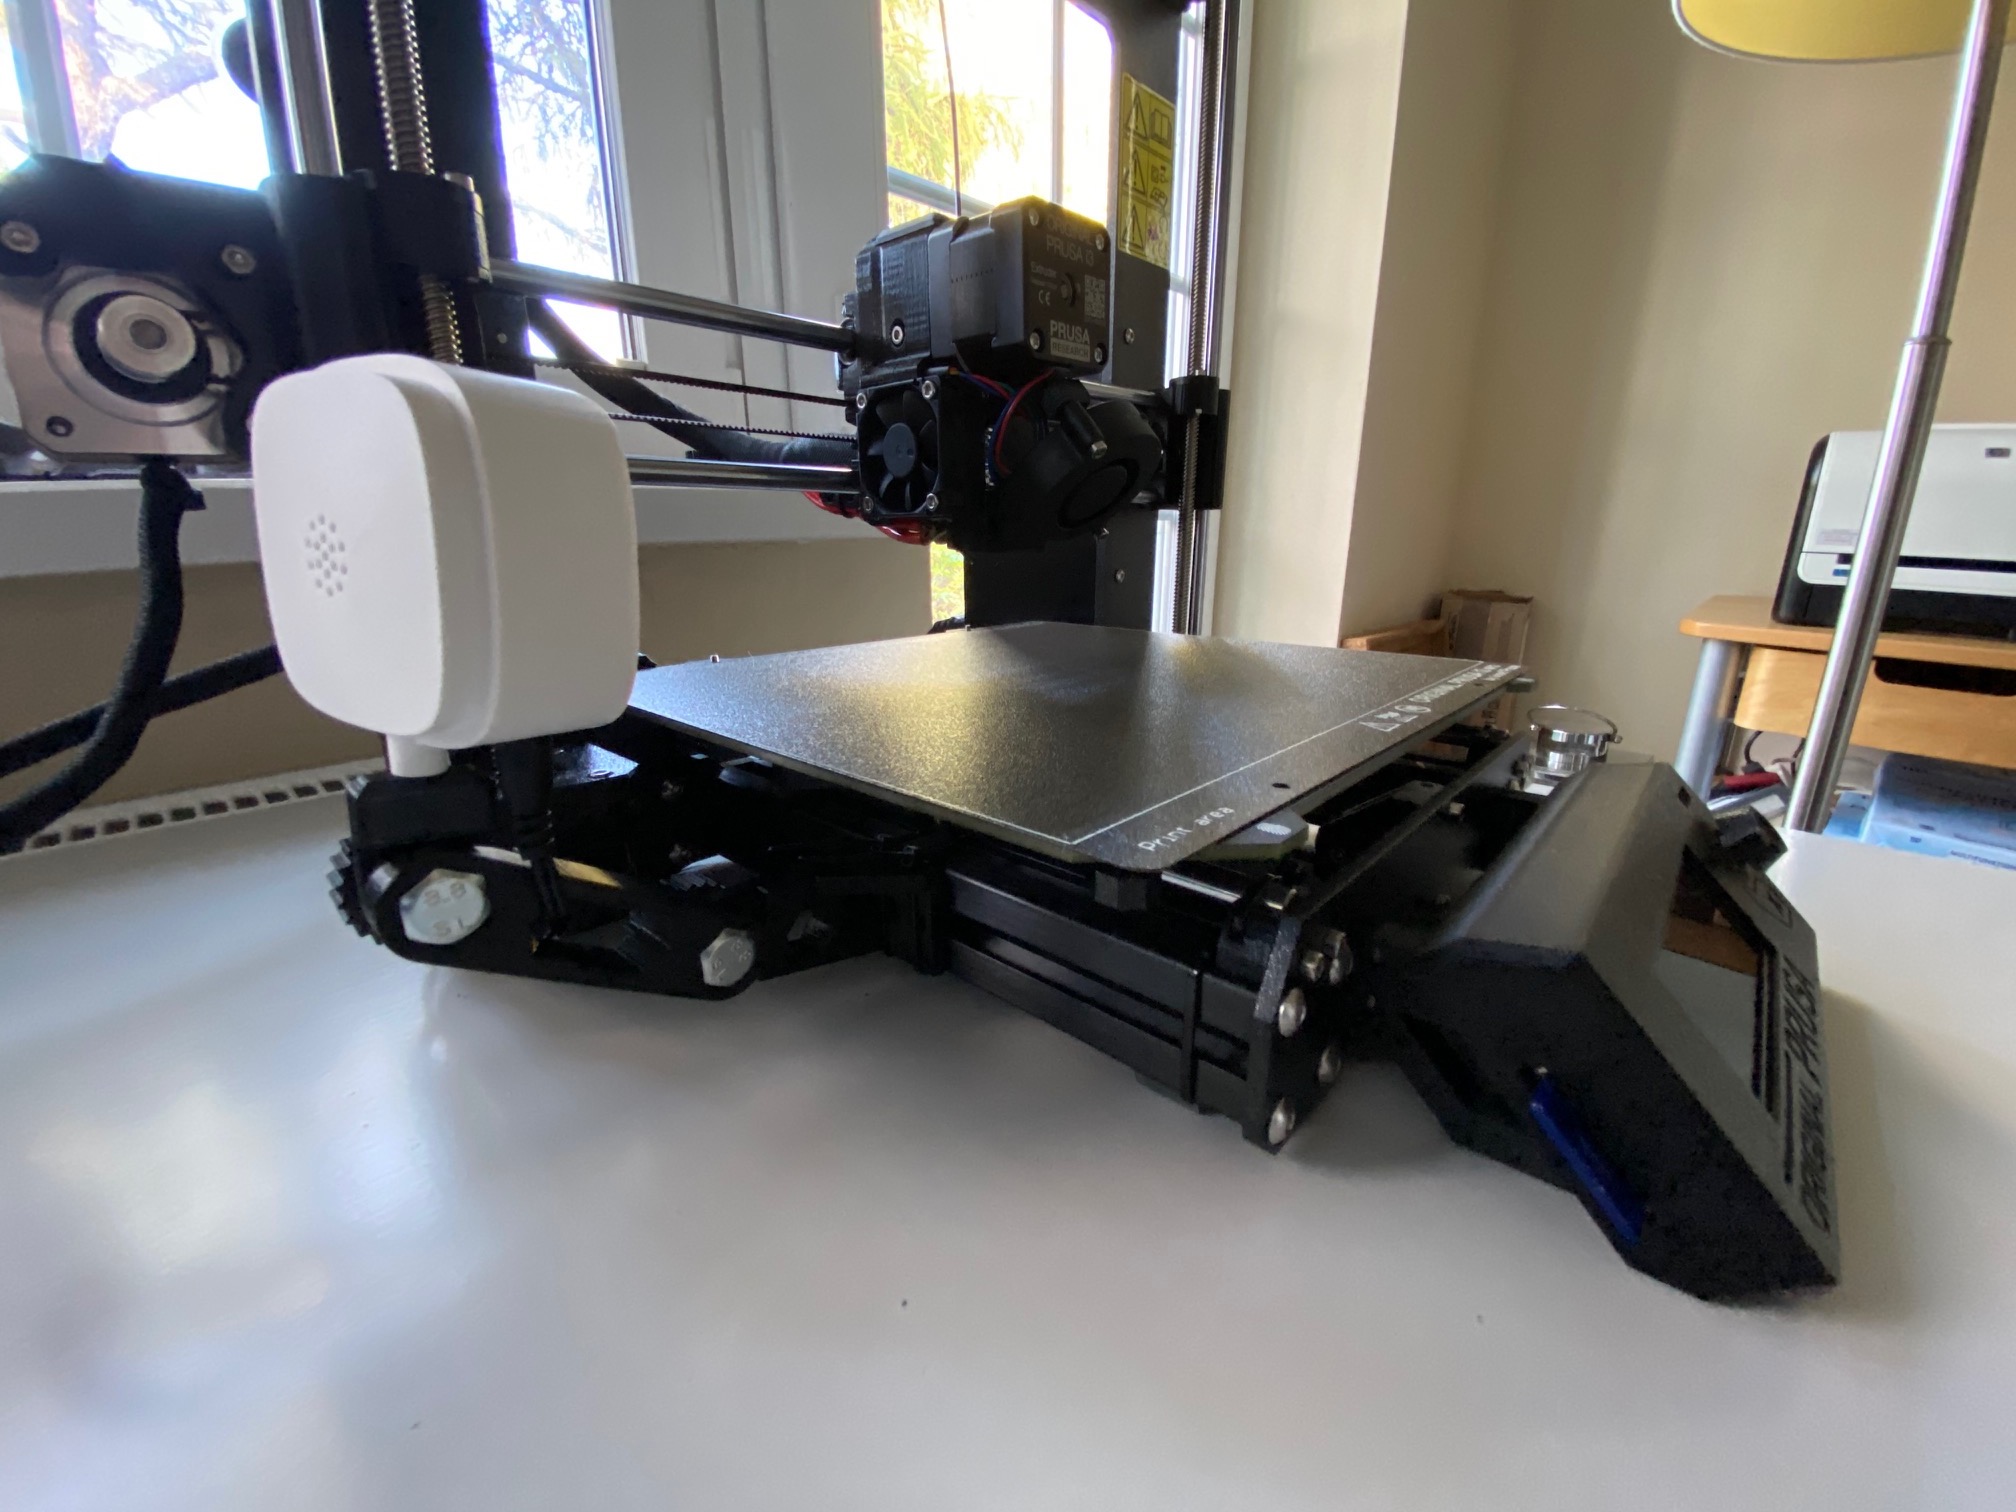
<p>This is a mount for TP-Link's Tapo C100 cam and a i3MK3.</p> <p>I have chosen the small C100 over an Octoprint controlled Raspberry cam for several reasons:</p> <ul> <li>it is quite inexpensive (27 EUR/US$) and delivers superior video quality</li> <li>it doesn't add additional load to the Raspberry Zero I have installed for Octoprint</li> <li>cabling is super easy (just a power supply)</li> <li>as a standalone IP cam, it can be operated independent from the printer</li> </ul><h3>Print instructions</h3><p>Filament and settings I have used: PETG, 0.4mm nozzle, layer height 0.2mm</p> <p>Things to print depends on whether you want to use metal bolts or print them:</p> <p>Build variant #1: mount with metal bolts</p> <ul> <li>2 x Nut.stl</li> <li>1 x Arm.stl</li> <li>1 x Basis.stl</li> <li>1 x Mount.stl</li> <li>2 x M8 metal bolts with a thread length of 20mm</li> <li>1 x BasisAdder.stl (optional)</li> </ul><p>Build variant #2: mount with printed bolts</p> <ul> <li>2 x Nut.stl</li> <li>1 x ArmWithBolts.stl</li> <li>1 x Basis.stl</li> <li>1 x Mount.stl</li> <li>1 x BasisAdder.stl (optional)</li> </ul><p>Variant #1 is recommended because it is quite easy to break the printed bolts when nuts are tightened too strong. So when print ArmWithBolts.stl, please at least increase values for vertical shell perimeters or even infill it with 100%.</p> <p>When printing Arm.stl, please enable automatic support.</p> <p><h3>Attaching the mount to the printer</h3><br/> The basis is designed to be attached to the front left YZ frame extrusion. There are three options prepared to fix it.</p> <ol> <li>In case you have two PSU holder M3nE (see step 6 in 2. Y-axis assembly of the kit) available, put them into the extrusion and use the two vertical holes in the basis to put screws in. This will require you to disassemble the YZ frame temporary. </li> <li>Use two zip ties and horizontal holes to mount the basis to the extrusion. Much easier but you need extremely thin ties to not get in conflict with the Y-moving bed.</li> <li>The best solution for most will be to print the additional BasisAdder.stl This thing clips into the aluminium extrusion nicely. The adder is attached to the basis using two screws / nuts you find in your spare parts set included in MK3 kits.</li> </ol><p><h3>Preparing the Tapo</h3><br/> The Tapo is coming with its own "foot-type" mount. To use it with this printed mount, the foot needs to be removed.</p> <ol> <li>Bend the leg so the ball snapped into the foot is going out if the housing.</li> <li>Pull the small rubber thing from the bottom of the ball.</li> <li>Find the small screw in the ball / leg and unscrew it.</li> <li>Plug the remaining "short leg" into the printed mount.</li> <li>Add the screw you removed in step #3 to fix the short leg in the printed mount.</li> </ol>
With this file you will be able to print TP-Link Tapo C100 mount with your 3D printer. Click on the button and save the file on your computer to work, edit or customize your design. You can also find more 3D designs for printers on TP-Link Tapo C100 mount.