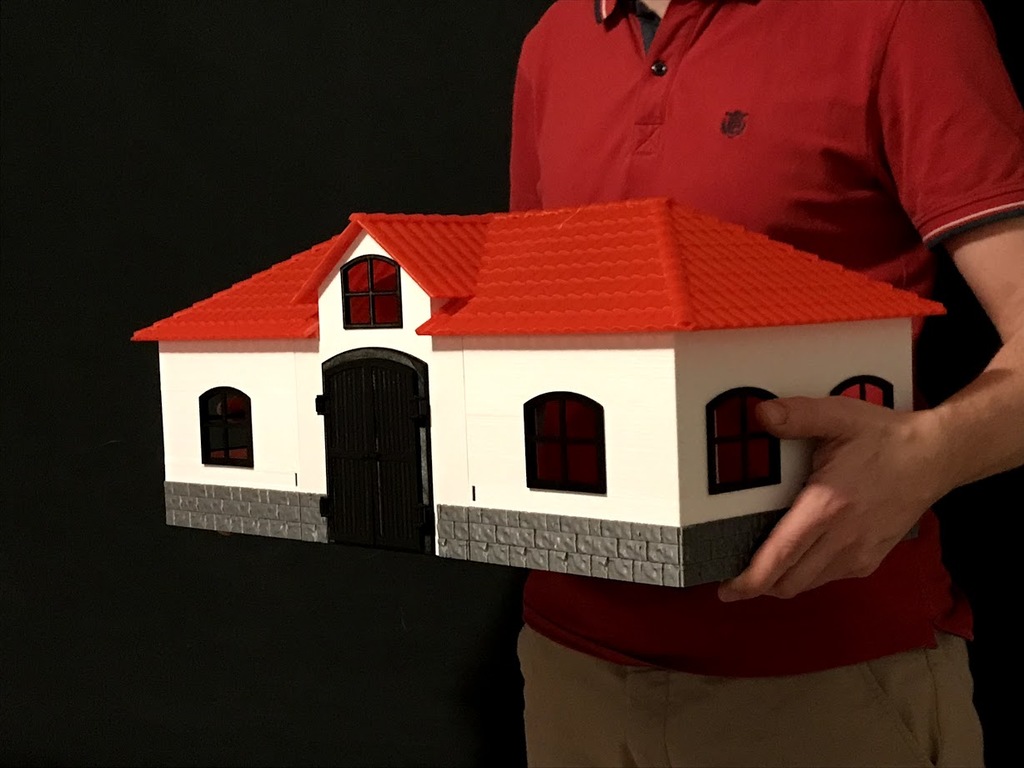
Toy Horse Stable in scale 1:24
thingiverse
UPDATE! Center floor piece was missing, I added it now "Base Plate Center.stl". Also, the center sections stone walls were missing in the zip-file, those have been added now. Sorry for that! This is a horse stable in scale 1:24 designed as a Christmas gift for my daughter for her 1:24 Schleich toy horses. It's not a perfect scale of any real horse stable, just a mix of inspiration I got from various pictures. I haven't yet printed all the parts so but I hope they fit! All big parts except the center roof (which is in the printer at time of writing) have been printed and fit. What I haven't printed yet is the interior walls, so if you want you can wait with those and start with the big parts until I've verified everything. <b>IMPORTANT!</b> Don't waste time on fine layer heights; it's not needed for this print. Actually, the walls look more realistic if there are layer imperfections in them! I used the FAST profile in Slic3r with 0.35mm layer height for everything except really small parts. Please note that the STLs are for center and right side of the structure, the left side is just a mirror of the right side so take the STLs and mirror in your slicer! <b>If your build plate is too small, check the zip-file with split parts!</b> Printing Instructions: <b>Base plates:</b> Print these with fastest profile (largest layer height) you have in your slicer of choice (FAST, 0.35mm in Slic3r). Use low infill, I used 10% and two perimeters. <b>Upper walls</b> Print these as shown in the picture, upside down and vertically. You can use 4 perimeters and no infill which makes straight lines (at least in Slic3r). But I found that an infill structure actually creates good-looking marks on the walls! The reason for printing them upside down is that bridges need to be horizontal. You cannot have an arc as a bridge. With this orientation, choose support on build plate only so you get support for the part where the wall lock clip goes. Use 4-5mm brim! <b>Roof parts</b> The end roof part was printed using FAST (0.35mm layer height) with 0% infill! This cut a LOT of time from the print and because of the tile structure, the part gets solid enough even with 0% infill because there are multiple points joining the underside and the top side. But I would not recommend reducing perimeters to one, that would make the surface too ugly probably, so use 2 perimeters. The center roof section needs a little bit more attention. I have split it in the middle so that it can be printed with the support in the right place, but you need to play with the Z-rotation in order to fit it to your build plate. In case it's too big, you have 4-part split in the zip-file "Split Parts.zip". <b>Note! use 4-5mm brim on both the walls and the roof parts. A big part with thin build plate exposure easily comes off in the edges and warps!</b> <b>Interior Parts</b> The interior parts are split so that you can print those that are supposed to look like wood in another filament or color. A tip is to print in white PLA and paint. Glue them in using CA-glue. You might need to sand a bit. All the interior walls are held together using the same principle as the main entrance door hinges, although the interior ones are called "Inner Wall Clamp" because it's slightly different in size than the main entrance door hinge. The columns are held in place using M3 screws through the bottom plate. You can choose if you want to keep it possible to disassemble and just press in the locking pieces that hold the floor plates and walls together, or you can glue with CA (if using PLA). I think that's about it, let me know if you have any questions!
With this file you will be able to print Toy Horse Stable in scale 1:24 with your 3D printer. Click on the button and save the file on your computer to work, edit or customize your design. You can also find more 3D designs for printers on Toy Horse Stable in scale 1:24.
