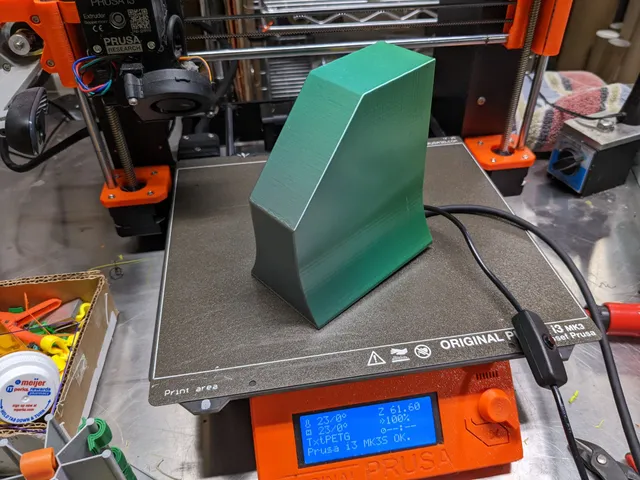
Tower Case for Raspberry Pi Model 4B
prusaprinters
This print was used for a Raspberry Pi 4B based streaming server. For this purpose, I wanted an enclosure that was a bit more decorative than the usual more practical enclosures. For this purpose, I designed this “tower” enclosure.The enclosure is designed to accept a cooling fan. This may or may not be necessary depending upon your application. Initially, I designed the enclosure without using a printed flex fan holder; however, I found that the enclosure amplified fan vibrations and made an otherwise quiet fan fairly noisy. Not surprisingly, I also found that a cheap fan made significantly more noise than a better quality fan.Update Aug. 21, 2022 : Although I was able to source a fairly quiet fan, it was still making more noise than I liked. So I simply removed the fan and let convective cooling do the job. So far, this has worked well even though the Raspberry Pi does not have a heat sink. I believe the vertical orientation of the Raspberry Pi makes it easier for air to circulate over the CPU.This print is comprised of these parts :Enclosure - the main piece (this includes an invisible “window” in front to show LED activity; the LEDS may or may not be visible depending on the translucency of the filament used). See the photos for the red oval “window.”Carrier - this holds the RasPi inside the caseFanHolder - printed in Flex to dampen fan vibrationsCover - encloses the back of the caseAdditional parts required30x30x7 cooling fan ( a fan up to 10.5mm thick will fit)M2x6 self tapping flat head screws (qty 10)And of course you will need a Raspberry PI 4B and associated accessories.LimitationsBecause of the way the RasPi is fit into the enclosure, not all of the ports on the board are usable. In particular, the USB2 ports are blocked by the fan. The Ethernet port will be blocked if you use a standard Ethernet connector, but I was able to fit a compact connector. All of the other ports should be accessible, depending upon the size of your connectors.If you look at the photos, you will see that one of the cut-away drawings shows some mock connectors (Ethernet, keyboard receiver, and USB-C power) in purple. Note that the standard Ethernet connector does not fit in the enclosure.AssemblyFirst, the RasPi is fastened to the Carrier with four M2x6 self-tapping screws. Be sure to use all four screws, as the RasPi adds stiffness to the Carrier.Attach the USB-C power cable, HDMI cable, and (for example) a USB wireless keyboard receiver. Next attach the cooling fan "extension" (a simple 2-wire extension to allow the cooling fan to extend to the back of the Enclosure), and attach the cooling fan to the extension.Next, attach the cooling fan FanHolder; note that the internal “tabs” will be inserted in the enclosure toward the inside of the Enclosure. Also, make sure the fan wires come out of the holder toward the inside of the Enclosure.Carefully slide the Carrier into the Enclosure so that it goes into the two internal slots on the top and bottom inside of the Enclosure. The RasPi should be on your left as you face the back of the Enclosure. Push the Carrier into the Enclosure as far as it will go.Insert the FanHolder and fan into the recess in the top of the Enclosure. Before putting the Cover on the back of the Enclosure, I recommend you power up the RasPi to make sure everything is working properly.Finally, insert the Cover into the back of the Enclosure, routing any cables through the cut-out at the bottom of the Cover. Fasten down the Cover with six M2x6 self-tapping screws.Print InstructionsPrint in PLA (except for the FanHolder) using the 3mf or gcode files provided; in general :4 perimeters0% infillOrient the Enclosure with the front end down for printing. I used a rainbow filament for the enclosure. I recommend using a somewhat translucent filament so that the Raspberry Pi LED will show.Print the FanEnclosure in Flex filament (I used Ninjaflex TPU) using the 3mf or gcode files provided.CADThe OnShape 3D CAD files for this are here :https://cad.onshape.com/documents/6fdb8d9714ccd3ffb0ead602/w/2e26b5680e2781a96ddc3493/e/68f451f3ae6997dcf0c44f48
With this file you will be able to print Tower Case for Raspberry Pi Model 4B with your 3D printer. Click on the button and save the file on your computer to work, edit or customize your design. You can also find more 3D designs for printers on Tower Case for Raspberry Pi Model 4B.
