Top monitor basket
prusaprinters
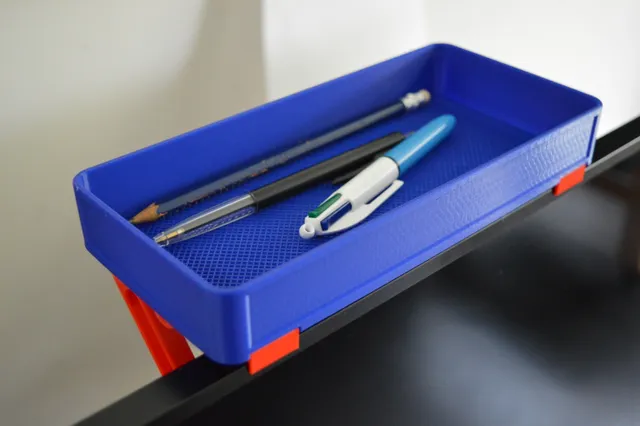
There are some really good monitor shelves on Printables. But I wanted a basket, to put things IN, without risking things falling behind the monitor.I could not really find a top monitor basket design. Instead of just adding a basket to an existing mounting design, I went all the way and completely (over?) designed something new. Obviously, I found some inspiration with the existing monitor shelves. The top display mounting design has an adjustable leg (leg.stl). To keep the mount from moving on top of the display, it has an sliding mechanism (slider.stl) that locks in place with an eccentric lever (lock.stl). The slider is adjustable 8 - 42mm, so you should be able to adjust it to most display bezels (although rounded bezels will not work well).To attach the locking lever to the mount, you have two options:Snap fit: This requires a good plastic bond. (mount_snap.stl)OrBolt (M5x15) and nut. (mount_bolt.stl)You could probably use the mount without the sliding mechanism, that’s up to you. The basket is snap fit firmly to the mounts. You need two mounts per basket.Bonus tip: You can have symmetric mounts if you mirror one set (mount, slider and lock). The basket is 210 x 100 x 30 mm. I may add other lengths and hole patterns.Pro tip: For the bottom, be creative with infill modifiers. You can see in one of the images: fit a modifier box that almost fills the basket. No top and bottom layers, only a dense infill. I used a grid pattern with 50% infill and 0.6mm line width. Warning: The design has some very tight tolerances. Make sure your printer is well calibrated. Print settings(for 0.4 mm nozzle and 0.2 mm layer height):Mount, leg, slider, lock: 3 walls, minimum 5 bottom/top layers, 20% stiff infill (cubic is my favorite).Basket: minimum 2 walls, 5 top layers, 4 bottom layers, needs only minimal infill.The basket has some overhangs, use some supports if you don’t trust your bridging settings.Heads-up: Keep in mind that some monitors get quite hot. Use a suitable filament type. AssemblyBreak off the print supports on the slider. Sliding assemblyoption 1: Bolt and nut (if you use mount_bolt.stl)Insert the slider in the mount. Put a nut in the lock. Screw an M5-15 bolt through the mount onto the lock.Don’t overtighten the bolt, you should be able to rotate the lock. option 2: Snap fit (if you use mount_snap.stl)Snap the lock (without nut) on the stud on the mount. Insert a nut in the mount. Screw an M5-15 bolt through the leg onto the mount.Secure the bolt tightly at the desired angle for the leg. Position the slider and lock the lever (rotate it all the way to the leg) to friction fit the slider to the mount. Snap the mount assembly firmly to the basket. AttributionIf you like my design, click on Like. Share a make.If you have any questions, use the comment section.Check out my other models too!
With this file you will be able to print Top monitor basket with your 3D printer. Click on the button and save the file on your computer to work, edit or customize your design. You can also find more 3D designs for printers on Top monitor basket.