Tonie Leuchturm / Lighthouse Regal
thingiverse
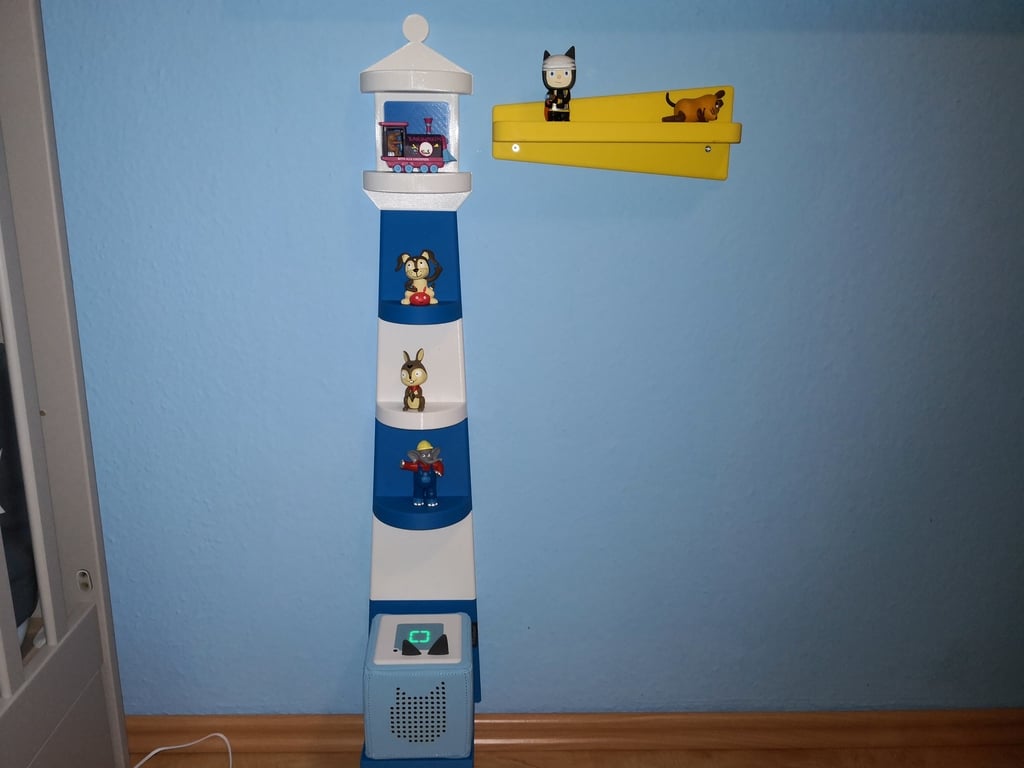
Hello People,\r\nthis is a Remix of Amprint. Thanks for the cool Charging Station.\r\n\r\nI used his Base for the Box and created a Lighthouse as background myself.\r\n \r\nI placed the Tonie places inside (using pause command) with a 10x4mm flat iron, so that the Tonies also stick magnetically to it.\r\n\r\nThe parts are printed individually (so they fit on the printer) and are screwed from behind. Total height of about 85cm.\r\n\r\nProject is not yet finished. Will be extended (Light Beam and Clouds)\r\n\r\nColors: I have printed 2,4,6 and White Cloud, Light Beam Yellow and the rest Blue.\r\n\r\nTo assemble you need:\r\n\r\nFlat Iron 10x4mm\r\n3x 85mm Length (2x Lighthouse Part 6, 1x Lighthouse Part 3)\r\n1x 70mm Length (Lighthouse Part 4)\r\n1x 50mm Length (Lighthouse Part 5)\r\n2x 240mm Length (Light Beam)\r\n2x 120mm Length (Cloud)\r\nA2-70 ISO7380\r\n\r\nFor the Charging Station to screw onto the Tower:\r\n\r\n2x M4x16 with 2x M4 Nuts\r\n\r\nTo assemble the individual Tower parts:\r\n\r\n10x M3x12 with 10x M3 Nuts\r\n\r\nFor fixing to the wall, I use:\r\n\r\n3x 3.5x30 with countersink head, which sinks into the Tower.\r\n2x 3.5x30 with countersink head, which sink into the Light Beam.\r\nOf course, other screws may also fit, these are the ones I used.
With this file you will be able to print Tonie Leuchturm / Lighthouse Regal with your 3D printer. Click on the button and save the file on your computer to work, edit or customize your design. You can also find more 3D designs for printers on Tonie Leuchturm / Lighthouse Regal.