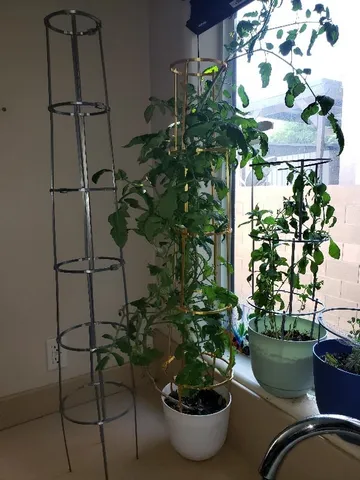
Tomato ring culture for growbags and brackets for canes and support cage, with auto-irrigation attachment
prusaprinters
Supercharge your tomato Yields in a growbag. increasing the number of roots on a tomato plant increases the size and number of tomatoes a plant can produce.remixed original to include a built in printable, modular, support cage that can grow with your plants. Assembly instructions:Poles push into holes on rings, smallest hole on top. Each ring has a break on it: this is to allow the cage to pull open and around a fully grown plant. Keep the breaks aligned vertically so they open at the same place.Thankyou for the source STLs for the upgrade: https://www.thingiverse.com/sahuargrapes/designshttps://www.thingiverse.com/thing:4894915Growing tomatoes with ring-culture pots involves surrounding the crop with a bottomless ring and adding layers of compost at 10-14 day intervals. This encourages the tomato to root from the stem so it can take up more water and nutrients than it would get from the growing bag alone. The result is vigorous, productive plants.You will need:Growing bags1 base (per plant)1 reservoir ring (per plant)1 ring culture w outer ring latest (per plant)1 ring culture top (per plant) 1 or two top support (per plant) depending on your requirements. (optional)1 set of ‘Tomato_cage_rings’1 Tomato_cage_connector per cage tier 4 bamboo or other canes for support (per plant) optional4 narrow cable ties to secure the support top (per plant) optionalSecateursMulti-purpose, peat-free compostTotal time: 15 minutesStep 1: Follow instructions on the growbag to create drainage holes in the bottom. Place a base under the growbag beneath where the plant will be. Cut a diagonal cross in the top of the growbag the size of the reservoir ring (corner to corner) the reservoir ring and the part 1 will be placed into the hole created and the flaps folded back over.printable, modular, support cage that can grow with your plants. Assembly instructions:Poles push into holes on rings, smallest hole on top. Each ring has a break on it: this is to allow the cage to pull open and around a fully grown plant. Keep the breaks aligned vertically so they open at the same place.Insert canes (if using) through the growbag so they pass through the corner holes of the part 1 and reservoir ring then seat in the base.place the top support onto the canes and secure using the cable ties using the small holes in each corner collar.Place the top onto the part 1 unit so that the cut out aligns with the spout. Step 2:Plant the tomato in the compost, stake, firm and water well as you would normally. Place the top onto the part 1 unit so that the cut out aligns with the spout Then, add a 2-3cm layer of compost to the pot every 10-14 days, until it's full. Try to water the plant daily ( this is easiest if automated watering is used- pass the watering tube through the holes in the top), and give it a liquid feed every week using the spout in the part 1 unit. do not spray leaves with water.Step 3:Remove side-shoots from plants as you would normally. When fruits start to develop, remove leaves which would otherwise shade them, so they ripen fully.Step 3:Harvest enormous crop of delicious tomatoes YUM YUM YUM!can also be used for peppers and chillies.I will update photos when it is growbag and tomato growing season in the UK now includes drip irrigation ring attachment and under soil feeding.Use PETG or ABS if you want them to last more than a season outdoors (exposed to UV)
With this file you will be able to print Tomato ring culture for growbags and brackets for canes and support cage, with auto-irrigation attachment with your 3D printer. Click on the button and save the file on your computer to work, edit or customize your design. You can also find more 3D designs for printers on Tomato ring culture for growbags and brackets for canes and support cage, with auto-irrigation attachment.
