TL-Smoother Case Cover and base, for extruded T-slot rail, or cable tie
thingiverse
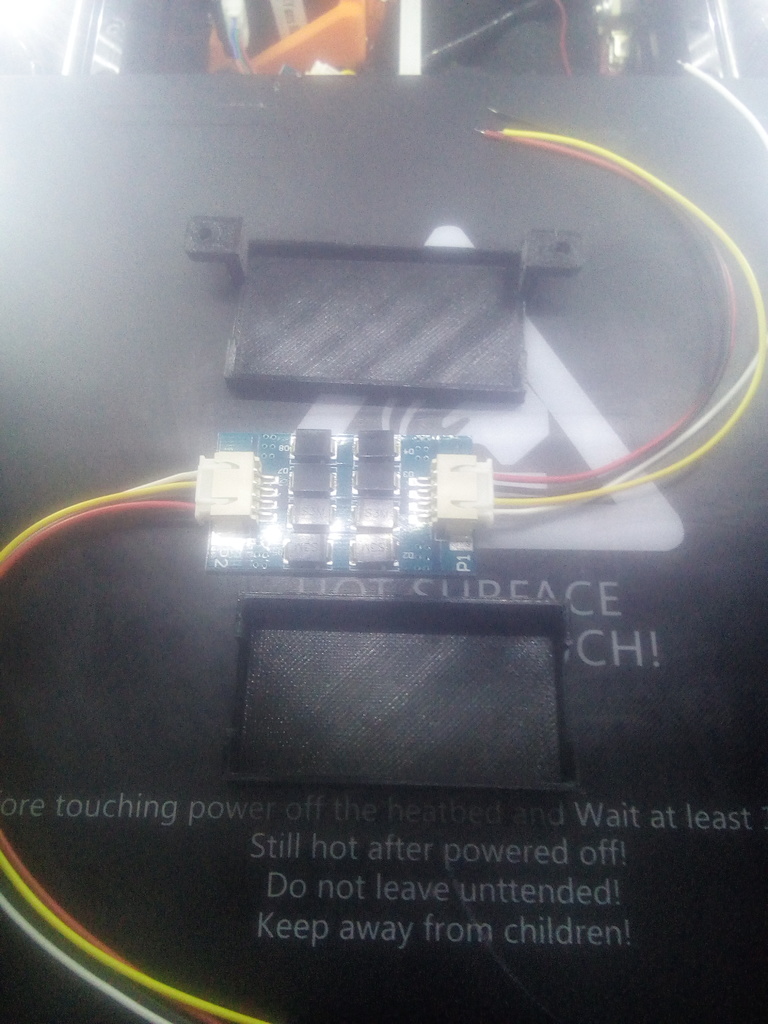
ANET A8 printers are prone to 'Salmon Skin.' It's caused by motor drivers producing a harsh signal rather than a smooth one. However, there is a cheap fix: 'TL-Smoothers.' They won't improve print quality on all 3D printers, just for the ones with bad motor drivers. I used these ones = https://www.aliexpress.com/item/32895224056.html?spm=a2g0s.9042311.0.0.6dbc4c4dWUyW58 The case halves fit perfectly, so no glue is needed. It has two lugs that I made for mounting via the T-Slot of an extruded aluminum rail (the rail was an ANET A8 Y-axis upgrade, but to be honest, the upgrade isn't worth it and you might as well stick with original A8 rails). The tl-smoothers make a much more noticeable quality improvement than the rails ever did. The lugs can be used to mount the case via small cable ties as well. There are three different versions, each with a different lug height: 3mm, 8mm, and 10.3mm. Choose the one you need depending on how long your screws are. The 10.3mm version won't require any supports. Step files are included in case you need to make any modifications. Practical Info On TL Smoothers ================ When it comes to wiring, there are two connections: P1 and P2. With the ones I've used, the motor goes to P1. If you find that when you use the menu to move one of the axes by 10mm at a time, e.g., then moving the bed, and it does a few regular moves before jumping much further, then you have your motor connected to the wrong P connector! Just swap them around. Another symptom of having the cables reversed can be that the motor sounds really loud, or / and the steps jump backwards and then forwards instead of going in just one direction. Test each TL-smother individually before adding another. Having the P1 and P2 connections the wrong way will affect all the motors (on the A8 at least) and not just the motor it is connected to. You won't damage your printer if P1 and P2 are connected the wrong way! The P1 and P2 connectors should look like a pass-through, with wiring going in a straight line. The top left of P1 will go to the connection wire that's on P2 directly below it. I hope this helps someone :)
With this file you will be able to print TL-Smoother Case Cover and base, for extruded T-slot rail, or cable tie with your 3D printer. Click on the button and save the file on your computer to work, edit or customize your design. You can also find more 3D designs for printers on TL-Smoother Case Cover and base, for extruded T-slot rail, or cable tie.