Tito biped robot
pinshape
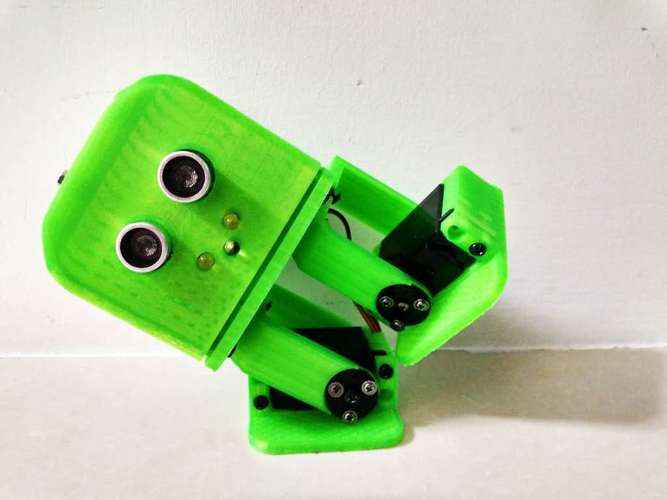
Tito, a walking and dancing DIY biped robot, draws inspiration from Zowi, a robot based on BOB, the original biped robot that relies solely on four servos to move about. Tito boasts several key improvements over its predecessors: it can accommodate an Arduino UNO board, or one of similar size, within its head; a simple mouth is created by three strategically placed LEDs; the top of the head has been rounded for a more streamlined look; the legs have been strengthened with increased thickness and reinforced rounds; the feet feature rounded tops for improved stability; the chassis or base has been simplified for easier construction; the connectors are now located at the back, making it effortless to reprogram or energize the robot. To build Tito, you will need: Arduino UNO or a compatible board - I personally use a DFRduino R3; a Nano breadboard or the option to solder all cables directly; a buzzer for added sound effects; four Futaba servos of model S3003; an HC-SR04 Ultrasound sensor for navigation and detection; twenty M3 nuts for securing various components; twelve M3 screws, twenty in total, for assembling the robot's frame; and an optional powerbank or simply a USB connection to power your Arduino board. Refer to the schematic picture provided for detailed connection instructions. Note that the HC-SR04 Ultrasound sensor is not shown in the original diagram but should be connected as follows: its trig pin to pin 8 and echo pin to pin 9 on the Arduino board. The same original code used by Otto DIY can be found at https://github.com/OttoDIY/DIY
With this file you will be able to print Tito biped robot with your 3D printer. Click on the button and save the file on your computer to work, edit or customize your design. You can also find more 3D designs for printers on Tito biped robot.