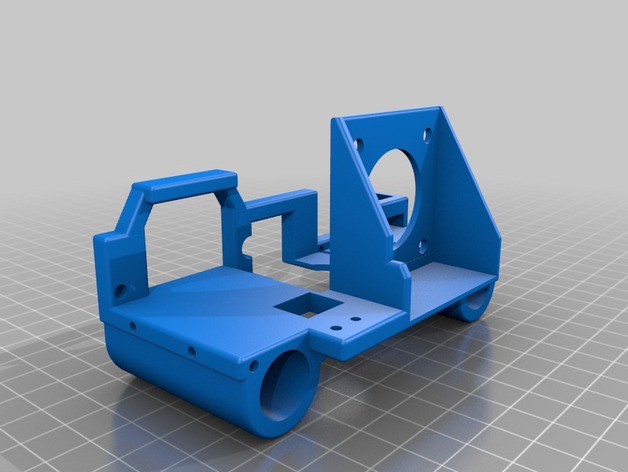
Titan Carriage - Robo 3D R1/R1+
thingiverse
I sought a carriage that provided effortless access to the extruder wheel. I wanted the titan to face forward or to the left, and I aimed to incorporate a cable chain mount for effective wire management. I used Mike Kelly's carriage file as a starting point, which can be found at http://www.thingiverse.com/thing:647798. I included two cable chain mounts. Both fit this cable chain from Amazon: http://www.amazon.com/dp/B00880AVL2/ref=sr_ph_1?ie=UTF8&qid=1461680057&sr=sr-1&keywords=cable+chain. One is simply the mount that you can glue or stick to whatever surface. The second is attached to a male GoPro-style clip mount. I used a GoPro pad to attach it to my case, and the cable mount clips in easily. A couple of notes: You will need approximately 22 links plus the ends for the cable chain if you mount it near your case. The carriage currently works for e3D V6 but would likely work fine with hex. However, you may need to use an alternate fan for the heatsink, as I did not leave mounting holes in place. The current design is intended for a 25mm pancake stepper motor (http://www.omc-stepperonline.com/nema-17-bipolar-step-motor-29v-07a-18ncm255ozin-17hs100704s-p-260.html). It will also work with a 20mm stepper and, in some cases, the stock extruder stepper. However, using the stock extruder stepper would result in losing 25mm of build area on your x-axis. Using a 25mm stepper will cause you to lose about 10mm of build volume on the x-axis. I plan to address this issue in my next revision. I have also remixed Novice Expert's toolless fan shroud into a quick connect/disconnect design, as seen in the pictures. This updated fan shroud is available at http://www.thingiverse.com/thing:1555114. Print Settings: Printer Brand: Robo 3D Printer: R1 ABS + PLA Model Rafts: Doesn't Matter Supports: Yes Resolution: .200 Infill: 50% Notes: I sliced using Simplify3d, which produces excellent supports. I removed the automatic supports from the small holes on the sides and bottom as they are not needed and can be challenging to remove. I printed in eSun PETg at 260c for the nozzle and 90c for the heated bed. I scaled down the heated bed to 70 at layer 3 and then turned it off at layer 150.
With this file you will be able to print Titan Carriage - Robo 3D R1/R1+ with your 3D printer. Click on the button and save the file on your computer to work, edit or customize your design. You can also find more 3D designs for printers on Titan Carriage - Robo 3D R1/R1+.
