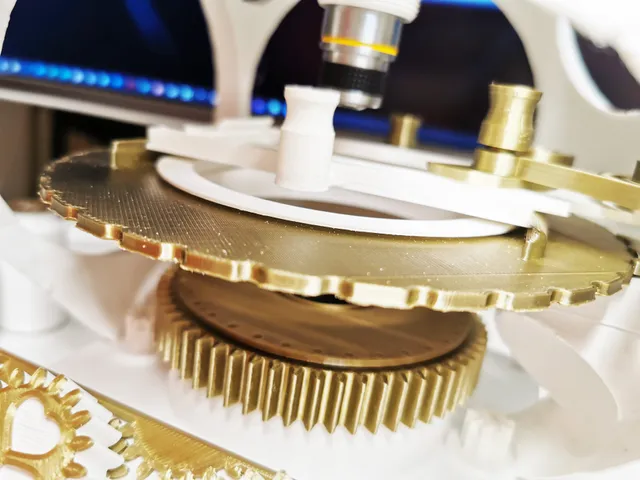
tinkerMicroscope MK1, a 3d printed microscope with mechanical stage and Royal Microscopical Society-threaded objectives
prusaprinters
Obviously, it is possible to buy a very nice microscope by throwing a lot of money at a shop, and it is also possible to improvise a microscope using some cheap acrylic lenses and cardboard.With this project I want to see how far I can get with 3d-printed parts, while allowing myself to use cheap microscope RMS lenses and cheap electrical components. What is cheap? A matter of taste, but I try to limit myself to lenses costing less than USD 10 and other components costing a few USD at most. You can see the parts list below – for some of the items you get more than one unit , I suggest you take that as a suggestion that you build more than one microscope, you can probably find someone who can use one, perhaps even someone who’ll build it with you ;)You can forgo the camera mount and use the tinkerMicroscope as a regular microscope, but it has been designed to be used with a digital camera to turn it into a digital microscope. For many people the best camera they own is in their smartphone, so I’ve designed the camera mounting solution with this in mind. That said, you should be able to mount most cheap USB webcams to the mounting plate with a bit of ingenuity. Please share your camera mounting solutions with the rest of us!With a bit of luck you can find old microscopes which are being sold for parts and grab their lenses – chances are that they have RMS threads – if they do not then perhaps you can adjust the MechanicalTube_lowerPart to fit your lenses.FeaturesCompatible with many microscope objectives with RMS threadsSliding and rotating specimen stageFocal plane adjustable using a worm gearDimmable LED light sourceMechanical iris for adjusting how much light reaches the specimenMechanical tube length of 160mmI plan on expanding on the capabilities of the tinkerMicroscope in the future, some ideas include:Dark field microscopyPolarized light microscopyFluorescence microscopyObjective turretThe tinkerMicroscope already has a socket for connecting an external light source and an extra knob on the front for adjusting the intensity of this light source, also two currently unused threaded pins on the base.When will all this be done? I make no promises, but you are most welcome to make your own versions.Printing adviceI printed my own tinkerScope using inexpensive PLA on a Prusa MK3S. Springs may benefit from being printed in PETG, but I’ve not had any problems with my PLA springs. Most parts can be printed without supports, with notable exceptions being the Base and MechanicalIris_gearLarge, both of which should be printed with supports on the build plate only (no internal supports apart from the ones already designed into the Base. The Body can be printed without support but may require a bit of polishing after printing.Threaded parts should be printed at a layer height of 0.2mm or less. Most parts can be printed with 3 perimenters and 10% or more infill. Springs, screws and nuts should be printed with 100% infill.The MechancialTube_upperPart and MechanicalTube_zScrew are the most difficult parts to get exactly right, as the mechanical tube needs to be able to slide up and down to adjust the focus. Do not try to force the zScrew to turn as it may break. If the fit between your MechancialTube_upperPart and MechanicalTube_zScrew ends up being too loose, then the mechanical tube may sway to a side, you can try to counteract this by placing one or more Head_spacer between the Head and the Body. Getting the Mechanical Iris to work can also take a bit of work, make sure that it works perfectly before you glue it.How to build your very own tinkerScopePlease watch this movie: https://youtu.be/IL0DcrnIoWQPrinted partsWill cost you approximately one 1kg spool of PLA, a bit more or less depending on how much infill you use.1 x Base1 x Base_front2 x Base_knob2 x Base_plug3 x Base_nut0 x Base_funnel (optional)1 x Body1 x Head4 x Head_nut0 x Head_spacer (optional)2 x CameraMount_slide2 x CameraMount_screw1 x CameraMount_plate1 x CameraMount_connector2 x CameraMount_nut1 x OcularMount_core4 x OcularMount_threadedPlate4 x OcularMount_screw1 x MechanicalTube_upperPart1 x MechanicalTube_lowerPart1 x MechanicalTube_zScrew2 x MechanicalTube_screw1 x MechanicalTube_nut1 x MechanicalTube_clampUnthreaded1 x MechanicalTube_clampThreaded1 x SlidingStage_y1 x SlidingStage_x1 x SlidingStage_spring1 x SlidingStage_finger1 x SlidingStage_nut11 x SlidingStage_nut21 x SlidingStage_nut31 x RotatingStage_main1 x RotatingStage_mount4 x RotatingStage_mountNut1 x RotatingStage_ring1 x RotatingStage_spring2 x RotatingStage_nut1 x RotatingStage_cap1 x MechanicalIris_cap1 x MechanicalIris_gearLarge8 x MechanicalIris_gearSmall8 x MechanicalIris_leaf1 x LightSource_core1 x LightSource_bottom1 x LightSource_stripHolder1 x LightSource_stripCapOther partsPlease visit tinkerheart.eu/tinkermicroscope/ for the complete bill of materials.
With this file you will be able to print tinkerMicroscope MK1, a 3d printed microscope with mechanical stage and Royal Microscopical Society-threaded objectives with your 3D printer. Click on the button and save the file on your computer to work, edit or customize your design. You can also find more 3D designs for printers on tinkerMicroscope MK1, a 3d printed microscope with mechanical stage and Royal Microscopical Society-threaded objectives.
