Tinkercad Tutorial: Joystick
thingiverse
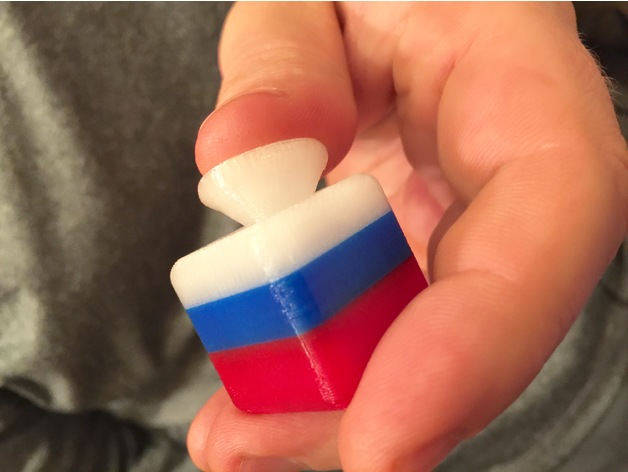
PRINT WITH NO SUPPORT (There is a small bit of built-in support that will remove easily.) This is one 3D print, no need to assemble anything. The joy stick prints in place and rotates straight off the print bed. It does not "return to center" like a real joystick, but makes a great fidget toy. It has a small hole in one corner so you can hook it to a backpack, bag, coat zipper, or keyring. Here is a link to a Tinkercad Tutorial if you want to make your own: https://youtu.be/3UJ5uBTbivs Here's a (not very exciting) video showing removing the support material off the print bed: https://youtu.be/3VPwNkBYmb8 Print Settings Printer Brand: FlashForge Printer: Creator Pro Rafts: No Supports: No Resolution: .2 Infill: 100% Notes: 100% infill is easiest. There is a lot of empty space in this print, so it doesn't use as much plastic as you might think. If you really don't want to do 100% infill, set a couple process settings with your slicer so that the area below and above the joy stick handle is 100% or it can break off with vigorous rotations. Post-Printing Rotate the joy stick and the built-in support should fall out of the bottom. You can also use needle-nosed pliers to pull it out. How I Designed This In Tinkercad: tutorial above Overview and Background Joysticks are popular with everyone, but especially kids, so I decided to do a tutorial on how to make a basic 3D printable joystick. Once a student gets the idea of it, they can improve on the design or incorporate it into other projects. Lesson Plan and Activity Make sure students have Tinkercad accounts. Watch tutorial video. Create their own version following tips given in tutorial. Materials Needed Computer with internet access Tinkercad account 3D printer & filament Skills Learned tinkercad joystick ball & socket Duration of Lesson 1-2 hours Preparation Make sure students have Tinkercad accounts and access to YouTube instructional video. Make sure 3D printer is working and loaded with filament!
With this file you will be able to print Tinkercad Tutorial: Joystick with your 3D printer. Click on the button and save the file on your computer to work, edit or customize your design. You can also find more 3D designs for printers on Tinkercad Tutorial: Joystick.
