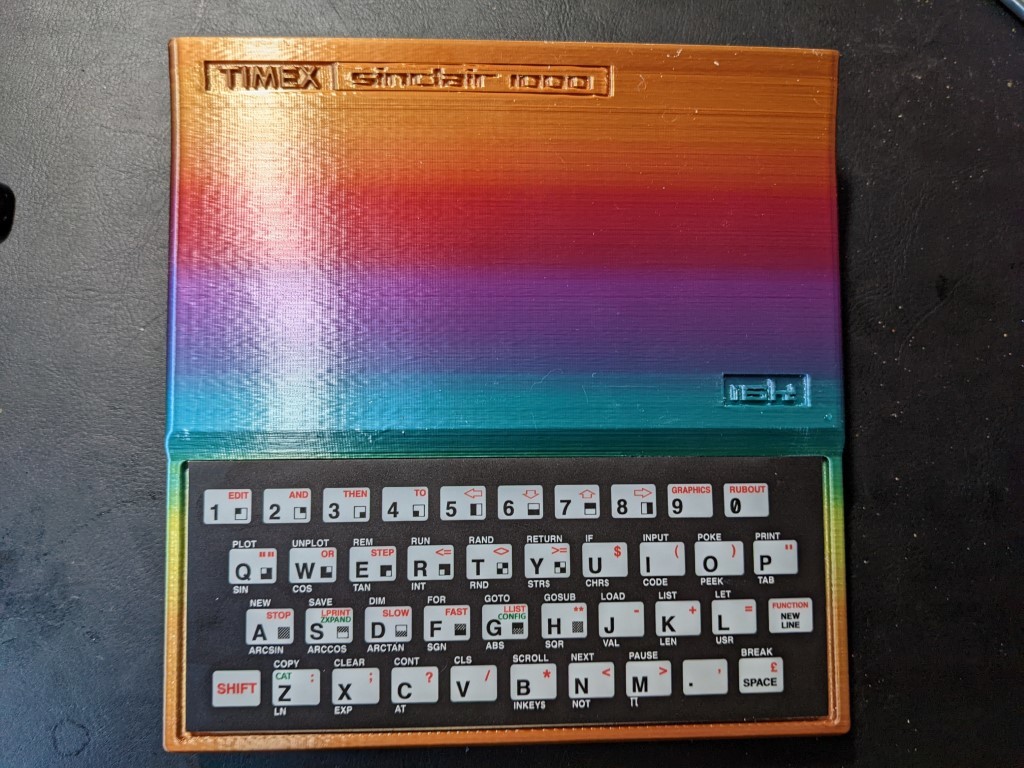
Timex Sinclair 1000 Case TS1000
prusaprinters
<p>I'm updating a Timex Sinclair 1000 and wanted a nicer case (the original shows a bit too much damage).</p> <p>Sagittario modeled an amazing ZX81 case and generously shared his model source with me. He even moved the video out port to match the difference on position for the ZX81.</p> <p>This build requires m2.5 screws in a couple lengths. The threads are modeled, but take care with metal screws in plastic.</p> <p><strong>Important note:</strong> To greatly reduce the amount of heat produced, I'd recommend you change the 7805 5V regulator for the more modern Traco 2-2450 (or a 1-2450 might work fine). You should be able to remove the heatsink with this change. If you do change to the Traco, I'd recommend you lay it flat instead of upright (see included photo) as placing it upright will likely not fit in this case with my modifications to the keyboard tray.<strong>It is possible the original voltage regulator might get too hot for PLA, especially if you use a 12V power supply.</strong></p> <p>This remix, targeting the TS100, is changed from the original ZX81 case in the following ways</p> <ul> <li>I created missing screw-head insets for the base</li> <li>Added a hole that should accomodate the RF modulator's channel switcher, but I recommend you install an composite mod and remove the switch.</li> <li>I removed a fin from the screw post in the lid that is closest to the ports (video/power/audio) so my PCB would line up with the screw posts.</li> <li>Removed the hole in the base under the RF modulator (from the original model)</li> <li>Changed the logo to Timex Sinclair 1000 on the lid</li> <li>Added 16k Badge to the lid. When this is done I might offer a version that doesn't include this feature.</li> <li>I made the depth of the model under the keyboard tray thicker</li> <li>This lid model's keyboard tray is 1mm deeper to accommodate the tactile keyboard.</li> <li>The opening for the keyboard cable has been made larger to accommodate JST-XH connectors</li> <li>This lid model requires you to use Heat Inserts for m2.5 screws. See https://www.amazon.com/dp/B089VKTLY4</li> </ul> <h3>Print Settings</h3> <p><strong>Printer Brand:</strong></p> <p>Prusa</p> <p class="detail-setting printer"><strong>Printer: </strong> <div><p>i3 MK3</p></div> <p><strong>Rafts:</strong></p> <p>No</p> <p class="detail-setting supports"><strong>Supports: </strong> <div><p>Yes</p></div> <p><strong>Resolution:</strong></p> <p>0.3mm base, 0.2mm lid</p> <p class="detail-setting infill"><strong>Infill: </strong> <div><p>15%</p></div> <p><strong>Filament:</strong> MIKA3D PLA Shiny Silk Multicolor Rainbow</p> <p><br/> <p class="detail-setting notes"><strong>Notes: </strong></p> </p><div><p>Print the lid and base my themselves.</p> Print the lid vertically, see images. Supports optional. <p>You can also print the base vertically. Supports optional. Printing flat MAY be better?</p> <p>Use a soldering iron to insert the m2.5 heat inserts into the lid. This will make re-assembly much more reliable.</p> <h3>How I Designed This</h3> <p>Imported the original 123D model into Fusion 360.</p> <p>Made many edits using the timeline and parameters for flexibility.</p> </div></p></p></p> Category: Computer
With this file you will be able to print Timex Sinclair 1000 Case TS1000 with your 3D printer. Click on the button and save the file on your computer to work, edit or customize your design. You can also find more 3D designs for printers on Timex Sinclair 1000 Case TS1000.
