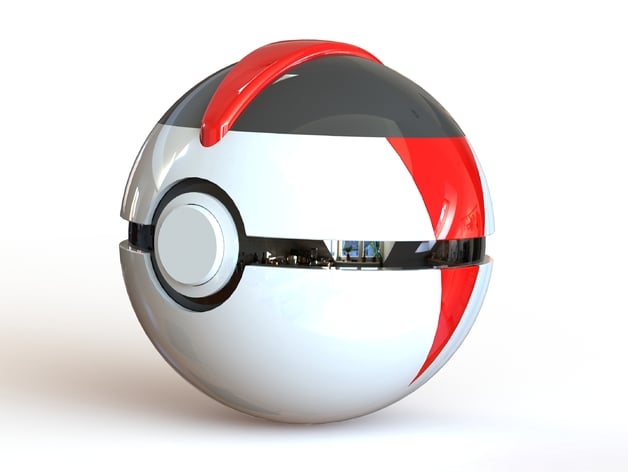
Timer Ball - Fully Functional PokeBall with Button and Hinge
thingiverse
Barnacules showcases a detailed PokeBall replica in his latest video - check it out here: https://www.youtube.com/watch?v=8SkTL3rZV00. Warning: This is still a work-in-progress, I have not yet printed this model and results may vary. Good luck to those who attempt! Update: September 27th, 2016 Additional features now include a 3mm Hinge Pin file for users with 1.75mm filament printers. This pin can be used in place of filament to create a stronger hinge. Description: Create an exact replica of the real TimerBall using only 3D printed parts and super glue. The resulting model has fully functional hinges and buttons that press in to unlock a catch, utilizing the flexibility of plastic as a spring mechanism. The hinge opens up to 90 degrees and stops, just like the original, without sticking out the back. The button conceals its internal mechanism from view, adding authenticity to this model. Notches and grooves on the parts ensure perfect alignment during glueing, resulting in a precise replica. I believe this is the most accurate and easy-to-print TimerBall available for 3D printers, making it ideal for catching Pokemon. The stand even resembles a PokeBall from above. Other PokeBall lids are also available on Thingiverse, including: - PokeBall: http://www.thingiverse.com/thing:1615753 - Great Ball: http://www.thingiverse.com/thing:1677042 - Ultra Ball: http://www.thingiverse.com/thing:1675718 - Master Ball: http://www.thingiverse.com/thing:1794489 - Net Ball: http://www.thingiverse.com/thing:1794277 Stay tuned for more PokeBall designs, including Quick Ball, Heavy Ball, Luxury Ball, Premier Ball, and Nest Ball. Printing Instructions: - Do not use a raft as parts are prone to warping and may make cleanup difficult. - Print all parts with support touching the build plate. - Remove support carefully; the PokeBall is designed to hide supported surfaces, ensuring a smooth finish isn't essential for its appearance. - Print lids with the dome side up like an igloo. - Print 'Inner Shells' upside down like a bowl. - Print the 'Button' with the flat surface on the build plate. - Use 3mm or 1.75mm filament as a hinge pin and shape it to fit smoothly, following the same curve as the back of the ball. Before gluing parts together, perform a dry fit to ensure everything fits correctly. Assemble the model by supergluing lids to their respective 'Inner Shells'. Next, place the 'Button' inside the 'Outer Button Smaller', aligning it with the two bumps positioned downwards to fit into the 'Inner Shell Bottom'. Then, super glue the 'Outer Button Smaller' to the 'Inner Shell Top', being careful not to glue the 'Inner Button' in place as it must be able to press. Insert the hinge pin attaching the two halves together and glue in place, taking care not to fix the hinge in a set position. You will need: - 1x Lid Bottom Base - 1x Lid Top Base - 1x Lid Black Top - 1x Red Stripes Lower - 1x Red Stripes Upper - 1x Top Red Stripe - 1x Inner Shell Top (choose filament size and with or without support) - 1x Inner Shell Bottom (choose filament size and with or without support) - 1x Button - 1x Outer Button Smaller - 1x Stand (optional) - Super Glue If you encounter problems with supports or printing, let me know for assistance. The tolerances are quite tight as this model works on my printer; if you have issues, please inform me. Happy Printing and good luck catching them all!
With this file you will be able to print Timer Ball - Fully Functional PokeBall with Button and Hinge with your 3D printer. Click on the button and save the file on your computer to work, edit or customize your design. You can also find more 3D designs for printers on Timer Ball - Fully Functional PokeBall with Button and Hinge.
