Time-Lapse Photography Skeinforge Plugin
thingiverse
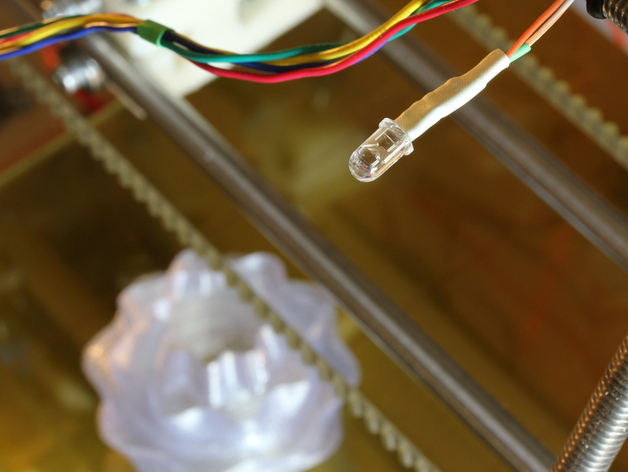
Triggering camera issues resolved in a blog post at http://eclecti.cc/bytes/reprap-controlled-time-lapse-photography, the author discusses two problems encountered while capturing time-lapses during 3D printing. Firstly, the moving platform causes the printed object to come in and out of focus, leading to a jarring video. Secondly, constant intervals between photos result in some layers being photographed multiple times while others are skipped entirely. A solution involves dynamically remote triggering the camera from the printer using a Skeinforge photograph plugin. This plugin features three modes: End of Layer, Corner of Layer, and Least Change between Layers. The author found the most visually interesting results with the last setting. To trigger the camera from the RepRap, the author emulated a Canon RC-1 Remote by using an 850nm infrared LED connected to one of the I/O pins on the Arduino Mega. The software side is managed through a fork of the Sprinter firmware, which responds to M240 and sends the appropriate pulse over the IR LED. Both the photograph plugin and firmware can be downloaded from github, with installation instructions included in the text.
With this file you will be able to print Time-Lapse Photography Skeinforge Plugin with your 3D printer. Click on the button and save the file on your computer to work, edit or customize your design. You can also find more 3D designs for printers on Time-Lapse Photography Skeinforge Plugin.