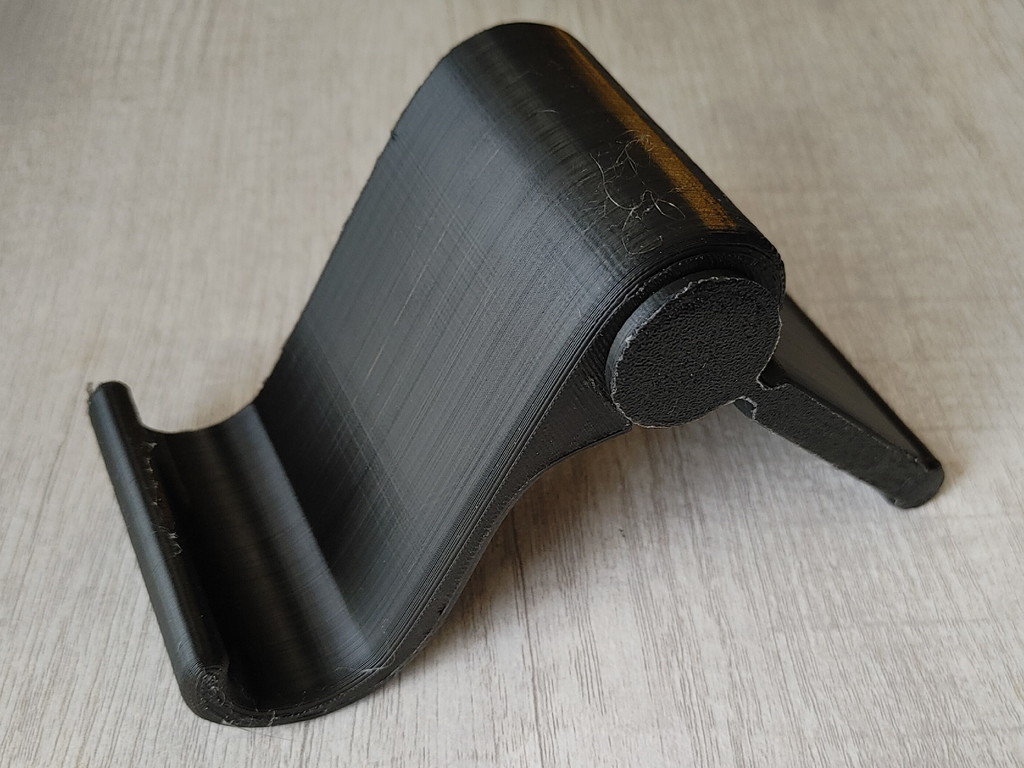
Tiltable Phone Stand (Fixed)
prusaprinters
<p>Fixed version of the Tiltable Phone & Tablet Stand by Mike-vom-Mars. It's a brilliant design overall, but there were some glaring problems for FDM prints that seem to have gotten added in the polishing process and not caught upon release. I'm not sure what happened but it's not too terribly hard to fix, so I did! :)</p> <p>The bottom geometry of the leg wasn't flat, but rather a small circle (which you can see on the rendered thumbnail on the source file), This meant that the first layer was<em>only</em> that circle, and the second was all the rest. idk what slicer or print settings were used on the original print, but I had to redo the entire geometry of that area to get it to print right without disturbing the bevel of the rest of that model. Unfortunately, given I don't have the original design file, I had to eliminate the bevel on that section and boolean cut the whole bottom once I dragged the cylindrical section down, the math on the Blender Grab-moves wasn't mathing and without the original design file, I didn't have an exact number, so I just got rid of it entirely.</p> <p>The tray bit was mostly flat on the top layer, but had a random spot where it wasn't near the hole. Didn't show up on 100% scaling, but absolutely did on 125% scaling, where the topmost shell wasn't a fully flat surface, but had line gaps to work around the odd geometry. Not sure how that happened, but it was so barely noticeable that a boolean cut of around 0.01mm off the top was enough to solve it.</p> <p>The tray section has those rectangle guiding fins, and the bottom is just a straight 3mm narrow and unbridged overhang, no angling or anything like that. I did NOT make adjustments to that area as it does print fine, it's just not as polished as it takes 2-3 layers to fully sort itself out. The dimensions of the whole interlocking section could definitely use some work to allow it to be far beefier, but it works as long as you don't beat on it (my family hasn't yet). Adult-safe, but I can't promise it's kid-safe, I'd probably want to adjust the guiding fins before getting too carried away with printing one for kids.</p> <p>Later adjustments I might make if needed:</p> <ul> <li>Add 30° or 45° angle to the bottom of the interlocking fins to eliminate overhang</li> <li>Interlocking section changes to add more plastic and have less air</li> <li>Bed surface area increase on the narrow section of the leg. The fins don't hit the bottom, and while it looks nice as-is, narrow strips like that can be a bastard for bed adhesion.</li> <li>Boolean-cut everything flat if I'm feeling fancy and use Blender to lower the radius on the bevels. They look nice, but they make the first layer thinner than it needs to be and can worsen adhesion issues</li> </ul> <p>Prints great at 5 shells, 5 perimeters, and 4% rectilinear infill for both 100% and 125% scaling, and doesn't use a whole lot of filament in the process. Again don't beat on it and it shouldn't break on you with those settings. I used a 10mm brim to print the one in the thumbnail that I didn't polish up before staging for a pic -- I don't have my files on me or I'd have cleaned it up first.</p> <p>CC-BY-SA as the original is CC-BY</p> Category: Mobile Phone
With this file you will be able to print Tiltable Phone Stand (Fixed) with your 3D printer. Click on the button and save the file on your computer to work, edit or customize your design. You can also find more 3D designs for printers on Tiltable Phone Stand (Fixed).
